
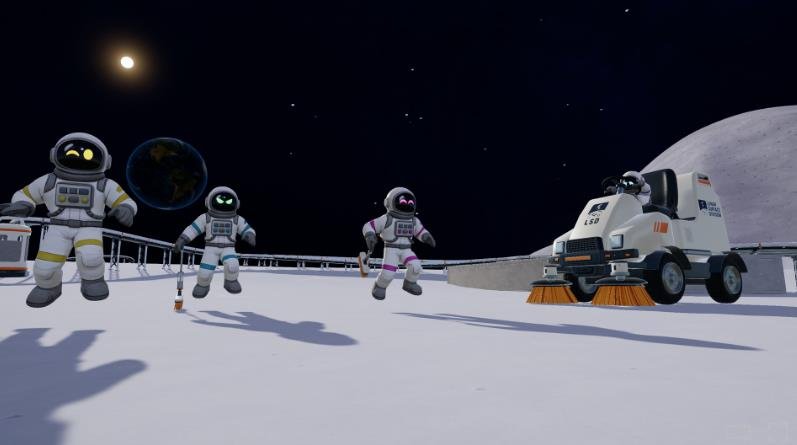
In this guide, I’ll show you how to build an efficient factory, connect conveyor belts, and get the most out of your machines. I’ll also explain how to connect your factory to a garage and expand your production for the end game.
The main goal is to make the best use of your conveyor belts, maximize production, and build a factory that works efficiently without wasting space.
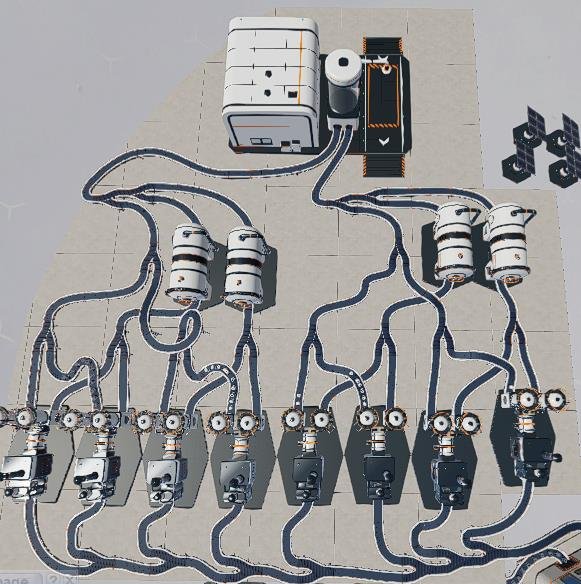
Full Size Factory
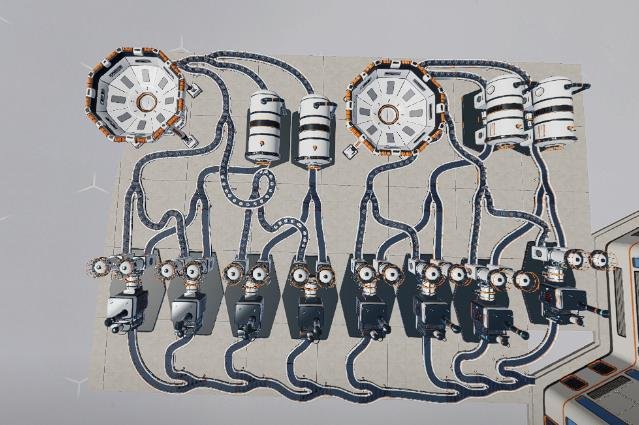
The build is very simple and compact:
- 2 Capsule Catchers
- 4 Pressure Chambers
- 8 Stone Presses
The splitter layout is important!
Half Size Factory Step-by-Step Guide
1. Place All Machines and Splitters
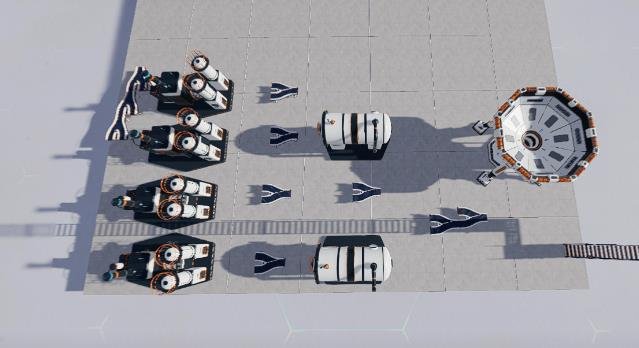
Place all splitters, stone presses, compression chambers, combiners, and capsule catchers as shown in the image.
Start with the combiners, then place the stone presses, first row of splitters, compression chambers, second row of splitters, third row of splitters, and finally the capsule catcher.
2. Connect Sand Conveyor Belts
Place conveyor belts to transfer sand between the machines.
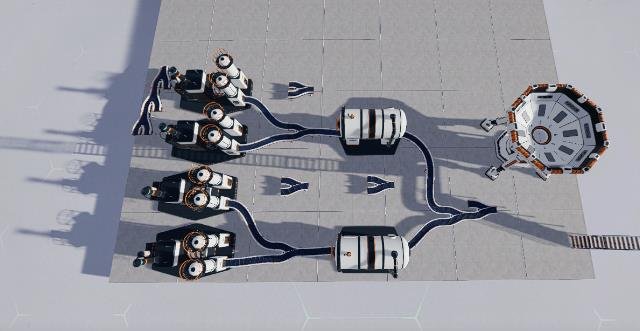
3. Connect Dust Conveyor Belts
Place conveyor belts to transfer dust.
You can lift some conveyor belts using CTRL + Mouse Wheel to avoid overlapping them.
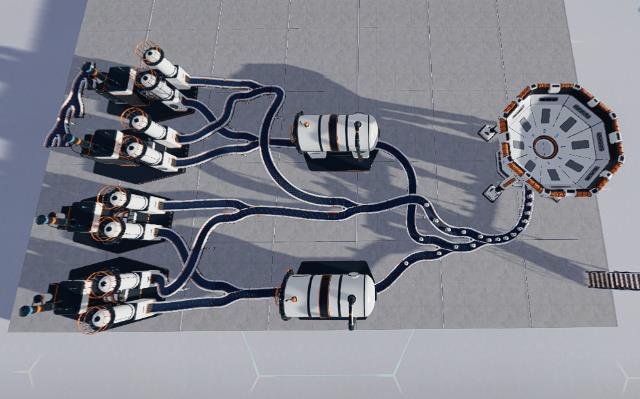
4. Connect Export Conveyors and Place Solar Panels
Connect the export conveyor belts and place solar panels to power the factory.
You need at least two large solar panels for each pressure chamber and stone press. My recommendation is to simply spam solar panels without counting them.
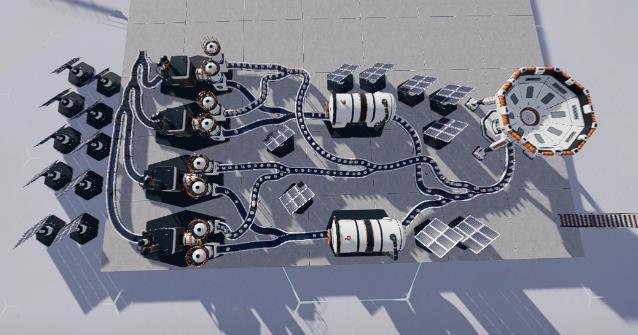
For the full-size factory, simply copy and paste this build and merge the stone block conveyor.
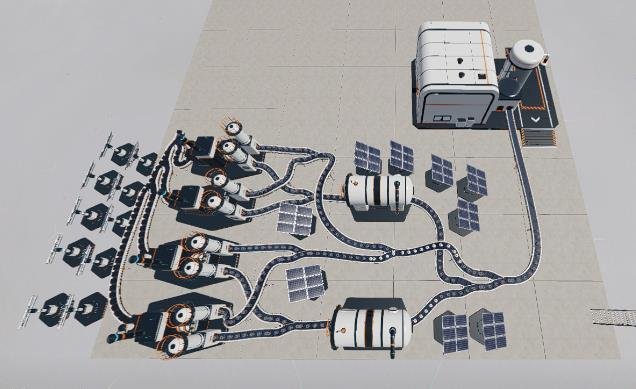
Connecting the Factory to a Garage
One garage outputs two conveyor belts.
If you want to connect the factory to a garage, simply replace one capsule catcher with one garage output.
One garage can provide enough dust for the full-size factory.
Half Size Factory Connection
Full Size Factory Connection
End Game and Additional Information
8 stone presses will fully load the conveyor belt.
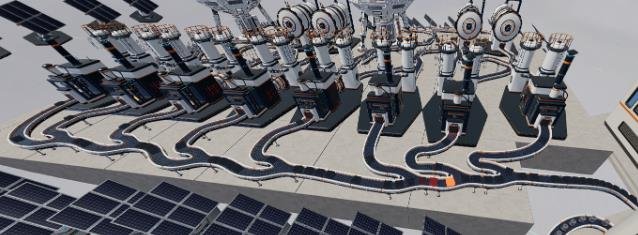
You can start with a smaller factory in the early game and expand it later when you have the resources.
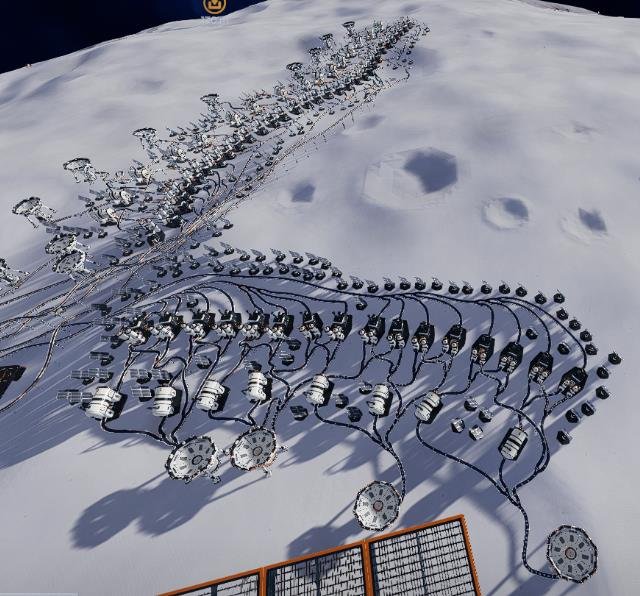
The main benefit of this build is that it maximizes the load on capsule catchers and station conveyors.
Sometimes the game can glitch with conveyor belts, so make sure to leave some distance between them!
The maximum-efficiency end-game build will look like this.
My J.O.O.N.A.S. Strategy
My best suggestion for J.O.O.N.A.S. is to build your first factory, connect it to the garage, and keep resupplying it.
After that, build another factory for J.O.O.N.A.S., or at least half of one.
Once your first J.O.O.N.A.S. factory is fully loaded, start building the second one.
When the second J.O.O.N.A.S. factory reaches its maximum capacity, disconnect the garage and connect two capsule catchers instead.
At this point, simply spam as many factories and J.O.O.N.A.S. units as you can.