
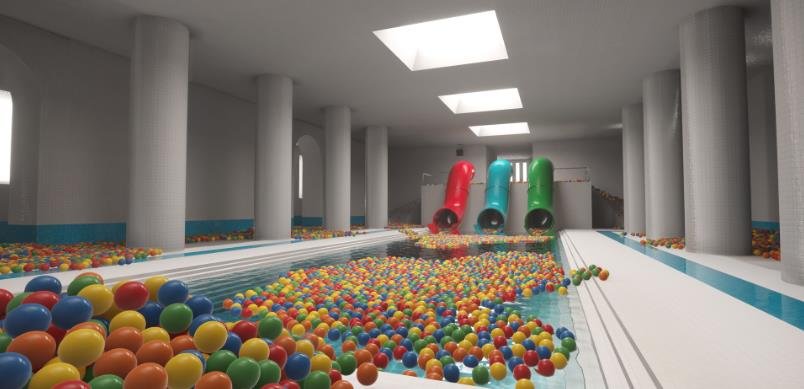
In this guide, I show how to unlock all achievements in Playrooms and complete the game 100%. I cover every achievement, including ball pit requirements, room unlocks, upgrades, vacuum robots, and Hardcore mode.
I have organized the achievements by their requirements and included useful tips, upgrade costs, and screenshots to make each objective easier to complete. Whether you are collecting balls, unlocking new rooms, or purchasing every upgrade, this guide will help you work towards completing all achievements in Playrooms.
Pit Unlocks
You can unlock different abilities and items by collecting balls. Here is the complete unlock list:
- Pit 1: Unlocks Sprint (1,500 balls).
- Pit 2: Unlocks Coffee (2,500 balls).
- Pit 3: Unlocks Crouch (5,000 balls).
- Pit 4: Unlocks Scanner (10,000 balls).
- Pit 5: Unlocks Fruit Basket (20,000 balls).
- Pit 6: Unlocks More Robots? (40,000 balls).
- Pit 7: Unlocks an item (40,000 balls).
- Pit 8: Unlocks an item (80,000 balls).
Important Notes:
- You cannot soft-lock yourself, so there is no need to worry about getting stuck.
- Sparrows will not chirp until you have collected them.
Achievements Guide
First Sparrow
Rescue your first sparrow.
First Sparrow
All the Chirps
Find all sparrows in the game.
Collect every sparrow hidden throughout the game to unlock this achievement.
Eagle Eye
Find all items for your office.
Achievement location
Eagle Eye
Free Lexi
Meow meow meow.
Achievement location
Free Lexi
Out of Water
Find the whale.
Out of Water
Step 1: Unlock the Waiting Room
First, you need to unlock the first room, called the Waiting Room.
Step 2: Find the maze entrance
Once inside the Waiting Room, head to the left hallway. Enter the first door on the right to access the area shown below.
Waiting Room Entrance
Maze Entrance
Step 3: Find the whale
To get through the maze, follow the right-wall and then left-wall strategy until you reach the whale.
Maze Path
Whale Location
If you need a more visual explanation, you can also check out this community guide:
Green Office Map – Playrooms
- Guide: Green Office Map
- Author: Munty
- Description: A rough map of the Green Office Labyrinth.
Green Office Map
Clocking In
Enter the Playroom.
Clocking In
Clean Playroom
Collect every ball in the Playroom.
Clean Playroom
Required total: 5,000 balls
Please Take a Number
Enter the Waiting Room.
Please Take a Number
Clean Waiting Room
Collect every ball in the Waiting Room.
Clean Waiting Room
Required total: 10,000 balls
Level 0
Enter the Backrooms.
Level 0
Clean Backrooms
Collect every ball in the Backrooms.
Clean Backrooms
Required total: 35,000 balls
Splash Splash
Enter the Poolroom.
Splash Splash
Clean Poolroom
Collect every ball in the Poolroom.
Clean Poolroom
Required total: 30,000 balls
Back to School
Enter the School.
Back to School
Clean School
Collect every ball in the School.
Clean School
Required total: 42,000 balls
Overtime
Enter the Office.
Overtime
Clean Office
Collect every ball in the Office.
Clean Office
Required total: 50,000 balls
Housekeeping
Enter the Hotel.
Achievement location
Housekeeping
Clean Hotel
Collect every ball in the Hotel.
Achievement location
Clean Hotel
Required total: 100,000 balls
Door Operator
Discover every room.
Achievement location
Door Operator
For this achievement, you only need to purchase all the room keys. You do not have to enter every room.
Here is the complete list of keys, their locations, and prices in the order you can buy them.
| Key | Price |
|---|---|
| 2nd Door on the Right (Waiting Area) | €10.00 |
| 1st Door on the Right (Backrooms) | €25.00 |
| 1st Door on the Left (Poolroom) | €50.00 |
| 2nd Door on the Left (School) | €60.00 |
| 3rd Door on the Right (Office) | €90.00 |
| 3rd Door on the Left (Hotel) | €100.00 |
Purchase all six keys to unlock the achievement.
Hooray
Complete the first ball pit.
Hooray
10,000 Reasons to Quit
Deliver 10,000 units.
10,000 Reasons to Quit
And They Keep Coming
Deliver 100,000 units.
And They Keep Coming
Model Employee
Requirements met. The supervisor has no objections.
Model Employee
To unlock this achievement, you only need to fill all 8 ball pits. Together, they require 199,000 balls.
If you collect every single ball in the game, you can reach a total of 272,000 balls, but collecting everything is not required for this achievement.
Clock Out
Fill the final ball pit and walk through the exit.
Clock Out
You can leave the game as soon as all 8 ball pits are filled. Head to the back of the Playroom and exit through the double push doors to unlock the achievement.
Colour Is a Distraction
Fill a ball pit with only one colour.
Colour Is a Distraction
This achievement can be a little tricky because you must fill an entire ball pit using just one colour. Here are some tips to make the process easier and avoid mistakes.
Tips and Recommendations
- Do NOT buy Ball Magnet. It does not give you the option to choose specific ball colours, so it can make this achievement harder.
- Vacuum Collect is optional. It allows you to hold LMB instead of repeatedly clicking. Personally, I didn’t like using it because you can move too quickly and accidentally pick up the wrong colour.
- DO buy Quick Grab. It reduces the time between picking up balls, making the process faster.
- Big Pockets are optional. However, be careful when using this upgrade. If you collect a lot of one colour and accidentally pick up the wrong ball, you can ruin your progress. Also, placing balls into a pit appears to be random, and you cannot take balls back out once they are inside.
- If you accidentally pick up the wrong colour, throw the entire bag into a different ball pit. You cannot soft-lock yourself, and collecting other colours still helps you earn money, purchase upgrades, and unlock keys for the next rooms.
- Avoid buying Wall Vent. Some balls can spawn in the vent, making them difficult to see or collect. The vent can also suck in nearby balls automatically.
- Be careful with automatic collection. Vents, robots, and other tools that collect or deliver balls without you manually placing them into a pit will automatically deposit balls in chronological order of completion.
- Choose an easily recognizable colour. I recommend picking a colour that stands out from the others, including in dark areas. Personally, I prefer using blue balls.
- Use the first ball pit. Please don’t make this harder than necessary. The first pit only requires 1,500 balls, which is much easier than the second pit’s 5,000 balls. You can use another pit if you want, but I recommend completing this achievement with the first one.
Mighty Hand
Fully upgrade all of your hand skills.
Mighty Hand
To unlock this achievement, purchase every upgrade under the Hand section in skills.exe.
All hand upgrades together cost €59.60.
Hand Upgrade Costs
| Upgrade Level | Big Pockets | Quick Grab | Vacuum Collect | Long Arms | Ball Magnet |
|---|---|---|---|---|---|
| 0 → 1 | €0.60 | €0.60 | €0.60 | €0.80 | €0.40 |
| 1 → 2 | €1.40 | €1.40 | X | €1.60 | €0.90 |
| 2 → 3 | €1.90 | €1.90 | X | €1.90 | €3.00 |
| 3 → 4 | €4.40 | €3.50 | X | €2.50 | €3.50 |
| 4 → 5 | €14.00 | €4.90 | X | €4.90 | €4.90 |
A New Colleague
Buy your first vacuum robot. It does not take breaks.
A New Colleague
Before you can purchase your first Roomba, you must buy a charging station. The game will not allow you to buy a robot without one.
You also need to completely fill Pit 6 (40,000 balls) to unlock the required item in shop.exe.
Initial Purchase Costs:
- First Charging Station: €10.00
- First Roomba: €8.00
Fully Equipped Part 1
Max out every possible upgrade.
Fully Equipped Part 1
For this achievement, you need to purchase all available upgrades. I have listed the upgrade costs below, organized by category and level.
Hand
| Upgrade Level | Big Pockets | Quick Grab | Vacuum Collect | Long Arms | Ball Magnet |
|---|---|---|---|---|---|
| 0 → 1 | €0.60 | €0.60 | €0.60 | €0.80 | €0.40 |
| 1 → 2 | €1.40 | €1.40 | X | €1.60 | €0.90 |
| 2 → 3 | €1.90 | €1.90 | X | €1.90 | €3.00 |
| 3 → 4 | €4.40 | €3.50 | X | €2.50 | €3.50 |
| 4 → 5 | €14.00 | €4.90 | X | €4.90 | €4.90 |
Ball Pit
| Upgrade Level | Quick Hands |
|---|---|
| 0 → 1 | €0.80 |
| 1 → 2 | €1.60 |
| 2 → 3 | €2.00 |
| 3 → 4 | €2.50 |
| 4 → 5 | €4.90 |
Light
| Upgrade Level | Longer Days | Slow Blackout |
|---|---|---|
| 0 → 1 | €0.90 | €0.90 |
| 1 → 2 | €1.90 | €2.00 |
| 2 → 3 | €4.40 | €2.00 |
| 3 → 4 | €4.90 | €2.80 |
| 4 → 5 | €15.00 | €7.00 |
Legs
| Upgrade Level | Sprint Stamina | Sprint Speed |
|---|---|---|
| 0 → 1 | €3.00 | €1.50 |
| 1 → 2 | €3.00 | €1.90 |
| 2 → 3 | €3.80 | €3.80 |
| 3 → 4 | €4.50 | €5.60 |
| 4 → 5 | €12.00 | €12.00 |
Flashlight
Initial cost: €5.00
| Upgrade Level | Battery Life | Beam Brightness | Beam Range | Fast Charge |
|---|---|---|---|---|
| 0 → 1 | €1.50 | €1.90 | €3.00 | €2.00 |
| 1 → 2 | €1.50 | €1.90 | €3.00 | €2.00 |
| 2 → 3 | €2.50 | €2.50 | €3.00 | €2.50 |
| 3 → 4 | €4.20 | €4.20 | €4.20 | €4.20 |
| 4 → 5 | €8.00 | €8.00 | €8.50 | €8.50 |
Push Broom
Initial cost: €15.00
| Upgrade Level | Load | Flick | Push Tempo | Sweep Width |
|---|---|---|---|---|
| 0 → 1 | €1.80 | €1.70 | €1.80 | €1.70 |
| 1 → 2 | — | — | — | — |
| 2 → 3 | — | — | — | — |
| 3 → 4 | — | — | — | — |
| 4 → 5 | — | — | — | — |
Ball Vacuum
Initial purchase costs: First €20.00 | Second: Not specified | Third: Not specified
| Upgrade Level | Upload Speed | Tank Size | Intake Reach | Intake Speed |
|---|---|---|---|---|
| 0 → 1 | €4.00 | €4.00 | €4.00 | €4.00 |
| 1 → 2 | €4.50 | €4.50 | €4.50 | €4.50 |
| 2 → 3 | — | — | — | — |
| 3 → 4 | — | — | — | — |
| 4 → 5 | — | — | — | — |
Fully Equipped Part 2
Ball Vent
| Upgrade Level | Suction Force | Intake Reach | Intake Speed | Throughput |
|---|---|---|---|---|
| 0 → 1 | €2.00 | €2.00 | €2.00 | €1.90 |
| 1 → 2 | — | — | — | — |
| 2 → 3 | — | — | — | — |
| 3 → 4 | — | — | — | — |
| 4 → 5 | — | — | — | — |
Robot Vacuums (Roomba)
Charging Station Costs: First €10.00 | Second and Third: Not specified
| Upgrade Level | Big Battery | Robot Tank | Robot Stacking | Fast Charging | Turbo Motor | Quick Unload |
|---|---|---|---|---|---|---|
| 0 → 1 | €5.50 | €5.50 | €5.50 | €5.50 | €5.50 | €5.50 |
| 1 → 2 | €6.50 | €6.50 | €6.50 | €6.50 | €6.50 | €6.50 |
| 2 → 3 | — | — | — | — | — | — |
| 3 → 4 | — | — | €13.00 | €13.00 | €14.00 | €14.00 |
| 4 → 5 | — | — | €17.50 | €17.50 | €17.00 | €19.00 |
Roomba Purchase Costs
| Roomba | Price |
|---|---|
| 1st | €8.00 |
| 2nd | €9.00 |
| 3rd | Not specified |
| 4th | Not specified |
| 5th | Not specified |
| 6th | Not specified |
| 7th | Not specified |
| 8th | Not specified |
Coffee
Unlock requirement: Fill Pit 2
| Upgrade Level | Strong Brew | Special Blend |
|---|---|---|
| 0 → 1 | €2.00 | €2.00 |
| 1 → 2 | €2.50 | €2.50 |
| 2 → 3 | €2.50 | €2.50 |
| 3 → 4 | €3.00 | €3.00 |
| 4 → 5 | €6.50 | €7.50 |
Fruit Basket
Unlock requirement: Fill Pit 5
| Upgrade Level | Fresh Picked | Mixed Basket |
|---|---|---|
| 0 → 1 | €2.20 | €2.20 |
| 1 → 2 | €2.50 | €3.20 |
| 2 → 3 | €3.20 | €8.00 |
| 3 → 4 | €6.50 | X |
| 4 → 5 | €10.50 | X |
Hand Vacuum
Unlock requirement: Purchase the School Key | Initial cost: €50.00
| Upgrade Level | Auto Upload | Suction Cone | Nozzle Reach | Suction Power | Tank Size |
|---|---|---|---|---|---|
| 0 → 1 | — | €8.00 | €8.00 | €8.00 | €8.00 |
| 1 → 2 | — | €9.00 | €9.00 | €9.50 | €9.00 |
| 2 → 3 | — | €15.00 | €15.00 | €15.00 | €16.00 |
| 3 → 4 | — | — | — | — | €21.50 |
| 4 → 5 | — | — | — | — | — |
Inventory Scanner
Unlock requirement: Fill Pit 4 | Initial cost: €10.00
| Upgrade Level | Cooldown | Display Duration | Scan Range |
|---|---|---|---|
| 0 → 1 | €2.00 | €2.00 | €2.00 |
| 1 → 2 | €2.20 | €2.20 | €2.50 |
| 2 → 3 | €3.20 | — | €3.20 |
| 3 → 4 | €6.50 | — | €6.50 |
| 4 → 5 | — | — | €10.00 |
Note: Some upgrade prices were not provided in the original information, so I have marked those entries with a dash instead of guessing.
No Re-hires Needed
Complete Hardcore mode.
No Re-hires Needed