
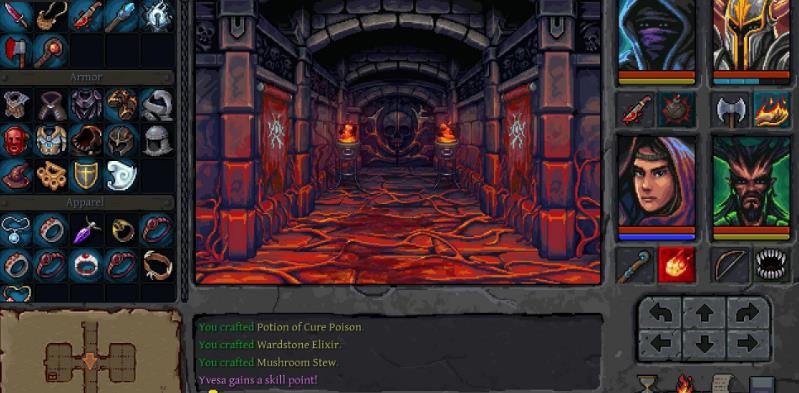
In this guide, I cover the basics of building a strong party and understanding the game’s mechanics, from races and classes to combat, skills, exploration and much more. Your adventure begins after receiving an unsigned letter that summons your party to a remote village called Underkeep. A dwarven expedition has disappeared in the nearby hills, and rumors speak of hidden riches beneath an ancient tower.
10 Rules for Your First Hours
1. Save Often: The game recommends saving regularly, and I strongly suggest doing the same. Use your own save slots along with Quicksave and Autosave.
2. Rest Before Every Fight: If you can see a fight coming, rest before starting it. Resting restores HP, Mana and Stamina for your entire party, but remember that it consumes food.
3. Collect Every Food Item: Food is an important resource because you cannot rest without it. Collect every apple, berry, loaf and ham you find.
4. Potions Are Free Actions: Drinking potions or using items directly from your inventory does not consume a hero’s turn. Use them whenever needed.
5. Use Free-Action Skills First: Skills with the description “Does not consume an action” should be used before your hero’s main action. Examples include Champion’s Grip, Righteous Strike, Skirmisher’s Step and Evasive Roll.
6. Think Before Attacking: Once any hero performs an action during a round, your party cannot move until the round ends. Decide whether you want to retreat before attacking.
7. Keep Melee Weapons in the Front Row: Heroes in the back row cannot attack with regular melee weapons unless the weapon has Reach. Give them bows, crossbows, slings or spells instead.
8. Search Everything: Garbage piles, hollow trees, graves, breakable objects and suspicious walls can hide valuable loot. Check every unusual object you find.
9. Activate Every Portal Stone: Touch each portal stone once to unlock it for future fast travel.
10. Save Gold for Revivals: Fallen heroes can be revived at Revival Statues, but bringing them back costs gold. Always keep some gold available.
Controls & Useful Settings
Controls
| Action | Default Controls |
|---|---|
| Move / Strafe / Turn | W, A, S, D, Q, E or Arrow Keys |
| Map | M |
| Pick Up All Items | Y |
| Pick Up One Item | Right-click the item or drag it into inventory |
| Throw Item | Drag and release over the centre of the screen |
| Change Active Skill | Right-click the skill slot next to the basic attack |
| End Round | Hourglass icon |
All controls can be changed under Options > Controls.
You can also rebind individual hero Attack and Use Skill keys, Quick Save, Quick Load, character panels, Equipment, Skills, Quests, Rest and Skip Round.
I recommend setting individual attack keys for each hero. It makes combat much faster and easier to manage.
Settings Worth Changing
Here are some settings I recommend changing before starting your adventure:
- Move / Turn Animation: Off – Makes movement faster and gives the game a more responsive, old-school feel.
- Item Tooltip Delay: Off – Displays item tooltips immediately.
- Show Items Behind Objects: On – Helps you find hidden loot behind objects.
- Automapping: Enabled is the default setting. You can also choose Minimap Only or Disabled if you prefer exploring without a full map.
- Floating Combat Text: Choose All, Damage Only, Status Only or Off, depending on your preference.
- Font: Choose between Default, Pixelated or Pixelated B. Use whichever is easiest to read.
- Accessibility: You can reduce or disable camera shake, flashing effects, portrait blinking, italics and wall-hit sounds.
You can change the difficulty at any time. If a particular fight becomes too difficult, don’t hesitate to switch to Easy.
Races: Pick With Care
The Six Races
Each race has different strengths and racial traits. I recommend choosing a race that complements your hero’s class and role.
| Race | Good At | Racial Trait |
|---|---|---|
| Human | Balanced; works with any class | Fast Learner: +10% XP |
| Dwarf | Physical roles and survivability | Deep Sight: +3% elemental resistance. Infravision: Can see things others cannot. |
| Stoneborn | Strength and resilience | Stonebound: Cannot wear body armor; gains +1 Armor at levels 1, 5, 9 and 13. |
| Raven | Agility, perception and flexibility | Twisted Blood: Receives one random positive and one random negative mutation. |
| Elk | Agility, wisdom, precision and magic | Beastwarden: +1 Armor against Animals. |
| Slugman | Magic and endurance | Eye Stalks: Immune to critical hits but takes double Fire damage. |
Race Tips
– Stoneborn: Cannot wear chest armor, but can still equip helmets, gloves, boots and other equipment. Its armor increases with level, making it a great choice for Warrior and Paladin.
– Slugman: A fantastic choice for spellcasters. Critical-hit immunity is also useful for front-line heroes. However, remember to increase Fire resistance and use cures quickly when affected by Burn.
– Elk: Its additional armor against Animals is useful during the early game, especially when fighting wolves, rats and spiders in forest areas.
– Human: The +10% XP bonus makes leveling faster over time. If you’re unsure which race to choose, Human is a safe option.
– Raven: This race comes with random mutations, so check the Character panel immediately after creating your hero. Some negative mutations, such as Backseat Parasite (50% chance to hit a random enemy) or Allergic to Ice, can negatively affect certain builds. If you get an unwanted mutation, delete the hero and create another one using the Party Creator.
Classes at a Glance
The Seven Classes
Each class has its own main stat, combat position and playstyle. Choosing the right combination is important when building your party.
| Class | Main Stat | Row | Role |
|---|---|---|---|
| Warrior | STR | Front | Weapon specialist, taunts and party buffs |
| Paladin | STR (+1 WIS) | Front | Tank and healer; builds Zeal and deals extra damage to Undead and Demons |
| Thief | DEX | Front | Evasion, critical hits and Bleed; uses daggers and swords |
| Ranger | DEX | Back | Marks enemies and deals precise damage with elemental arrows |
| Wizard | WIS | Back | Fire, Ice and Lightning damage, barriers and crowd control |
| Voidcaller | WIS | Back | Healing, barriers, debuffs and party auras |
| Blood Mage | END | Back | Bleed effects and powerful execution spells that consume bones or HP |
Recommended Starter Parties
Here are three party combinations I recommend for different playstyles.
1. Classic Party (Easiest)
Warrior + Paladin / Wizard + Voidcaller
This is the safest party combination for beginners. You get two front-line tanks, strong burst damage from the Wizard and dedicated healing from the Voidcaller.
It’s a forgiving setup that gives you plenty of room to make mistakes during combat.
2. Hunter’s Pack
Warrior + Thief / Ranger + Blood Mage
This party focuses on marking enemies and dealing additional damage to a single target.
The Ranger’s Hunter’s Prey or the Blood Mage’s Mark the Dead increases the damage an enemy receives, allowing the entire party to focus on that target. The Thief and Blood Mage can also stack Bleed effects for additional damage.
3. Holy Order
Paladin + Thief / Voidcaller + Wizard
This combination gives you two sources of healing through Lay on Hands and Void Mend. The Paladin handles tanking while the Thief uses evasion to avoid incoming attacks.
Against Undead, I recommend using the Paladin’s Judgment and the Wizard’s Fire spells. Undead take additional Fire damage but are immune to Bleed and Poison.
Against Demons, switch the Wizard to Ice spells.
The Voidcaller’s Null Bolt ignores enemy defenses, making it useful against almost any enemy type.
Class Deep Dives & Skill Picks
Skills: The Basics
Before spending skill points, there are a few important things you should understand:
- You receive 1 skill point per level, and each skill can have a maximum of 5 points.
- Active skills are placed in the slot next to your basic attack. Right-click the slot to change the selected skill.
- Passive skills are always active once unlocked.
- Some skills require specific weapon types, so always check their tooltips before spending points.
- Every skill has a minimum hero level requirement before you can invest points in it.
- Powerful skills such as Fireball, Ice Tower, Storm Chain, Execution Shot, Shadow Lunge, Bloodfall and Judgment unlock at level 6.
- Exact skill values for levels 1 to 5 are listed in Sections 6A–6G, with a separate section for each class.
Warrior
The Warrior is a weapon specialist, so I recommend choosing skills based on the weapon you want to use.
- Flurry Thrust: Requires a sword.
- Skull Rattle: Requires a mace and has a chance to stun enemies.
- Slice and Dice: Requires an axe and ignores enemy armor.
- Cleave: Requires a two-handed weapon and hits two enemies.
- Riposte: Requires a one-handed weapon and allows counterattacks.
- Shield Bash: Requires a shield, has a chance to stun and provides passive armor.
Warrior Skill Tips
– Champion’s Grip: This is a free action that increases damage and provides stun immunity. I recommend activating it at the beginning of difficult fights.
– Provoking Shout: Redirects enemy attacks toward the Warrior. Use it to protect a wounded front-line hero.
– Battle Roar: Increases the damage of your entire party. It’s a useful skill when you want to improve everyone’s offensive power.
– The Flow of Life: This passive increases maximum HP and elemental resistance. It’s a solid choice if you want to improve the Warrior’s survivability.
Paladin
The Paladin builds 1 Zeal with every successful basic attack, up to a maximum of 5 Zeal.
Some of its powerful skills, including Flame of Conviction, Judgment and Stun Undead, consume all available Zeal when activated.
Paladin Skill Tips
– Righteous Strike: This is a free action that increases the damage of your next basic attack and generates 1 additional Zeal. Use it regularly while building Zeal.
– Zeal Management: Build up 4 or 5 Zeal before using powerful finishers. Use Judgment against Undead and Demons, or Lay on Hands when an ally needs healing.
– Divine Guard: Grants additional armor whenever you spend Zeal.
– Zealous Resolve: Increases your damage for every Zeal you currently hold.
– Sacred Bulwark: Converts a percentage of Wisdom into Armor, making the Paladin’s additional +1 WIS useful.
Keep in mind that Divine Guard and Zealous Resolve encourage different playstyles. Divine Guard rewards spending Zeal, while Zealous Resolve rewards holding it. Choose your skills according to how you want to play.
Thief
The Thief relies heavily on evasion, which normally has a maximum cap of 60%. Its Evasive Roll skill is a free action that temporarily increases evasion and raises this cap.
Thief Skill Tips
– Nightshade Mastery: Adds a random Poison, Bleed, Blind or Burn effect to attacks.
– Backstab the Weak: Gains additional critical-hit chance for every negative status effect on the target.
– Shadow Lunge: Deals increased damage against enemies affected by Bleed or Poison.
These three skills work extremely well together. Apply negative effects with Nightshade Mastery, increase critical-hit chances with Backstab the Weak and finish with Shadow Lunge.
– Smoke Bomb: Blinds up to two enemies, reducing their accuracy by 50%. It’s particularly useful against enemies that deal heavy damage.
– Mark the Dead: Unlocks at level 3 and is also available to the Thief, not just the Blood Mage. It increases the damage the marked enemy receives from everyone by 20% to 40%, depending on skill level.
Ranger
The Ranger specializes in ranged attacks and marking enemies for additional damage.
Ranger Skill Tips
– Hunter’s Prey: Unlocks at level 5. Use it on the most dangerous nearby enemy and let your entire party focus on that target. Remember that it only works on close enemies.
– Execution Shot: Deals additional damage against enemies affected by Hunter’s Prey or Mark the Dead. Both the Thief and Blood Mage can provide the Mark the Dead effect.
– Skirmisher’s Step: A free action that increases evasion and strengthens your next basic attack.
– Runebound Arrows: This passive adds random elemental damage to every projectile, making your regular ranged attacks more powerful.
Wizard
The Wizard specializes in elemental damage and crowd control. It can deal powerful Fire, Ice and Lightning damage while also providing defensive support.
Wizard Skill Tips
– Fire Spark: A good early-game option that deals Fire damage and can apply Burn.
– Ice Shard: Deals Ice damage and has a chance to Freeze enemies. Frozen enemies lose their turn, making this especially useful against dangerous targets.
– Static Shock: Hits two enemies in front of the Wizard.
– Fireball: Deals Fire damage to two enemies and can apply Burn.
– Storm Chain: Deals Lightning damage and can strike the same targets again.
– Ice Tower: Deals Ice damage to every enemy in the area ahead.
– Arcane Lock: Paralyzes an enemy, but remember that paralyzed enemies can still attack. It prevents movement rather than stopping damage.
– Dragon Arcana and Feel the Flow: These are important passive skills that improve the Wizard’s elemental damage and Mana capacity.
– Invisibility: Makes your entire party invisible until you perform an action. It’s useful when you want to sneak past enemies without starting a fight.
Voidcaller
The Voidcaller is a support-focused class that provides healing, defensive barriers, debuffs and party-wide bonuses.
Voidcaller Skill Tips
– Void Mend: Heals an ally and gains additional cleansing effects at higher levels. At levels 2, 3, 4 and 5, it also removes Bleed, Burn, Poison and Stun effects, respectively. I recommend investing in this skill because it provides both healing and status removal.
– Void Lance: Ignores enemy defenses, making it especially useful against heavily armored enemies.
– Auras: Only one aura can be active at a time, and you can switch between them when leveling up. Investing skill points into one aura also levels up the others.
– Aura of the Void: Provides a self-renewing barrier for your party, making it a reliable default choice for defensive support.
Blood Mage
The Blood Mage uses powerful spells that consume 1 bone and some HP with every cast. If you don’t have a bone available, the spell consumes additional HP instead.
Always collect every bone and skull you find during exploration.
Blood Mage Skill Tips
– Leechcraft: Unlocks at level 5 and restores a percentage of the HP lost through blood damage, ranging from 10% to 50%. I recommend taking this skill as soon as it becomes available to help offset the health cost of your spells.
– Blood Lance and Bloodfall: Both spells deal 30% less damage against Undead. I recommend letting your Paladin handle enemies in crypts whenever possible.
– Exsanguinate: Increases the power of an existing Bleed effect. Combine it with Bloodfall or the Thief’s Bleed skills for better results.
Skill Tables: Warrior
Warrior Skills: Levels 1–5
In this section, I list every Warrior skill with its unlock requirement, skill type, weapon requirement and exact values from levels 1 to 5.
All Warrior skill costs are paid in Stamina.
Unlock indicates the minimum hero level required before you can invest skill points.
Flurry Thrust
Unlock: Level 1 | Active | Requires a sword | Cooldown: 3
| Stat | Level 1 | Level 2 | Level 3 | Level 4 | Level 5 |
|---|---|---|---|---|---|
| Stamina Cost | 4 | 5 | 6 | 7 | 8 |
| First Strike (% of weapon) | 110% | 120% | 130% | 140% | 150% |
| Second Strike (% of weapon) | 35% | 40% | 45% | 50% | 55% |
Skull Rattle
Unlock: Level 1 | Active | Requires a mace | Cooldown: 3
| Stat | Level 1 | Level 2 | Level 3 | Level 4 | Level 5 |
|---|---|---|---|---|---|
| Stamina Cost | 5 | 6 | 7 | 8 | 9 |
| Damage (% of weapon) | 110% | 120% | 130% | 140% | 150% |
| Stun Chance | 9% | 17% | 25% | 33% | 41% |
Slice and Dice
Unlock: Level 1 | Active | Requires an axe | Cooldown: 3
| Stat | Level 1 | Level 2 | Level 3 | Level 4 | Level 5 |
|---|---|---|---|---|---|
| Stamina Cost | 5 | 6 | 7 | 8 | 9 |
| Damage (% of weapon) | 110% | 122% | 134% | 146% | 158% |
| Armor Ignored | 1 | 2 | 3 | 4 | 5 |
The Flow of Life
Unlock: Level 1 | Passive
| Stat | Level 1 | Level 2 | Level 3 | Level 4 | Level 5 |
|---|---|---|---|---|---|
| Max HP | +10 | +20 | +30 | +40 | +50 |
| Fire/Ice/Lightning/Poison Resistance | +3% | +6% | +9% | +12% | +15% |
Provoking Shout
Unlock: Level 2 | Active | Self buff: 2 rounds | Cooldown: 4
| Stat | Level 1 | Level 2 | Level 3 | Level 4 | Level 5 |
|---|---|---|---|---|---|
| Stamina Cost | 7 | 8 | 9 | 10 | 11 |
| Attack Redirect Chance | 40% | 55% | 70% | 85% | 100% |
Shield Bash
Unlock: Level 2 | Active | Requires a shield | Cooldown: 4
| Stat | Level 1 | Level 2 | Level 3 | Level 4 | Level 5 |
|---|---|---|---|---|---|
| Stamina Cost | 5 | 6 | 7 | 8 | 9 |
| Stun Chance | 9% | 17% | 25% | 33% | 41% |
| Passive Armor with Shield | +1 | +2 | +3 | +4 | +5 |
Riposte
Unlock: Level 3 | Active | Requires a one-handed weapon | Counter lasts 1 round | Cooldown: 4
| Stat | Level 1 | Level 2 | Level 3 | Level 4 | Level 5 |
|---|---|---|---|---|---|
| Stamina Cost | 5 | 6 | 7 | 8 | 9 |
| Armor Ignored | 1 | 2 | 3 | 4 | 5 |
| Counterattack Damage | 100% | 110% | 120% | 130% | 140% |
Cleave
Unlock: Level 4 | Active | Requires a two-handed melee weapon | Hits 2 enemies | Cooldown: 2
| Stat | Level 1 | Level 2 | Level 3 | Level 4 | Level 5 |
|---|---|---|---|---|---|
| Stamina Cost | 6 | 7 | 8 | 9 | 10 |
| Damage per Target (% of weapon) | 80% | 88% | 96% | 104% | 112% |
Champion’s Grip
Unlock: Level 4 | Free Action | Self buff: 4 rounds | Stun Immunity | Cooldown: 6
| Stat | Level 1 | Level 2 | Level 3 | Level 4 | Level 5 |
|---|---|---|---|---|---|
| Stamina Cost | 7 | 8 | 9 | 10 | 11 |
| Melee/Ranged/Unarmed Damage | +20% | +27% | +34% | +41% | +48% |
Battle Roar
Unlock: Level 5 | Active | Whole party: 3 rounds | Cooldown: 5
| Stat | Level 1 | Level 2 | Level 3 | Level 4 | Level 5 |
|---|---|---|---|---|---|
| Stamina Cost | 10 | 11 | 12 | 13 | 14 |
| Party Melee/Ranged/Unarmed Damage | +15% | +20% | +25% | +30% | +35% |
| Party Critical Chance | +3% | +6% | +9% | +12% | +15% |
Skill Tables: Paladin
Paladin Skills: Levels 1–5
Here I list all Paladin skills, including their Zeal costs, unlock requirements and exact values for levels 1 to 5.
All Paladin skill costs are paid in Zeal.
Stun Undead
Unlock: Level 1 | Active | Starting skill | Single level only | Consumes all Zeal (minimum 1) | Undead only | Stun lasts 1 round | Cooldown: 1
| Stat | Value |
|---|---|
| Stun Chance | 20% per Zeal consumed |
| Maximum Stun Chance | 100% at 5 Zeal |
Lay on Hands
Unlock: Level 1 | Active | Heals one ally | Consumes Zeal (minimum 1) | Cooldown: 2
| Stat | Level 1 | Level 2 | Level 3 | Level 4 | Level 5 |
|---|---|---|---|---|---|
| Max Zeal Consumed | 1 | 2 | 3 | 4 | 5 |
| Maximum Heal (3 HP per Zeal) | 3 HP | 6 HP | 9 HP | 12 HP | 15 HP |
Divine Guard
Unlock: Level 1 | Passive | Triggers whenever you spend Zeal | Lasts 1 round
| Stat | Level 1 | Level 2 | Level 3 | Level 4 | Level 5 |
|---|---|---|---|---|---|
| Bonus Armor | +1 | +2 | +3 | +4 | +5 |
Flame of Conviction
Unlock: Level 2 | Active | Consumes all Zeal (minimum 1) | Stun lasts 1 round | Cooldown: 4
| Stat | Level 1 | Level 2 | Level 3 | Level 4 | Level 5 |
|---|---|---|---|---|---|
| Fire Damage per Zeal | 3 | 6 | 9 | 12 | 15 |
| Stun Chance | 15% | 25% | 35% | 45% | 55% |
Righteous Strike
Unlock: Level 3 | Free Action | Costs no Zeal | Next basic attack gains +1 Zeal | Cooldown: 3
| Stat | Level 1 | Level 2 | Level 3 | Level 4 | Level 5 |
|---|---|---|---|---|---|
| Next Basic Attack Damage | +15% | +20% | +25% | +30% | +35% |
Zealous Resolve
Unlock: Level 3 | Passive
| Stat | Level 1 | Level 2 | Level 3 | Level 4 | Level 5 |
|---|---|---|---|---|---|
| Melee Damage per Zeal Held | +5% | +6% | +7% | +8% | +9% |
Sacred Bulwark
Unlock: Level 4 | Passive
| Stat | Level 1 | Level 2 | Level 3 | Level 4 | Level 5 |
|---|---|---|---|---|---|
| Wisdom Added as Armor | 20% | 35% | 50% | 65% | 80% |
Consecrated Ground
Unlock: Level 5 | Active | Costs 3 Zeal | Ends early if the party moves | Cooldown: 5
| Stat | Level 1 | Level 2 | Level 3 | Level 4 | Level 5 |
|---|---|---|---|---|---|
| Duration | 1 round | 2 rounds | 3 rounds | 4 rounds | 5 rounds |
| Party Armor | +1 | +2 | +3 | +4 | +5 |
| Party Fire/Ice/Lightning Resistance | +5% | +9% | +13% | +17% | +21% |
Judgment
Unlock: Level 6 | Active | Requires a melee weapon or bare hands | Consumes all Zeal (minimum 1) | Cooldown: 5
| Stat | Level 1 | Level 2 | Level 3 | Level 4 | Level 5 |
|---|---|---|---|---|---|
| Base Damage (% of weapon) | 120% | 130% | 140% | 150% | 160% |
| Bonus per Zeal | +10% | +12% | +14% | +16% | +18% |
| Bonus vs Undead/Demons | +10% | +14% | +18% | +22% | +26% |
Skill Tables: Thief
Thief Skills: Levels 1–5
In this section, I cover every Thief skill, including Stamina costs, weapon requirements and skill values.
All Thief skill costs are paid in Stamina.
Bleeding Dash
Unlock: Level 1 | Active | Requires a sword or dagger | Cooldown: 2
| Stat | Level 1 | Level 2 | Level 3 | Level 4 | Level 5 |
|---|---|---|---|---|---|
| Stamina Cost | 6 | 7 | 8 | 9 | 10 |
| Bleed Chance | 60% | 70% | 80% | 90% | 100% |
| Bleed Damage per Round | 4 | 5 | 6 | 7 | 8 |
| Bleed Duration | 1 round | 2 rounds | 3 rounds | 4 rounds | 5 rounds |
Nightshade Mastery
Unlock: Level 1 | Passive | Requires daggers or swords | Random Poison, Bleed, Blind or Burn | Strength and duration roll from 1 to 3
| Stat | Level 1 | Level 2 | Level 3 | Level 4 | Level 5 |
|---|---|---|---|---|---|
| Status Chance per Hit | 40% | 50% | 60% | 70% | 80% |
Backstab the Weak
Unlock: Level 1 | Active | Requires a dagger | Cooldown: 2
| Stat | Level 1 | Level 2 | Level 3 | Level 4 | Level 5 |
|---|---|---|---|---|---|
| Stamina Cost | 5 | 6 | 7 | 8 | 9 |
| Base Critical Chance | +20% | +20% | +20% | +20% | +20% |
| Critical Chance per Negative Effect | +10% | +15% | +20% | +25% | +30% |
Cloak of Swiftness
Unlock: Level 2 | Passive | Thief Version
| Stat | Level 1 | Level 2 | Level 3 | Level 4 | Level 5 |
|---|---|---|---|---|---|
| Evasion | +2% | +4% | +6% | +8% | +10% |
| Ranged Hit Chance | +5% | +10% | +15% | +20% | +25% |
| Critical Chance | +3% | +6% | +9% | +12% | +15% |
| Unarmed Damage | +1 | +2 | +3 | +4 | +5 |
Evasive Roll
Unlock: Level 3 | Free Action | Self buff: 2 rounds | Cooldown: 5
| Stat | Level 1 | Level 2 | Level 3 | Level 4 | Level 5 |
|---|---|---|---|---|---|
| Stamina Cost | 6 | 7 | 8 | 9 | 10 |
| Evasion | +10% | +15% | +20% | +25% | +30% |
| Evasion Cap Increase | +2% | +4% | +6% | +8% | +10% |
Mark the Dead
Unlock: Level 3 | Active | Close Enemy | Duration: 2 rounds | Cooldown: 3
| Stat | Level 1 | Level 2 | Level 3 | Level 4 | Level 5 |
|---|---|---|---|---|---|
| Stamina Cost | 4 | 6 | 8 | 10 | 12 |
| Damage Taken by Target | +20% | +25% | +30% | +35% | +40% |
Smoke Bomb
Unlock: Level 4 | Active | Ranged | Hits up to 2 enemies | Blind lasts 2 rounds | Blind chance reduced by enemy evasion | Cooldown: 4
| Stat | Level 1 | Level 2 | Level 3 | Level 4 | Level 5 |
|---|---|---|---|---|---|
| Stamina Cost | 6 | 7 | 8 | 9 | 10 |
| Blind Chance | 45% | 53% | 61% | 69% | 77% |
Shadow Instinct
Unlock: Level 5 | Passive
| Stat | Level 1 | Level 2 | Level 3 | Level 4 | Level 5 |
|---|---|---|---|---|---|
| Melee and Ranged Critical Chance | +3% | +6% | +9% | +12% | +15% |
| Melee and Ranged Armor Pierce | +1 | +2 | +3 | +4 | +5 |
Shadow Lunge
Unlock: Level 6 | Active | Requires a dagger | Cooldown: 3
| Stat | Level 1 | Level 2 | Level 3 | Level 4 | Level 5 |
|---|---|---|---|---|---|
| Stamina Cost | 6 | 8 | 10 | 12 | 14 |
| Damage (% of weapon) | 130% | 145% | 160% | 175% | 190% |
| Bonus vs Bleeding/Poisoned | +50% | +50% | +50% | +50% | +50% |
Skill Tables: Ranger
Ranger Skills: Levels 1–5
Here I list all Ranger skills with their exact values, Stamina costs and unlock requirements.
All Ranger skill costs are paid in Stamina.
Quickshot
Unlock: Level 1 | Active | Requires a ranged weapon | Second shot has no weapon effects or critical hits | Cooldown: 2
| Stat | Level 1 | Level 2 | Level 3 | Level 4 | Level 5 |
|---|---|---|---|---|---|
| Stamina Cost | 5 | 6 | 7 | 8 | 9 |
| Chance to Shoot Twice | 20% | 25% | 30% | 35% | 40% |
Aimed Shot
Unlock: Level 1 | Active | Requires a ranged weapon | Cooldown: 3
| Stat | Level 1 | Level 2 | Level 3 | Level 4 | Level 5 |
|---|---|---|---|---|---|
| Stamina Cost | 6 | 8 | 10 | 12 | 14 |
| Ranged Damage | +50% | +60% | +70% | +80% | +90% |
| Ranged Critical Chance | +2% | +4% | +6% | +8% | +10% |
Cloak of Swiftness
Unlock: Level 1 | Passive | Ranger Version
| Stat | Level 1 | Level 2 | Level 3 | Level 4 | Level 5 |
|---|---|---|---|---|---|
| Evasion | +2% | +4% | +6% | +8% | +10% |
| Ranged Hit Chance | +5% | +10% | +15% | +20% | +25% |
| Ranged Critical Chance | +2% | +4% | +6% | +8% | +10% |
| Unarmed Damage | +1 | +2 | +3 | +4 | +5 |
Deadly Shot
Unlock: Level 2 | Passive
| Stat | Level 1 | Level 2 | Level 3 | Level 4 | Level 5 |
|---|---|---|---|---|---|
| Ranged Critical Chance | +4% | +8% | +12% | +16% | +20% |
Skirmisher’s Step
Unlock: Level 3 | Free Action | Evasion lasts 1 round | Cooldown: 4
| Stat | Level 1 | Level 2 | Level 3 | Level 4 | Level 5 |
|---|---|---|---|---|---|
| Stamina Cost | 5 | 6 | 7 | 8 | 9 |
| Evasion | +10% | +20% | +30% | +40% | +50% |
| Next Basic Attack Damage | +20% | +30% | +40% | +50% | +60% |
Barbed Arrows
Unlock: Level 3 | Active | Requires a ranged weapon | Cooldown: 3
| Stat | Level 1 | Level 2 | Level 3 | Level 4 | Level 5 |
|---|---|---|---|---|---|
| Stamina Cost | 6 | 7 | 8 | 9 | 10 |
| Bleed Chance | 50% | 60% | 70% | 80% | 90% |
| Bleed Damage per Round | 1 | 2 | 3 | 4 | 5 |
| Bleed Duration | 1 round | 2 rounds | 3 rounds | 4 rounds | 5 rounds |
Runebound Arrows
Unlock: Level 4 | Passive | Random Fire, Ice or Lightning damage on each projectile
| Stat | Level 1 | Level 2 | Level 3 | Level 4 | Level 5 |
|---|---|---|---|---|---|
| Elemental Damage | +2 | +4 | +6 | +8 | +10 |
Stillstrike
Unlock: Level 4 | Active | Requires a ranged weapon | Paralyze lasts 1 round (target can still attack) | Cooldown: 3
| Stat | Level 1 | Level 2 | Level 3 | Level 4 | Level 5 |
|---|---|---|---|---|---|
| Stamina Cost | 5 | 6 | 7 | 8 | 9 |
| Paralyze Chance | 25% | 30% | 35% | 40% | 45% |
Hunter’s Prey
Unlock: Level 5 | Active | Close Enemy | Duration: 3 rounds | Cooldown: 4
| Stat | Level 1 | Level 2 | Level 3 | Level 4 | Level 5 |
|---|---|---|---|---|---|
| Stamina Cost | 5 | 7 | 9 | 11 | 13 |
| Damage Taken by Target | +20% | +25% | +30% | +35% | +40% |
Execution Shot
Unlock: Level 6 | Active | Requires a ranged weapon | Bonus applies to targets affected by Hunter’s Prey or Mark the Dead | Cooldown: 3
| Stat | Level 1 | Level 2 | Level 3 | Level 4 | Level 5 |
|---|---|---|---|---|---|
| Stamina Cost | 6 | 8 | 10 | 12 | 14 |
| Damage (% of weapon) | 110% | 120% | 130% | 140% | 150% |
| Bonus vs Marked Target | +40% | +50% | +60% | +70% | +80% |
Skill Tables: Wizard
Wizard Skills: Levels 1–5
The Wizard uses Mana to cast spells. Below, I have listed every Wizard skill with its Mana cost, damage values, status chances and unlock requirements.
All Wizard skill costs are paid in Mana.
Fire Spark
Unlock: Level 1 | Active | One enemy in front | Burn: 2 damage per round for 1–3 rounds
| Stat | Level 1 | Level 2 | Level 3 | Level 4 | Level 5 |
|---|---|---|---|---|---|
| Mana Cost | 8 | 10 | 12 | 14 | 16 |
| Fire Damage | 7–13 | 10–16 | 13–19 | 16–22 | 19–25 |
| Burn Chance | 20% | 20% | 20% | 20% | 20% |
Static Shock
Unlock: Level 1 | Active | Hits 2 enemies in front
| Stat | Level 1 | Level 2 | Level 3 | Level 4 | Level 5 |
|---|---|---|---|---|---|
| Mana Cost | 6 | 8 | 10 | 12 | 14 |
| Lightning Damage | 3–12 | 4–13 | 5–14 | 6–15 | 7–16 |
Ice Shard
Unlock: Level 1 | Active | Ranged | One enemy
| Stat | Level 1 | Level 2 | Level 3 | Level 4 | Level 5 |
|---|---|---|---|---|---|
| Mana Cost | 5 | 6 | 7 | 8 | 9 |
| Ice Damage | 4–8 | 6–10 | 8–12 | 10–14 | 12–16 |
| Freeze Chance | 10% | 12% | 14% | 16% | 18% |
Shielding Barrier
Unlock: Level 2 | Active | Self | Duration: 3 rounds | Absorbs any damage type
| Stat | Level 1 | Level 2 | Level 3 | Level 4 | Level 5 |
|---|---|---|---|---|---|
| Mana Cost | 8 | 10 | 12 | 14 | 16 |
| Damage Absorbed | 5 | 10 | 15 | 20 | 25 |
Feel the Flow
Unlock: Level 2 | Passive
| Stat | Level 1 | Level 2 | Level 3 | Level 4 | Level 5 |
|---|---|---|---|---|---|
| Maximum Mana | +12 | +24 | +36 | +48 | +60 |
Dragon Arcana
Unlock: Level 3 | Passive
| Stat | Level 1 | Level 2 | Level 3 | Level 4 | Level 5 |
|---|---|---|---|---|---|
| Fire Spell Damage | +10% | +18% | +26% | +34% | +42% |
| Ice Spell Damage | +10% | +17% | +24% | +31% | +38% |
| Lightning Spell Damage | +10% | +19% | +28% | +37% | +46% |
| Burn and Freeze Chance | +2% | +4% | +6% | +8% | +10% |
Arcane Lock
Unlock: Level 3 | Active | Ranged | Always paralyzes for 1 round (target can still attack) | Cooldown: 3
| Stat | Level 1 | Level 2 | Level 3 | Level 4 | Level 5 |
|---|---|---|---|---|---|
| Mana Cost | 8 | 9 | 10 | 11 | 12 |
| Stun Chance | 20% | 25% | 30% | 35% | 40% |
Invisibility
Unlock: Level 5 | Active | Whole Party | Breaks when you attack or perform an action
| Stat | Level 1 | Level 2 | Level 3 | Level 4 | Level 5 |
|---|---|---|---|---|---|
| Mana Cost | 20 | 18 | 16 | 14 | 12 |
| Duration | 3 rounds | 4 rounds | 5 rounds | 6 rounds | 7 rounds |
Fireball
Unlock: Level 6 | Active | Ranged | Hits 2 enemies | Burn: 3 damage per round for 1–3 rounds
| Stat | Level 1 | Level 2 | Level 3 | Level 4 | Level 5 |
|---|---|---|---|---|---|
| Mana Cost | 15 | 19 | 23 | 27 | 31 |
| Fire Damage | 16–22 | 19–25 | 22–28 | 25–31 | 28–34 |
| Burn Chance | 20% | 22% | 24% | 26% | 28% |
Ice Tower
Unlock: Level 6 | Active | Hits every enemy in the area ahead
| Stat | Level 1 | Level 2 | Level 3 | Level 4 | Level 5 |
|---|---|---|---|---|---|
| Mana Cost | 13 | 15 | 17 | 19 | 21 |
| Ice Damage | 10–14 | 12–16 | 14–18 | 16–20 | 18–22 |
| Freeze Chance | 12% | 14% | 16% | 18% | 20% |
Storm Chain
Unlock: Level 6 | Active | Ranged | Hits 2 enemies | May strike the same targets again
| Stat | Level 1 | Level 2 | Level 3 | Level 4 | Level 5 |
|---|---|---|---|---|---|
| Mana Cost | 14 | 16 | 18 | 20 | 22 |
| Lightning Damage | 6–18 | 7–20 | 8–22 | 9–24 | 10–26 |
| Recast Chance | 10% | 12% | 14% | 16% | 18% |
I have kept the original skill values, mechanics and descriptions intact while organizing everything into sections and tables for easier reading.
Skill Tables: Voidcaller
Voidcaller Skills: Levels 1–5
In this section, I list every Voidcaller skill with its unlock requirements, Mana costs and exact values from levels 1 to 5.
All Voidcaller skill costs are paid in Mana.
Unlock indicates the minimum hero level required before you can invest skill points.
Void Mend
Unlock: Level 1 | Active | Targets one ally | Removes Bleed at Level 2, Burn at Level 3, Poison at Level 4 and Stun at Level 5 | Cooldown: 2
| Stat | Level 1 | Level 2 | Level 3 | Level 4 | Level 5 |
|---|---|---|---|---|---|
| Mana Cost | 7 | 10 | 13 | 16 | 19 |
| Health Restored | 4 | 7 | 10 | 13 | 16 |
Power of the Void
Unlock: Level 1 | Passive | Increases Void healing and damage
| Stat | Level 1 | Level 2 | Level 3 | Level 4 | Level 5 |
|---|---|---|---|---|---|
| Void Spell Power | +8% | +16% | +24% | +32% | +40% |
Aura of Blades
Unlock: Level 1 | Aura | Only one aura can be active at a time. Leveling up one aura also levels up all other auras.
| Stat | Level 1 | Level 2 | Level 3 | Level 4 | Level 5 |
|---|---|---|---|---|---|
| Party Melee Attack | +1 | +2 | +3 | +4 | +5 |
Aura of the Void
Unlock: Level 1 | Aura | Periodically provides a barrier to the entire party
| Stat | Level 1 | Level 2 | Level 3 | Level 4 | Level 5 |
|---|---|---|---|---|---|
| Barrier Absorption | 6 | 11 | 16 | 21 | 26 |
Aura of Thorns
Unlock: Level 1 | Aura
| Stat | Level 1 | Level 2 | Level 3 | Level 4 | Level 5 |
|---|---|---|---|---|---|
| Melee Damage Reflected | 10% | 15% | 20% | 25% | 30% |
Void Veil
Unlock: Level 2 | Active | Targets one ally | Duration: 3 rounds | Absorbs any damage type
| Stat | Level 1 | Level 2 | Level 3 | Level 4 | Level 5 |
|---|---|---|---|---|---|
| Mana Cost | 5 | 7 | 9 | 11 | 13 |
| Damage Absorbed | 5 | 10 | 15 | 20 | 25 |
Void Lance
Unlock: Level 3 | Active | Ranged | Ignores enemy defenses
| Stat | Level 1 | Level 2 | Level 3 | Level 4 | Level 5 |
|---|---|---|---|---|---|
| Mana Cost | 5 | 7 | 9 | 11 | 13 |
| Void Damage | 9 | 11 | 13 | 15 | 17 |
Fade into Nothingness
Unlock: Level 4 | Passive
| Stat | Level 1 | Level 2 | Level 3 | Level 4 | Level 5 |
|---|---|---|---|---|---|
| Armor | +1 | +2 | +3 | +4 | +5 |
| Void and Blood Resistance | +10% | +15% | +20% | +25% | +30% |
Unholy Convergence
Unlock: Level 5 | Active | Close Enemy | Duration: 2 rounds | Cooldown: 4
| Stat | Level 1 | Level 2 | Level 3 | Level 4 | Level 5 |
|---|---|---|---|---|---|
| Mana Cost | 10 | 12 | 14 | 16 | 18 |
| Enemy Physical Damage | -20% | -25% | -30% | -35% | -40% |
| Enemy Elemental and Blood Resistance | -3% | -6% | -9% | -12% | -15% |
Skill Tables: Blood Mage
Blood Mage Skills: Levels 1–5
Here I cover every Blood Mage skill, including HP costs, damage values, Bleed effects and unlock requirements.
Blood Mage skills consume HP and 1 Bone when cast. If you don’t have a Bone available, the spell costs additional HP instead.
Blood Pact
Unlock: Level 1 | Active | Marks an enemy for 2 rounds | Cooldown: 3
| Stat | Level 1 | Level 2 | Level 3 | Level 4 | Level 5 |
|---|---|---|---|---|---|
| HP Cost | 6 | 8 | 10 | 12 | 14 |
| Damage You Take Reflected to Target | 20% | 40% | 60% | 80% | 100% |
Blood Lance
Unlock: Level 1 | Active | Ranged | 30% weaker against Undead | Bleed: 2 damage per round for 1–5 rounds | Cooldown: 2
| Stat | Level 1 | Level 2 | Level 3 | Level 4 | Level 5 |
|---|---|---|---|---|---|
| HP Cost | 6 | 8 | 10 | 12 | 14 |
| Blood Damage | 6–11 | 7–14 | 8–17 | 9–20 | 10–23 |
| Bleed Chance | 50% | 50% | 50% | 50% | 50% |
Exsanguinate
Unlock: Level 1 | Active | Only works on an enemy already affected by Bleed | Cooldown: 2
| Stat | Level 1 | Level 2 | Level 3 | Level 4 | Level 5 |
|---|---|---|---|---|---|
| HP Cost | 6 | 8 | 10 | 12 | 14 |
| Extra Bleed Damage | +2 | +4 | +6 | +8 | +10 |
| Extra Bleed Duration | +1 round | +2 rounds | +3 rounds | +4 rounds | +5 rounds |
Mark the Dead
Unlock: Level 2 | Active | Close Enemy | Duration: 2 rounds | Cooldown: 3
| Stat | Level 1 | Level 2 | Level 3 | Level 4 | Level 5 |
|---|---|---|---|---|---|
| HP Cost | 4 | 6 | 8 | 10 | 12 |
| Damage Taken by Target | +20% | +25% | +30% | +35% | +40% |
Crimson Renewal
Unlock: Level 2 | Active | Heals one ally using your own health | Cooldown: 3
| Stat | Level 1 | Level 2 | Level 3 | Level 4 | Level 5 |
|---|---|---|---|---|---|
| HP Cost | 5 | 10 | 15 | 20 | 25 |
| Health Restored | 5 | 10 | 15 | 20 | 25 |
Omen of the Veins
Unlock: Level 3 | Passive
| Stat | Level 1 | Level 2 | Level 3 | Level 4 | Level 5 |
|---|---|---|---|---|---|
| Blood Spell Critical Chance | +10% | +15% | +20% | +25% | +30% |
Scarlet Shackles
Unlock: Level 4 | Active | Hits all close enemies | Paralyzes for 1 round and applies Bleed | Cooldown: 3
| Stat | Level 1 | Level 2 | Level 3 | Level 4 | Level 5 |
|---|---|---|---|---|---|
| HP Cost | 8 | 10 | 12 | 14 | 16 |
| Bleed Damage per Round | 2 | 3 | 4 | 5 | 6 |
| Bleed Duration | 1–3 rounds | 2–4 rounds | 3–5 rounds | 4–6 rounds | 5–7 rounds |
Leechcraft
Unlock: Level 5 | Passive
| Stat | Level 1 | Level 2 | Level 3 | Level 4 | Level 5 |
|---|---|---|---|---|---|
| Blood Damage Returned as HP | 10% | 20% | 30% | 40% | 50% |
Bloodfall
Unlock: Level 6 | Active | Hits 2 enemies with 3 hits each | 30% weaker against Undead | Bleed: 2 damage per round for 1–3 rounds | Cooldown: 3
| Stat | Level 1 | Level 2 | Level 3 | Level 4 | Level 5 |
|---|---|---|---|---|---|
| HP Cost | 12 | 16 | 20 | 24 | 28 |
| Blood Damage per Hit | 3–5 | 4–7 | 5–9 | 6–11 | 7–13 |
| Bleed Chance per Hit | 30% | 30% | 30% | 30% | 30% |
Stats & Formulas
The Math (Straight From the Game)
The game provides several important stat formulas through its tooltips. I have collected them all in one place so you can easily understand how damage, accuracy, critical hits and resistances work.
| Value | Formula |
|---|---|
| Base Damage | STR / 2 + Weapon Damage + Bonuses |
| Physical Damage | Base Damage – Target Armor + Sharpness |
| Critical Damage | ×1.75 |
| Melee Critical Chance | DEX / 10 |
| Ranged Critical Chance | DEX / 7 |
| Ranged Hit Chance | DEX × 10 – Enemy Evasion |
| Evasion | DEX × 2% (Maximum 60%) |
| Mana per Level | 2 + WIS |
| Fire / Ice / Lightning / Poison Resistance | WIS × 2 |
| Blood Magic Resistance | END × 2 |
What These Formulas Mean
– Armor Reduces Physical Damage: Armor is subtracted from every physical hit. Small attacks can deal very little damage against heavily armored enemies. Use armor-piercing attacks, armor-ignoring skills such as Slice and Dice, Riposte and Shadow Instinct, or switch to Void Lance and elemental spells.
– DEX Is Important for Ranged Heroes: Dexterity affects ranged accuracy and critical-hit chances. With 5 DEX, you have approximately 50% base ranged hit chance before enemy evasion is calculated.
– Wisdom Provides Elemental Resistance: Wisdom doesn’t only help casters with Mana. It also increases Fire, Ice, Lightning and Poison resistance. This means your Wizard can naturally resist elemental attacks better than a Warrior with lower Wisdom.
– Endurance Helps Against Negative Effects: Endurance increases Blood Magic resistance and also helps shorten Poison duration.
Combat Explained
How a Round Works
Understanding the combat system is important because every action can affect how your party performs during a fight.
- Each hero gets one action per round, which can be a basic attack or an assigned active skill.
- Potions and inventory items do not consume an action. You can use them without sacrificing a hero’s turn.
- Some skills are free actions. Check their tooltips for the description “Does not consume an action.”
- A round ends when every hero has acted or when you press the hourglass icon. Any hero who hasn’t acted will lose their remaining action.
- Once any hero performs an action, your entire party cannot move again until the round ends.
Rows and Range
Your party’s positioning is just as important as choosing the right skills.
- Melee Attacks: Require a front-row position unless your weapon has the Reach property.
- Out of Reach: If you see this message, move forward, equip a Reach weapon or use a ranged attack.
- Enemy Attacks: Most enemies target your front row, so place your tankiest heroes there.
- Changing Positions: Swapping positions consumes that hero’s action. Always arrange your party before starting a fight.
Tactics That Win Fights
Here are some combat tactics I recommend using throughout the game.
1. Focus Fire: Mark a dangerous enemy using Hunter’s Prey, Mark the Dead or Unholy Convergence. Then have your entire party attack the same target to eliminate it quickly.
2. Control Dangerous Enemies: Use Stun, Freeze and Blind effects to reduce incoming damage. Skills such as Skull Rattle, Shield Bash, Arcane Lock, Ice Shard and Smoke Bomb are useful for controlling enemies.
3. Check Enemy Immunities: Some enemies are immune to critical hits, Stun, Bleed, Burn, Freeze, Poison, Blind, Paralysis or Disease. Pay attention to the combat log and change your strategy when necessary.
4. Exploit Enemy Weaknesses: Different enemy types have different counters. Paladins are especially effective against Undead and Demons, while Elk characters receive additional armor against Animals.
5. Retreat When Necessary: If a fight isn’t going well, end the round and retreat. You can also return after resting and restoring your party’s resources.
6. Destroy Objects: Some objects in the world can be attacked and broken. Check suspicious objects during exploration because they may hide useful items or secrets.
Status Effects & Cures
Status Effects
Different enemies can apply negative status effects during combat. Knowing what each effect does and how to remove it can save your party from unnecessary deaths.
| Effect | What It Does | Cure |
|---|---|---|
| Poison | Deals damage every round, always at least 1. END shortens its duration. | Potion of Cure Poison, Void Mend Level 4 |
| Burn | Deals Fire damage every round. | Frostvein Draft, Void Mend Level 3 |
| Freeze | Causes the affected hero to skip their turn. | Frostvein Draft |
| Bleed | Removes HP every round. | Void Mend Level 2 |
| Stun | Prevents the affected hero from acting. Does not stack. | Thunderwake Draught, Void Mend Level 5 |
| Paralyze | Prevents movement and stops the entire party from moving, but the affected hero can still attack. | Thunderwake Draught |
| Blind | Reduces hit chance by 50%. | Wait for the effect to expire |
| Disease | Prevents HP recovery while resting. | Cure it before resting |
| Mental Fog | Prevents the use of skills for several rounds. | Wait for the effect to expire |
| Slime Corrosion | Reduces armor. | Wait for the effect to expire |
Important Tip: Disease is particularly dangerous when you need to rest. If your party is affected by Disease, resting consumes food but restores no HP. Always cure it before resting.
Exploration, Tools & Fast Travel
Exploring Efficiently
Exploration is an important part of the game. Many useful items, hidden areas and resources are found away from the main paths.
Tools You Want
Different tools allow you to access areas and objects that you cannot interact with otherwise.
| Tool | What It Opens |
|---|---|
| Pickaxe | Breaks collapsed rocks. Some rocks require a Reinforced Pickaxe. |
| Shovel | Allows you to dig graves for loot. Digging costs food. |
| Golden Chisel | Extracts gold from veins in rock walls. |
| Lockpick Tools | Opens locked chests. |
| Mortar and Pestle | Used for alchemy and cooking. |
If you find rocks that you cannot break or gold veins that you cannot mine, mark their locations on your map and return later when you have the required tools.
Things to Always Check
I recommend checking every suspicious object while exploring. Some hidden items are easy to miss if you only follow the main path.
- Garbage Piles and Hollow Trees: These can contain hidden stashes and useful loot.
- Alcoves and Tombstones: Some locations require you to place a specific item.
- Walls Near Dead Ends: Listen carefully for the sound of sliding stones. Some walls hide secret passages.
- Pressure Plates and Pushable Objects: Check the surrounding area for switches and objects that can be moved.
- Fragile Objects: Attack anything that looks breakable.
- Signposts: These provide directions and can point you toward the next region.
Fast Travel
Activate every portal stone you find during exploration.
Simply touch a portal stone once to activate it. After that, you can travel between activated portals whenever you need to return to an earlier area.
This is particularly useful when you want to revisit locations with locked chests, inaccessible rocks or other items you couldn’t collect earlier.
The Map
Press M to open the map.
The map legend displays different symbols for:
- Doors
- Treasure
- Statues
- Pressure Plates
- Pits
- Rocks
- Shrines
- Teleports
- Portals
- Passages
Use the map regularly to keep track of important locations and areas you want to revisit.
Food, Resting, Alchemy & Money
Keeping the Party Alive
Food, potions and gold are important resources. Managing them properly makes exploration and combat much easier.
Food and Rest
- Food is shared between all party members and displayed as a single number in the HUD.
- Resting automatically consumes food while restoring your party’s HP, Mana and Stamina.
- You cannot rest when enemies are nearby.
- Digging graves also consumes food.
- Collect every food item you find during exploration.
- Use the Mortar and Pestle to prepare stews and toast.
Tip: Always keep enough food available for resting after difficult fights. Running out of food can make long exploration sessions much harder.
Alchemy
Alchemy allows you to craft useful potions using recipes and ingredients found throughout the world.
First, find recipes and collect the required ingredients, such as mushrooms, flowers, berries and monster parts. Then use the Mortar and Pestle and select Craft.
If you combine the wrong ingredients, the crafting attempt simply fails without consuming them.
Useful Recipes to Look For
- Healing Potions
- Mana Potions
- Stamina Potions
- Cure Poison
- Frostvein: Removes Burn and Freeze.
- Thunderwake: Removes Stun and Paralyze.
- Mindwell: Restores Health and Mana.
- Armor Potions
- Evasion Potions
- Elemental Resistance Potions
- Resurrection
- Permanent Mana Boost
I recommend collecting ingredients whenever possible because having the right potion available can make a difficult fight much easier.
Gold
Gold is shared between your entire party.
You can spend it on equipment upgrades and other useful items from merchants, but always keep some gold reserved for reviving fallen heroes at Revival Statues.
Some valuable items, including gems and ores, are mainly useful for selling. If you need extra gold, check your inventory for valuables and duplicate equipment you no longer need.
Raven Mutations Cheat Sheet
Raven Mutations
Every Raven starts with two random mutations:
- One Stable Mutation: A positive mutation that provides a beneficial effect.
- One Unstable Mutation: A negative mutation that introduces a disadvantage.
Some mutations are extremely useful, while others can negatively affect your entire build. I recommend checking both mutations immediately after creating a Raven.
Best Stable Rolls
These are some of the positive mutations worth looking for:
– Redundant Organs (Rare): Provides a 40% chance to survive a lethal hit with 1 HP remaining.
– Roommate from the Void: Restores HP equal to 5% of the melee damage dealt.
– Predator Instinct: Deals 10% additional damage against enemies below 50% HP.
– Adrenal Spike: Grants +4 damage and +4% critical chance when below 30% HP.
– Gravemind Link: Restores +5 Mana or Stamina whenever a nearby enemy dies.
– Static Carapace / Crystal Chitin / Spore Spit: Punishes enemies that attack you with melee attacks.
– Iron Mandibles: Gives melee attacks a chance to apply a small Bleed effect.
Worst Unstable Rolls (Consider Rerolling)
Some negative mutations can seriously affect your character. I recommend considering a reroll if you receive one of these:
– Backseat Parasite: Has a 50% chance to attack a random enemy instead of your selected target. This can make combat unpredictable.
– Allergic to Ice (Rare): Any Ice damage received freezes you for 2 rounds.
– Molting Season: Causes you to take double Fire damage.
– Cracking Shell: Increases incoming melee damage by 15%. Particularly bad for front-line characters.
– Arcane Appetite: Increases the Mana cost of every spell by 1. Not a good choice for spellcasters.
– Heavy Metabolism: Makes basic attacks consume Stamina.
Mild Negative Mutations
These mutations are less dangerous but can still affect your build:
- Weak Circulation: Reduces maximum Stamina by 10.
- Glutton Parasite: Reduces STR by 2 when food drops below 10. Keep your food above 10 to avoid this penalty.
- Slow Regeneration: Reduces healing by 25%.
Double-Edged Mutations
Some mutations provide both positive and negative effects:
– Reverse Osmosis: Doubles healing received from potions but also doubles Poison damage.
– Phase-Slip Carapace: Gives a 50% chance to dodge spells but causes you to take double damage from spells that successfully hit.
Bestiary Preview (Light Spoilers)
Early Enemies
During the early parts of your adventure, you’ll encounter different enemies in forests and caves. Here are some of the enemies you should prepare for:
– Giant Rats / Underfangs: Weak individually but dangerous when fighting in groups. They belong to the Animal category.
– Grassfang (Snakes): Watch out for their Poison attacks.
– Wrathclaw (Wolves): These are Animals, so Elk characters benefit from their additional armor.
– Wrathspinner / Stormspinner (Spiders): Be careful of their status effects during combat.
– Boneblades / Boneblade Archers (Skeletons): These enemies belong to the Undead category. Bring a Paladin to deal with them. Boneblade Archers can also attack from range.
– Orc Fighters: These enemies have high armor. Use armor-piercing attacks or elemental damage to deal with them.
– Ooze Cubes: Can apply Slime Corrosion, reducing your armor.
Bosses and Named Foes
The game includes several bosses and named enemies throughout its different areas.
Some of the names you will encounter include:
Rat Queen, Mother of the Warren; Arachneira; Scourge of the Tunnels; Orc Chieftain; Bandit Chieftain; Dreadcoil of the Deep; Frog King, Last Crown of the Mire; Obula; Skeleton King; Fangspire; Mud Ooze; The Thing; and several more in deeper areas.
Boss Tips (No Story Spoilers)
Here are some general tips I recommend following before entering a boss fight:
- Save and Rest: Always save your game and restore your party’s HP, Mana and Stamina before entering an obvious boss room.
- Check Immunities: Test the boss’s weaknesses during the first round. Many bosses are immune to Stun, so don’t waste your strongest skills.
- Use Marking Skills: Apply Hunter’s Prey or Mark the Dead to increase the damage the boss receives.
- Bring Cures: Bosses frequently apply multiple status effects, so carry enough potions to remove them.
Quick Tips & FAQ
Rapid-Fire Tips
Here are some additional tips that can make your adventure easier:
- Hover over everything. Stat, item, skill and status tooltips explain important mechanics and exact values.
- Equip a shield on a Warrior using Shield Bash to benefit from its additional passive armor.
- Remember that Paralyze only prevents movement. The affected target can still attack. Stun and Freeze actually prevent enemies from taking their turns.
- Read encounter choices carefully. Some decisions can reward you with XP, items or access to new paths.
- Talk to villagers more than once. They may provide additional information or useful details.
- Sell spare gems, ores and duplicate equipment to earn extra gold.
- Don’t ignore books and notes. They often contain hints about puzzles, hidden locations and secrets.
Frequently Asked Questions
Q: Can I change the difficulty during the game?
Yes. You can change the difficulty at any time, even after starting your adventure.
Q: A hero died. How can I revive them?
Find a Revival Statue and pay the required gold, or use a resurrection item if you have one available.
Q: Why can’t my party move during combat?
One of your heroes has already performed an action during the current round. You must end the round before moving again. Paralyze can also prevent the entire party from moving.
Q: Why can’t I rest?
There are enemies nearby, or you don’t have enough food available.
Q: My back-row hero keeps getting the “Out of Reach” message. How do I fix it?
Equip a ranged weapon, a weapon with Reach or use spells to attack enemies from the back row.
Q: Can Stoneborn wear armor?
Stoneborn cannot equip body armor, but they can still use all other equipment slots, including helmets, gloves and boots.