
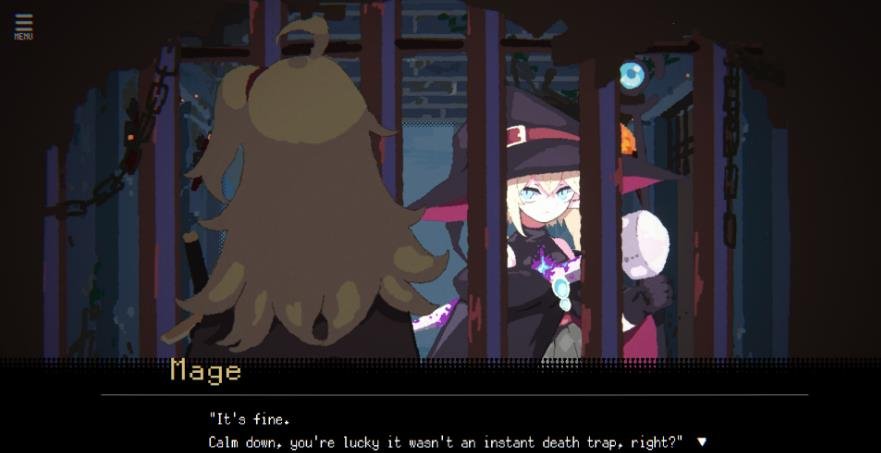
In this guide, I show how to unlock every ending in Annihilated, including the choices and requirements for each route. I have organized the endings by character and explained the important decisions, hidden counters, and conditions that can affect your progress.
The game contains 22 endings in its files, but one Warrior ending cannot be unlocked through normal gameplay. This means there are 21 obtainable endings in total.
I have also included the requirements for the secret Priest ending, which is the most complicated ending to unlock. Make sure to read the instructions carefully before starting, as certain deaths and route completions can prevent you from getting it.
Read This First
Spoiler Warning: This guide contains choices for every ending, including story twists and ending names. The screenshots cannot be hidden, so be careful if you want to avoid spoilers.
How I made this guide: The instructions are based on the game’s files. I also tested the secret ending route through an actual playthrough. If you find anything that does not work as described, let me know in the comments.
All Endings
| Route | Total Endings | Obtainable Endings |
|---|---|---|
| Hero | 3 | 3 |
| Warrior | 7 | 6 |
| Mage | 5 | 5 |
| Priest | 7 | 7 |
| Total | 22 | 21 |
Before You Start
- Saving and Reloading: You can safely save before major choices and reload to select another option. This allows you to unlock most endings without replaying the entire route.
- Hidden Loop Counter: Every game over increases a hidden loop counter by 1. This mainly affects the secret ending. The counter increases as soon as you reach 0 HP and the death scene starts, even if you reload immediately afterward.
- Endings: Unlocking endings does not increase the loop counter. Only game overs and the prologue ritual count.
- Scripted Game Overs: Two scripted events also increase the counter: the fake game over near the end of the Warrior route and missing the final kick at the end of the Hero route.
How to Unlock the Priest
To unlock the Priest as a partner, you must die during Part 1 or Part 2 of another route.
He will appear next to your body and offer to become your partner. Both answers unlock him:
- Alright: Returns you to the partner selection menu with the Priest already selected.
- Never: Gives you a normal game over. You can select the Priest as your partner on your next run.
Starting Sanity
During the prologue, ask the Hero, Warrior, and Mage every available question. Each question gives you additional sanity at the beginning of your run.
I recommend asking them everything before starting any route.
Recommended Order
If you want to unlock the secret ending (covered in the last section), I recommend doing it first on a fresh save.
The secret ending requires a low loop counter and no clears on the other routes. Every death and certain route completions make it harder to unlock.
Once you have obtained the secret ending, you can unlock the remaining endings in any order without worrying about the loop counter.
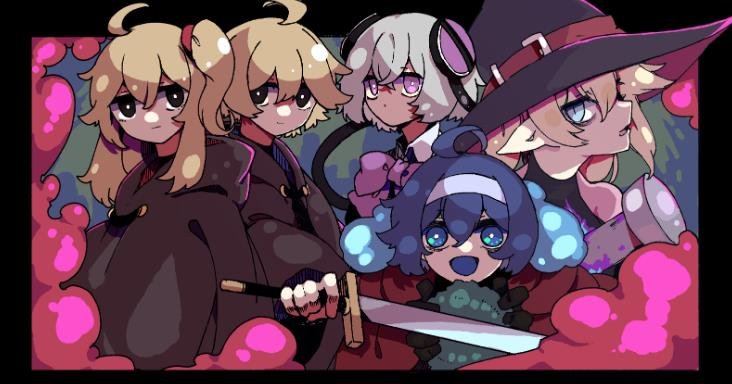
All game artwork and text belong to DeathKumiai. This is a free fan guide, so please support the game.
Gameplay Tips
Before starting the routes, here are some gameplay mechanics that can make battles easier.
Attack Modes
The game has two attack modes:
- Resolve and Will: You time your attacks manually, similar to the combat system in Undertale and Deltarune.
- Choice and Destiny: Attacks use an RNG-based hit chance, similar to Fire Emblem. For example, the game may give you a 60% chance to hit an enemy.
Enemies also have a Break Gauge. You must deal enough damage to reduce this gauge to 0. Once it is depleted, an orange bar appears, and you must time your next attack correctly.
Successfully hitting the orange bar allows you to seize the enemy’s weapon.
Normal enemies are defeated immediately, while elite enemies and bosses enter CHANCE status. They remain stunned for one turn and take double damage until their next turn.
Weapon Breaking
You will often use the Dreak, the main protagonist’s weapon, to break enemy weapons. However, it can only be used when you are carrying a few items or fewer, and its effectiveness scales with your DEX.
You can also use certain weapons in Item Break mode to break your own weapon.
Item Break mode changes a weapon from Normal Use to Break After Next Use. Instead of consuming all its remaining uses, the weapon breaks after its next attack.
I recommend using this mode when you need a weapon’s breaking effect or want to deal additional damage to defeat a boss quickly.
The orange timing bar also appears in the attack preview, allowing you to steal an enemy’s weapon if the weapon supports it. However, not every weapon can seize enemy weapons, so keep that in mind.
Weapon Enhancements
You can enhance your weapons to improve their effectiveness. There are three enhancement tiers:
- Grey
- Yellow
- Purple (Best)
You usually need a campfire to enhance weapons. You also need Curse, which is the game’s currency. You can obtain it by breaking weapons or defeating bosses.
There are also different events throughout the game, similar to Slay the Spire. These mainly provide the roguelike elements of the gameplay.
What Happens When You Die?
If you die during a route, the game generally restarts you from a checkpoint while keeping the Curse currency you have collected.
You can then reallocate your stats or spend your Curse to craft cursed weapons from memories you have previously obtained.
Whenever you obtain a weapon, its memory is stored in your crafting inventory. This allows you to craft it again later.
Hero Route (3 Endings)
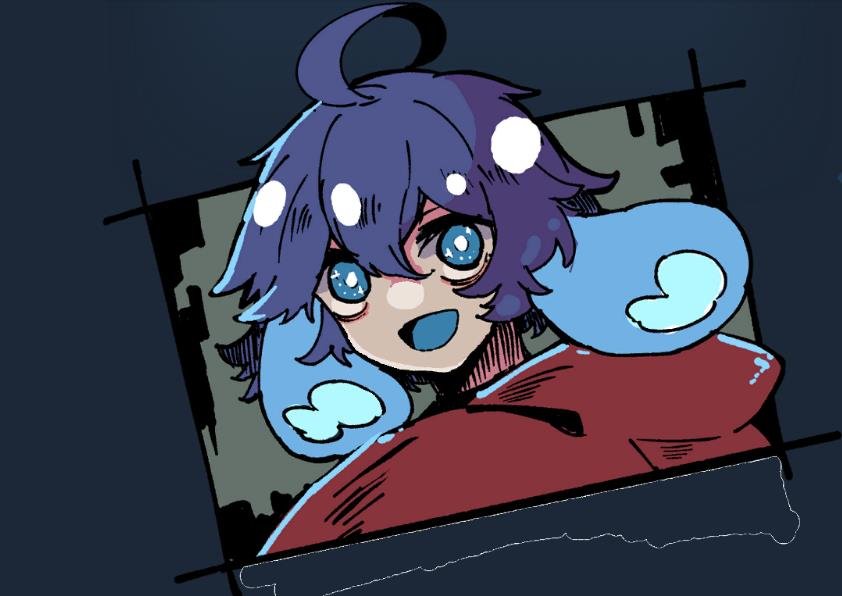
This section shows all three endings available in the Hero route and the choices required to unlock them.
Story: The Hero is actually a slime. The original Hero stabbed themselves in the head with the Hero’s Sword, allowing a weak blue slime to take over their body.
Save Location: Part 3, immediately before the boss fight.
Ending 1: Hero
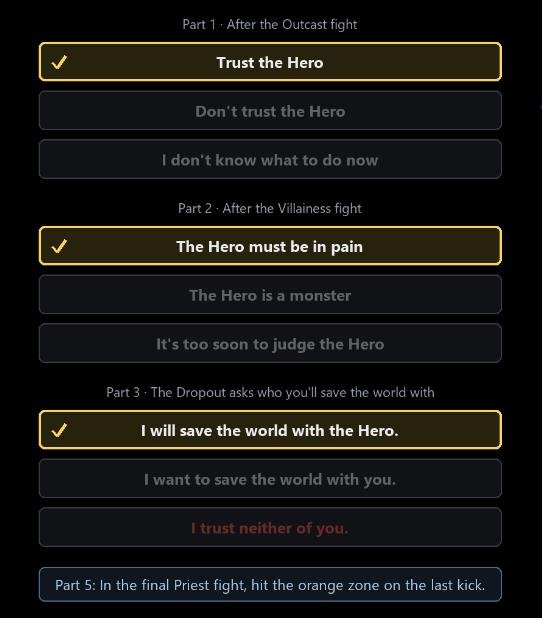
If you miss the final kick, the fight restarts. However, this also counts as a game over and increases your hidden loop counter.
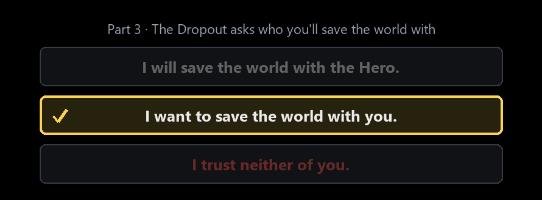
Ending 2: Dropout
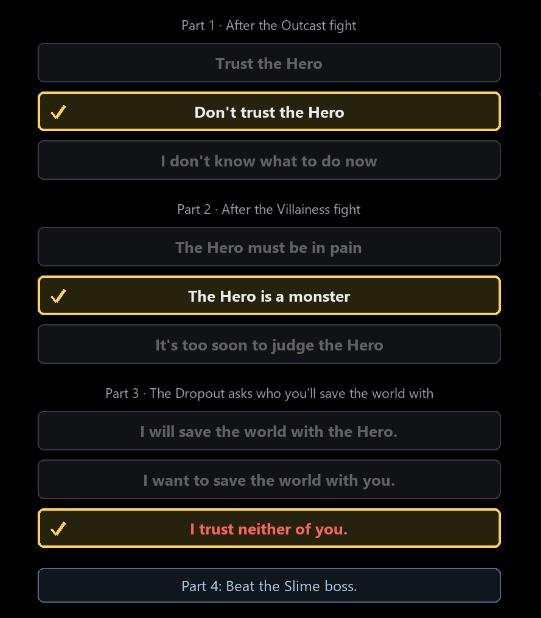
Ending 3: Distrust
Bonus: How Distrust Works
The Hero route has a hidden distrust counter that determines which choices are available in Part 3.
Depending on your distrust, some options will appear greyed out and cannot be selected.
| Distrust | Available Choices |
|---|---|
| 1 or less | “I will save the world with the Hero.” or “I want to save the world with you.” The red option is unavailable. |
| 2 to 4 | All three options are available. |
| 5 or more | “I want to save the world with you.” or the red option “I trust neither of you.” The Hero option is unavailable. |
Choices That Affect Distrust
| Part | Choice | Effect |
|---|---|---|
| Part 1: After the Outcast fight | Trust the Hero | -1 |
| Part 1: After the Outcast fight | Don’t trust the Hero | +1 |
| Part 2: After the Villainess fight | The Hero must be in pain | -1 |
| Part 2: After the Villainess fight | The Hero is a monster | +1 |
Choosing “I don’t know” does not change your distrust counter.
Important: Keep your sanity above 40 before the Part 3 boss fight. If your sanity is below 40, the game adds additional distrust.
Warrior Route (7 Endings, 6 Obtainable)
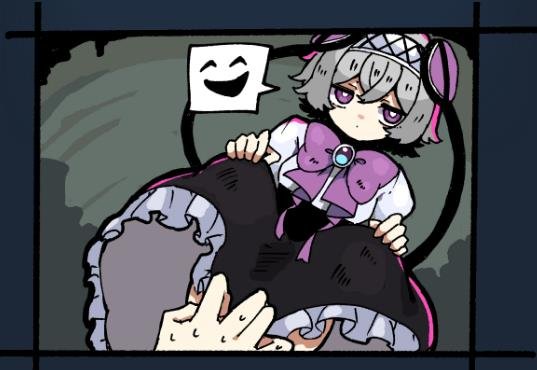
This section covers all the endings available in the Warrior route, including the ending that cannot be unlocked through normal gameplay.
Story: The Warrior is the Villainess’s former fiancé and childhood friend. She was sickly when they were young. He ended their engagement after the Priest told him that they would both die. Because of this, she used her curse to turn him into a doll.
He is actually happy with his new situation because he wants to become an idol.
Save Locations:
- Part 1, after the Outcast fight.
- Part 2, after the Villainess fight.
- Part 5, before the major choice.
Sanity: Neither your sanity nor the Warrior’s sanity affects the endings in this route. They only change a few dialogue lines.
Ending 1: Idol
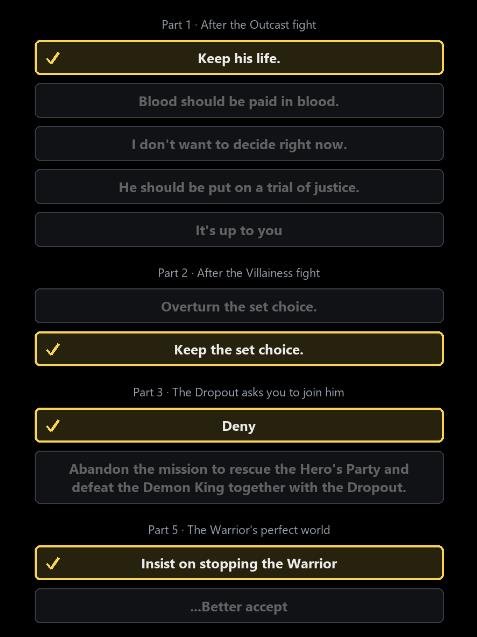
Ending 2: Miniature Garden
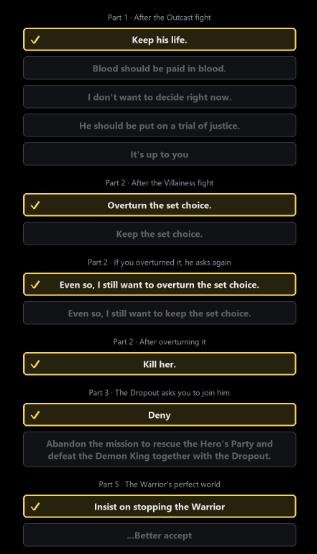
Ending 3: Burden
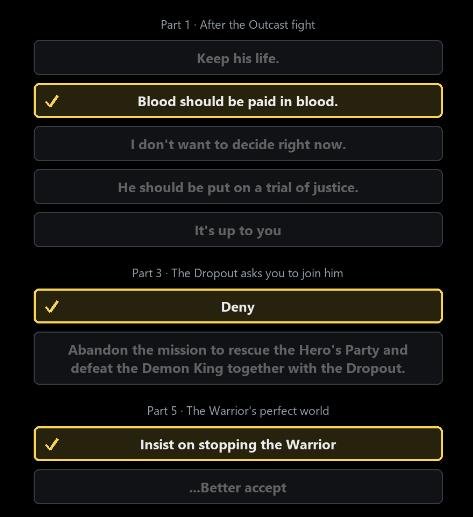
Ending 4: Glitched World
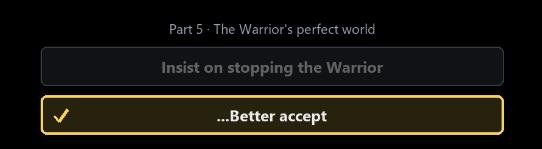
After unlocking this ending, the game automatically returns you to the same choice. This is intentional. Continue from there to unlock Ending 5.
Ending 5: Glitched Idol
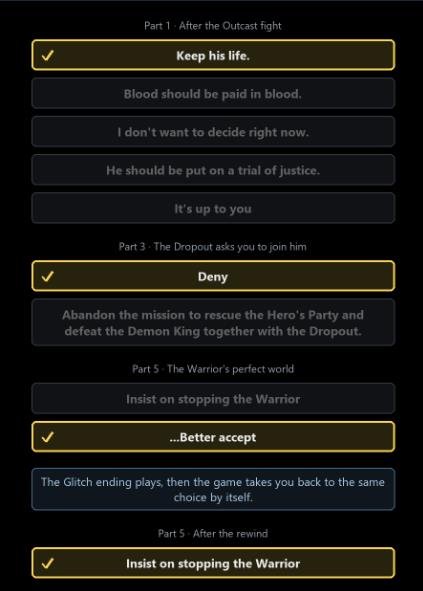
Important: If you selected “Blood should be paid in blood.” in Part 1, Step 5 will give you Ending 3 instead.
Ending 6: Dropout
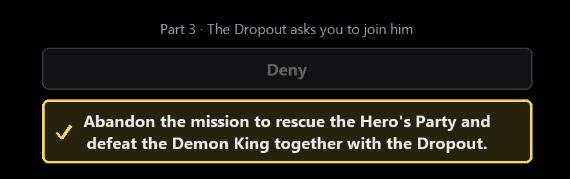
Ending 7: Glitched Miniature Garden
This ending exists in the game’s files, but it cannot be unlocked through normal gameplay.
To obtain it, you would need to unlock both the Miniature Garden epilogue (Ending 2) and the Glitch (Ending 4) during the same run.
However, the game automatically skips the Miniature Garden epilogue whenever you have completed the Glitch. Because of this, the ending is unobtainable.
Note: You cannot permanently lose the duels near the end of this route. If you lose, you simply retry them.
There is also a scripted game over near the end of the route. Both events increase the hidden loop counter, which only matters when unlocking the secret ending.
Mage Route (5 Endings)
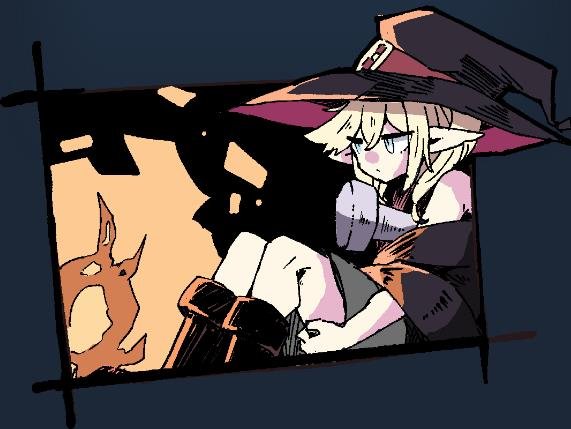
This section shows all five endings available in the Mage route and the choices required to unlock them.
In my opinion, this is the best route in the game.
Story: The Mage is an elf who was considered an outsider in her village. Her rival, the Dropout, was her classmate at magic school. They worked hard but could never surpass her, so they eventually stole her magic.
Save Location: Part 3, immediately after the Dropout fight. The choice here determines which direction the entire route takes.
Sanity: Neither your sanity nor the Mage’s sanity affects the endings in this route. They only change a few dialogue lines.
Warning: In Part 1, selecting either of the following red options sends you back to the title screen:
- “So be it, let’s head back.”
- “Understood.”
Ending 1: Magic
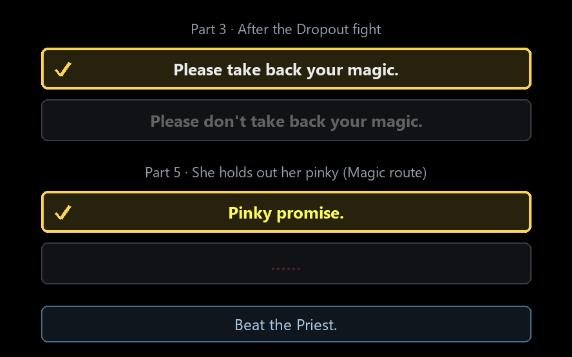
Important: This ending counts as a Mage route clear, which prevents you from unlocking the secret ending.
Ending 2: Unspoken
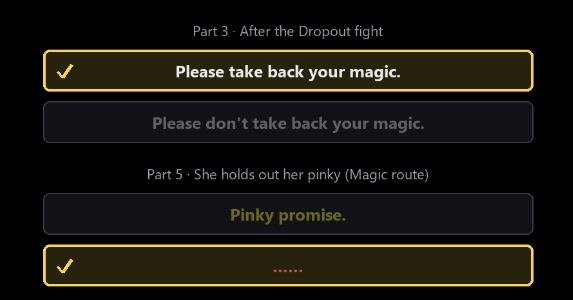
Ending 3: Love
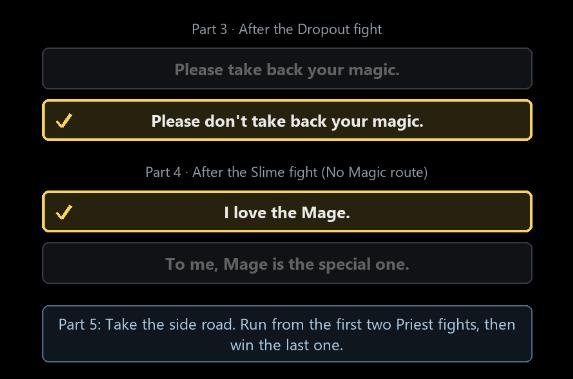
Ending 4: Friendship
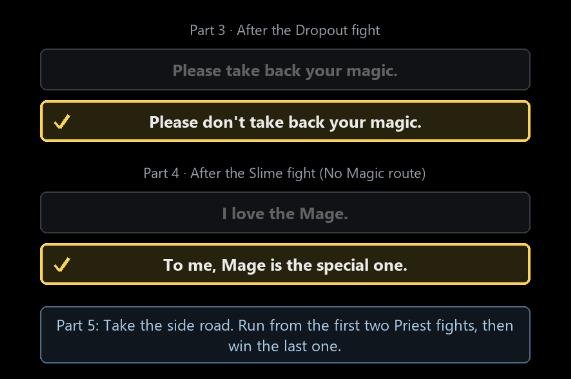
Ending 5: Sheer Guts
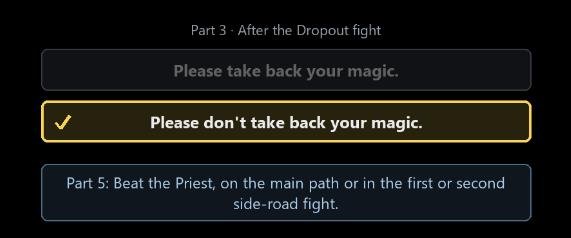
Every death during this fight makes the enemy weaker if you use the game’s retry option.
I recommend saving this ending until after you have unlocked the secret ending.
Priest Route (7 Endings)
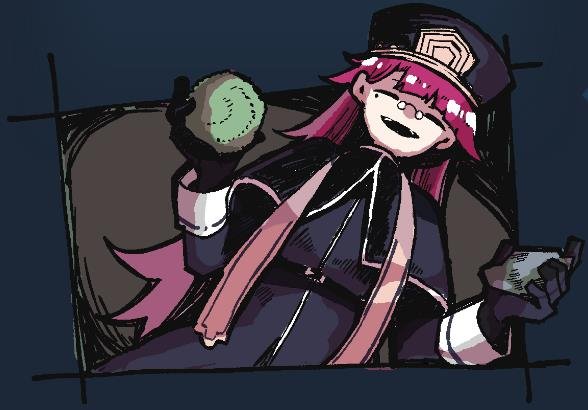
This section covers all seven Priest endings, including the secret ending and the hidden points that determine which choices are available.
Story: The Priest has never lost his faith. The “great god” he constantly prays to is actually you. Its name is always blacked out, and he even refers to you as “my god”.
He also calls himself a “reincarnator”.
In the original (0th) world, he was the protagonist’s childhood friend from the same village, but he lost them. During this loop, he deliberately left the village before ever meeting you.
Unlock Requirement: You must die during Part 1 or Part 2 of another route. The Priest will appear next to your body, and either answer will unlock him as a partner.
Selecting “Alright” immediately returns you to the partner selection menu with the Priest already selected.
Save Locations:
- Part 3, during the hand scene.
- Part 4, after the Slime fight.
- Part 5, at the final question.
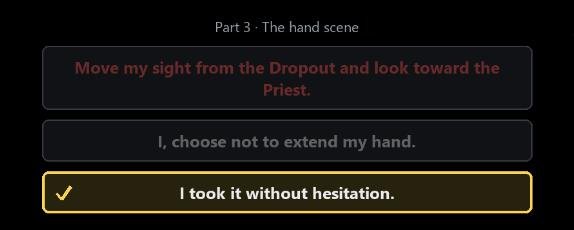
Ending 1: Dropout
Ending 2: Abandoned
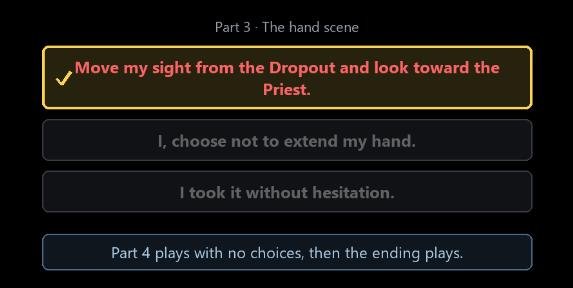
After unlocking this ending, the game automatically returns you to the hand scene. Continue from there to unlock Ending 3.
Ending 3: Dark Slow Life
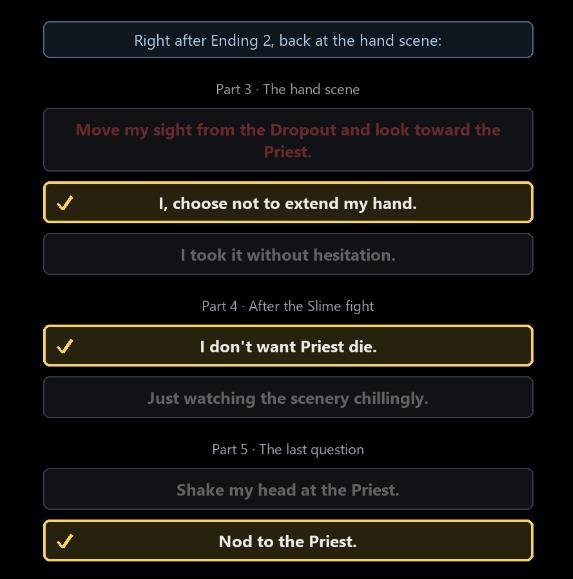
During this run, the other choices simply send you back to the same scene. Nodding is the only option that allows you to continue.
Ending 4: Left Alone
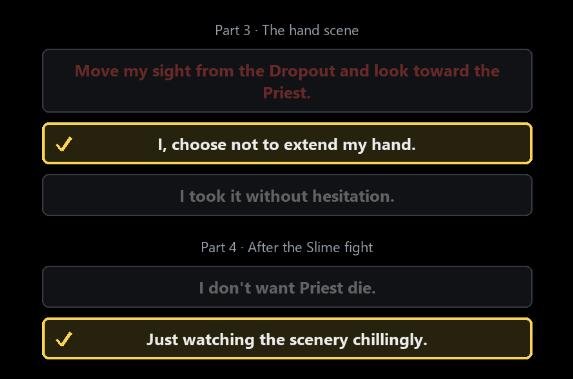
Ending 5: Slow Life
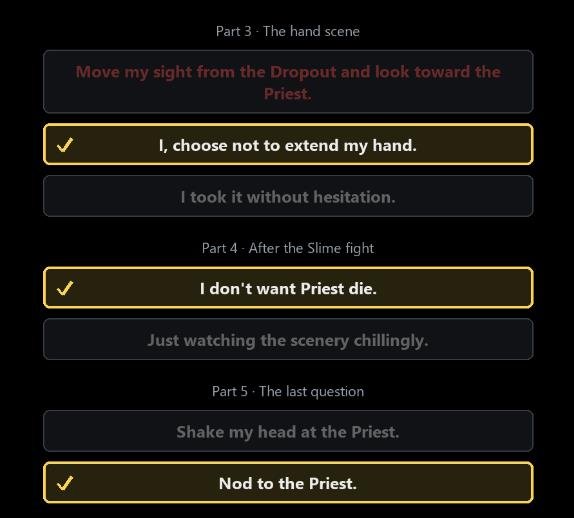
Ending 6: High Loop
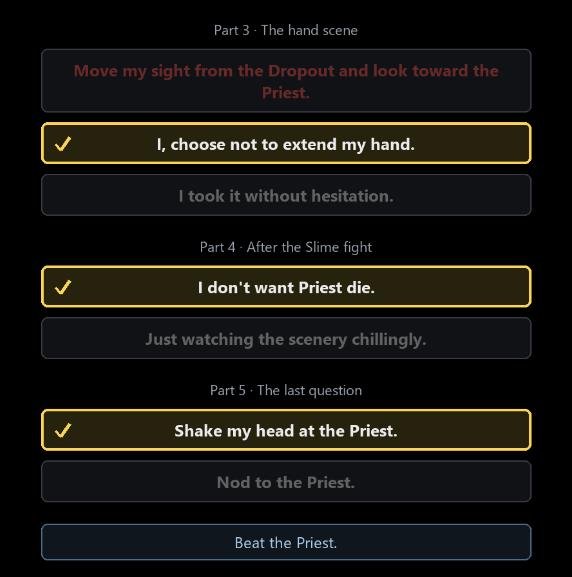
You will unlock this ending if your hidden loop counter is above 8 or if you have already completed another route.
Ending 7: Low Loop (Secret)
See the Secret Ending section at the bottom of this guide for the complete requirements and instructions.
Bonus: How Priest Points Work
The Priest route has a hidden point system that determines which choices are available during the Part 3 hand scene.
Depending on your total Priest points, some choices will appear greyed out.
| Priest Points | Available Choices |
|---|---|
| 0 or 1 | Refuse the hand or take it. The red option is unavailable. |
| 2 to 4 | All three choices are available. |
| 5 or more | Only the red option is available. The other two are greyed out. |
Choices That Affect Priest Points
The following table shows how different choices affect your Priest points and sanity.
| Choice | Priest Points | Sanity |
|---|---|---|
| Part 1: That is to say, I cursed someone? | 0 | -5 |
| Part 1: Has my fate been changed by someone’s curse? | 0 | +5 |
| Part 1: There’s no such thing as fate! | 0 | 0 |
| Part 1: Indeed, this might be the miracle from the god above | +1 | -7 |
| Part 1: This isn’t the miracle from the god at all | 0 | +2 |
| Part 1: Even so, I have to kill him | -1 | 0 |
| Part 1: I need first to hear what he has to say | 0 | 0 |
| Part 1: Trust the Priest | 0 | -20 |
| Part 1: Don’t trust the Priest | 0 | +2 |
| Part 2: Open mouth. | +1 | -3 |
| Part 2: I’m afraid I’ll have to turn down your good will | 0 | +2 |
| Part 2: What’s the meaning of hearing all these? | -1 | +2 |
| Part 2: Just listen quietly. | 0 | 0 |
| Part 2: I can’t | 0 | +3 |
| Part 2: Give up on all partners except the Priest | +10 | Huge loss |
| Part 2: That’s only a skull, a thing, nothing more | 0 | +2 |
| Part 2: If you treasure it so much, then I’ll leave it to you. | 0 | +3 |
| Part 2: (Silent) | 0 | 0 |
| Part 3: Don’t even think about it. | 0 | +3 |
| Part 3: …Just a little, maybe. | +1 | -5 |
How Sanity Affects Priest Points
Your sanity also adds Priest points when you reach the Part 3 hand scene.
| Sanity | Additional Priest Points |
|---|---|
| Above 50 | +0 |
| 50 or below | +1 |
| 40 or below | +3 |
| 30 or below | +6 |
| 20 or below | +11 |
Some scenes also reduce your sanity automatically, so avoid choices that cause major sanity losses.
Tip: Try to reach the hand scene with 2 to 4 Priest points and save your game there. From this single save, you can unlock every Priest ending by selecting the available choices.
Secret Ending (Priest Route: Low Loop)
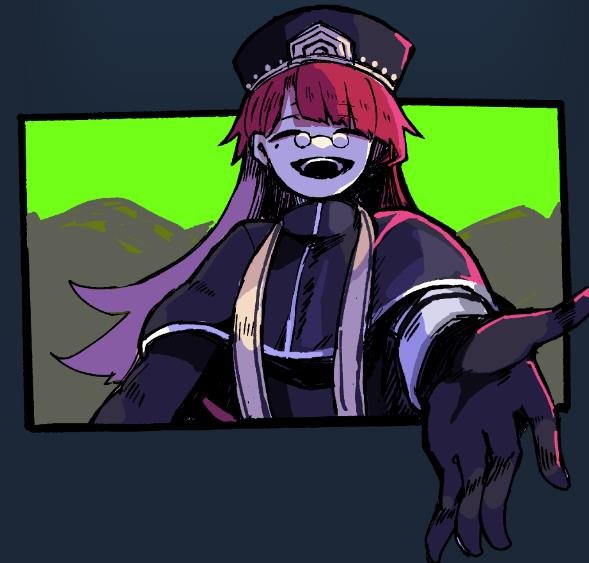
The secret Priest ending is the most complicated ending in the game. It is also the only good Priest ending.
You must meet several requirements before reaching the final fight. Make sure you follow everything carefully, as even one unnecessary death can ruin your run.
Requirements
Before starting, make sure you meet all the following conditions:
- Loop Counter: Your loop counter must be 8 or lower when you defeat the Priest. A new game starts with 7. Every game over adds 1, and the prologue ritual also adds 1.
- No Hero Ending: Do not unlock the Hero ending.
- No Mage Magic Ending: Do not unlock the Magic ending.
- No Warrior Idol or Miniature Garden Ending: Do not unlock either of these endings.
- Warrior Route: Do not complete the Warrior route before attempting the secret ending.
- Priest Points: You must have 4 or fewer Priest points when you reach the hand scene.
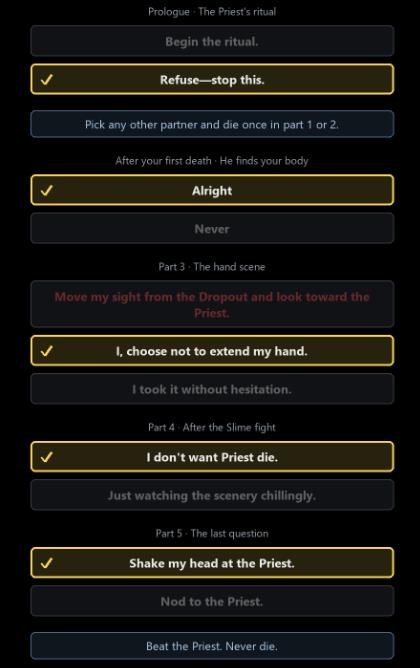
Before You Start
I recommend preparing a completely fresh save before attempting this ending.
- Turn off Steam Cloud for the game.
- Delete your existing save data.
- Start a new game.
- During the prologue, ask the Hero, Warrior, and Mage every available question to gain additional starting sanity.
Rules for the Entire Run
After the Priest finds your body, you must avoid dying again.
If you are about to die, reload your save instead. Only an actual game over increases the loop counter.
However, the following revives are safe and do not count as game overs:
- Immortality Potion (Undying): You can use this to survive a death.
- Death Prevention Items: Items with the effect “When you would die, break this item instead and survive with 1 HP” are safe to use. These effects do not trigger during the final Priest fight because Curse saves you there instead.
- Priest Resurrection: The Priest can revive you using Resurrection: Curse.
- Curse Revival: During the final Priest fight, Curse can bring you back after reaching 0 HP.
Important: Make sure you bring plenty of Curse to the final Priest fight. If you reach 0 HP, Curse will revive you, but if you run out of Curse, you will get a real game over.
Keep Your Sanity Above 30
Do not allow your sanity to drop to 30 or below before reaching the hand scene.
Low sanity adds additional Priest points, which can prevent you from selecting the required options.
Avoid choices that cause large sanity losses. The most important one to avoid is:
- “Trust the Priest” (-20 sanity).
Bonus: Endings You Can Unlock Before the Secret Ending
The following information is based on the game’s files and has not been tested in-game.
These endings should not increase your loop counter or count as route clears, so they should not prevent you from unlocking the secret ending.
However, I still recommend completing the secret ending first on a fresh save to avoid unnecessary risks.
You must also avoid dying while unlocking these endings, except for the single death required to unlock the Priest.
Hero Route:
- Dropout
- Distrust
Warrior Route:
- Glitched World
- Dropout
Mage Route:
- Unspoken
- Love
- Friendship
- Sheer Guts
Priest Route:
- All endings
Endings to Avoid Before the Secret Ending
Do not unlock the following endings before attempting the secret route:
Hero Route:
- Hero
Mage Route:
- Magic
Warrior Route:
- Idol
- Miniature Garden
- Burden
- Glitched Idol
The Hero and Magic endings count as route clears.
The Warrior endings listed above either increase your loop counter or count as route clears. The Idol and Miniature Garden endings are particularly important to avoid because they count as clears.
Final Result
If you have followed all the requirements correctly, the secret ending will play after completing the final fight.
Once it is unlocked, the title screen changes to show the entire party together in the tavern.