
In this guide, I show how to unlock all 69 achievements and find the collectibles in Clive Barker’s Hellraiser: Revival. I follow the story objectives in order, starting with the Prologue and continuing through the Labyrinth, while covering firearms, crafting recipes, Pain and Suffering Pillars, keypad codes, and missable achievements.
I have organized every section by story progression to make it easier to track collectibles and achievements during a single playthrough. I also include important manual save locations and tips for achievements that may require additional attempts.
About Clive Barker’s Hellraiser: Revival
Clive Barker’s Hellraiser: Revival is a first-person survival horror game where I play as Aidan, who enters a terrifying world of Cenobites, occult rituals, and dangerous creatures while searching for his missing girlfriend, Sunny.
The game combines exploration, combat, supernatural abilities, and puzzles. As I progress through the story, I uncover the secrets of the Genesis Configuration and face different enemies throughout the Labyrinth.
This guide focuses on the collectibles, achievements, and important information needed for 100% completion.
Guide Contents
I have divided the guide into four main sections:
- Gameplay Sections: Story objectives, collectibles, important locations, and achievements organized in chronological order.
- Firearms & Crafting: Locations of all firearms and crafting recipes, including their related achievements.
- Pain and Suffering Pillars: Locations of every Pain and Suffering Pillar needed for achievements.
- Missable & Miscellaneous Achievements: Tips for unlocking achievements that are difficult, missable, or require specific actions.
Achievement Overview
| Category | Details |
|---|---|
| 100% Difficulty | 4/10 |
| Difficulty Factors | Knowledge, Precision, Skill |
| Total Achievements | 69 |
| Single-Player Achievements | 69 |
| Multiplayer Achievements | 0 |
| Estimated Completion Time | 10–15 Hours |
| Required Playthroughs | 1–2 |
| Missable Achievements | Yes |
| Grind Achievements | 6 |
| Difficulty Achievements | 0 |
| DLC Achievements | 0 |
| Bugged Achievements | Yes |
Bugged Achievement – No Life in the Void, Only Death
The No Life in the Void, Only Death achievement currently has an issue where it does not unlock at full health. Collecting the final Pillar restores full health, which can prevent the achievement from unlocking.
I recommend creating a manual save before collecting the final Pillar so you can return to this point if needed.
In the room with Sunny, just before entering Leviathan’s room, I can craft a Fuel Can and pour the fuel onto the floor. I then shoot the fuel until it catches fire and stand in the flames to reduce my health.
Once my health is low, I enter Leviathan’s room and let Leviathan’s gaze kill me. This method has been reported to unlock the achievement.
Difficulty Factors
- Skill: Achievements that require combat or gameplay ability.
- Knowledge: Achievements that require specific information or planning.
- Precision: Achievements that require accurate timing or actions.
Important Tips Before Starting
All 69 achievements can be unlocked during a single playthrough. However, I recommend playing through the game normally first if you want to experience the story without worrying about achievements.
There is no chapter select, so I recommend creating separate manual saves at the available save points. This makes it easier to return for missable achievements or grind-related tasks.
There are no achievements tied to difficulty, so I can complete the game on any difficulty setting.
On Hard difficulty and above, enemies have increased health and numbers, and autosaves are disabled. If I die, I return to my last manual save point.
The game is mostly linear, so I focus on important collectibles, missable achievements, and useful tips instead of covering every step of the story.
Documents and recordings are not required for achievements, but I still recommend collecting them if you want to learn more about the game’s lore.
Prologue
The game begins with Aidan and Sunny opening the mysterious Genesis Configuration, which sends them into the Labyrinth.
I follow Sunny through the changing environment, solve the first few puzzles, and continue through the opening story sequence.
There are no collectibles or missable achievements during the Prologue, so I can complete this section without worrying about missing anything.
Escape the Cult
After completing the Prologue, I find myself captured by the Cult. My first objective is to escape their hideout while learning the basic combat, stealth, and crafting mechanics.
Several achievements are tied to these mechanics, and I can unlock some of them naturally while progressing.
I also collect the first firearm, crafting recipes, and keypad codes in this section.
Escape the Cult Objectives
I complete the objectives in the following order:
- Free Yourself
- Unlock the Door
- Sneak Past Bruno / Find the Keycard
- Outrun the Chatterer
- Enter the VIP Area / Appease the Girl in White
- Take Back the Genesis Configuration
Escape the Cult Collectibles
| Collectible | Location |
|---|---|
| Recipe 1/12 – Bandage | Unlocked from the start of the game. |
| Keypad 1 – 0199 or 9901 | In the hallway after sneaking past Bruno. |
| Keypad 2 – 9891 | In the medical area after the bookshelf section. |
| Firearm 1/5 – Pistol | Found on the detective’s body. |
| Recipe 2/12 – Pistol Ammo | Found alongside the Pistol. |
I recommend collecting the Pistol and Pistol Ammo Recipe as soon as I reach the detective’s body.
Escape Charlotte
After recovering the Genesis Configuration, I need to escape Charlotte and make my way through the graveyard.
This section also introduces the first merchant, Zora, where I can purchase crafting recipes and other useful items.
I don’t need to purchase everything during my first visit because there will be more opportunities to use the merchant later.
There is also a missable achievement in this section, which I cover in the The Quiet Place achievement section.
Escape Charlotte Objectives
- Escape Charlotte
- Get to Safety
- Find a Way Out of the Graveyard
Important Manual Saves
- Manual Save 1: First Zora Shop.
- Manual Save 2: Before entering the graveyard. I use this as a backup for The Quiet Place achievement.
Escape Charlotte Collectibles
| Collectible | Location |
|---|---|
| Recipe 3/12 – Medkit | Purchase from Zora. |
| Recipe 4/12 – Lockpick | Purchase from Zora. |
| Recipe 5/12 – Basic Repair Kit | Purchase from Zora. |
| Firearm 2/5 – Shotgun | Found on the corpse beside me when entering the graveyard. |
| Keypad 3 – 9606 | Safe inside the house in the southeast section of the graveyard. |
I make sure to collect the Shotgun when entering the graveyard and check the house in the southeast for the keypad safe.
Free Sunny’s Soul
After escaping the graveyard, I meet Pinhead, who offers a deal to save Sunny.
I follow him into the Labyrinth and make my way through several shifting corridors, traps, and environmental puzzles until I reach Sunny’s Pillar.
There is no combat during this section, but I need to collect the available Pain and Suffering Pillars because missing them can prevent me from unlocking their associated achievements.
Free Sunny’s Soul Objectives
- Enter the Labyrinth
- Reach Sunny’s Pillar
- Free Sunny’s Soul
- Exit the Labyrinth
Free Sunny’s Soul Collectibles
| Collectible | Location |
|---|---|
| Pain Pillar 1/5 | Refer to the Pain and Suffering Pillars section. |
| Suffering Pillar 1/5 | Refer to the Pain and Suffering Pillars section. |
| Suffering Pillar 2/5 | Refer to the Pain and Suffering Pillars section. |
Manual Save 3: I create a separate manual save at the first save point I find inside the Labyrinth.
There are no firearms, crafting recipes, keypad codes, or upgrades to collect during this section.
Open the Gate to Charlotte
After freeing Sunny’s soul, I return toward the graveyard to find Charlotte.
Before I can reach her, I need to unlock several gates by collecting missing statue parts and completing the corresponding puzzles.
I also return to Zora’s shop to purchase any crafting recipes I can afford before continuing toward the mansion.
This section includes exploration, combat encounters, and several statue puzzles.
There is also a missable achievement related to this part of the game, which I cover in the Red Dead Damnation achievement section.
Open the Gate to Charlotte Objectives
- Find a Statue’s Missing Part
- Escape the Sacrifice Room
- Find a Way to Exit the Mansion
- Complete the First Statue
- Find Another Missing Statue Part
- Complete the Second Statue
- Find the Statue’s Tongue
- Complete the Final Statue
- Claim Charlotte’s Heart
Important Manual Save
Manual Save 4: I create a manual save before entering the Docks, after completing the second statue.
This is a useful backup for the Red Dead Damnation achievement and for completing any remaining combat-related achievements.
Open the Gate to Charlotte Collectibles
| Collectible | Location |
|---|---|
| Recipe 6/12 – Advanced Repair Kit | Purchase from Zora. |
| Recipe 7/12 – Ammo Pack 12-Gauge | Purchase from Zora. |
| Firearm 3/5 – SMG | Found inside the large safe upstairs in Bruno’s mansion. |
| Keypad 4 – 1966 | Upstairs in Bruno’s mansion. |
| Recipe 8/12 – Ammo Pack 9mm | Purchase from Zora. |
| Firearm 4/5 – Revolver | Purchase from Zora after obtaining the Statue’s Head. |
| Recipe 9/12 – Bear Trap | Purchase from Zora. |
| Recipe 10/12 – Fuel Can | Purchase from Zora. |
I make sure to check the upstairs area of Bruno’s mansion for the SMG and keypad.
After collecting the Statue’s Head, I return to Zora to purchase the Revolver and any remaining recipes available at this point.
Give Charlotte’s Heart to Sunny
After defeating Charlotte and collecting her heart, I return to the Labyrinth to find Sunny.
I continue through the environmental obstacles and short story sequences until I reach Sunny and complete the objective.
There are two Pillars in this section. Both are relatively easy to find, but I still make sure to collect them before moving forward.
Give Charlotte’s Heart to Sunny Collectibles
| Collectible | Location |
|---|---|
| Suffering Pillar 3/5 | Refer to the Pain and Suffering Pillars section. |
| Pain Pillar 2/5 | Refer to the Pain and Suffering Pillars section. |
I collect both Pillars before leaving this section because they count toward the Pillar-related achievements.
Hunt Marlowe
After returning to the club, I continue searching for Marlowe.
During this section, the Sister of Mercy steals the Genesis Configuration, forcing me to enter the Labyrinth again.
I navigate through the changing corridors to recover the box before meeting the Chatterer and unlocking a new ability.
Afterward, I return to the club, confront the Sister of Mercy, and collect her heart.
This section also contains the final firearm, the remaining crafting recipes, and several important collectibles.
Hunt Marlowe Objectives
- Enter the Voyeur Room
- Get the Genesis Configuration Back
- Exit the Labyrinth
- Get to Marlowe
- Claim the Sister of Mercy’s Heart
Important Manual Save
Manual Save 5: I create a separate manual save before fighting the Sister of Mercy.
This gives me another opportunity to return and complete any remaining merchant-related achievements.
Hunt Marlowe Collectibles
| Collectible | Location |
|---|---|
| Firearm 5/5 – Assault Rifle | Purchase from Zora. |
| Recipe 11/12 – Ammo Pack .357 | Purchase from Zora. |
| Keypad 5 – 1952 | Near the table with the Voyeur Ticket. |
| Recipe 12/12 – Ammo Pack 7.62 | Purchase from Zora. |
| Keypad 6 – 1923 | Inside the room on the right after the puzzle box door. |
| Suffering Pillar 4/5 | Refer to the Pain and Suffering Pillars section. |
| Pain Pillar 3/5 | Refer to the Pain and Suffering Pillars section. |
By the end of this section, I should have collected all 5 firearms and all 12 crafting recipes, provided I purchased everything available from Zora.
I also make sure to collect both Pillars before continuing.
Hunt Marlowe Part II
In this section, I continue through the final stretch of the Labyrinth, where I encounter more puzzles, exploration areas, and combat encounters.
I need to find the missing Bell, navigate through the Labyrinth, and recover the Genesis Configuration from Bruno before confronting Marlowe.
This is one of the last major sections before the final story choice, so I recommend checking any unfinished achievements before progressing further.
I also use my available manual saves to return for any combat or miscellaneous achievements that I may have missed earlier.
Hunt Marlowe Part II
In this section, I continue through the Labyrinth after defeating the Sister of Mercy. I need to give her heart to Sunny before returning to hunt Marlowe.
During this section, I need to find the missing Bell, use the elevator, and recover the Genesis Configuration from Bruno before finally confronting Marlowe.
There are also three remaining Pillars to collect, so I recommend checking their locations before progressing.
Hunt Marlowe Objectives
- Return to the Labyrinth
- Give the Sister of Mercy’s Heart to Sunny
- Enter the Labyrinth
- Hunt Marlowe
- Find and Use the Missing Bell
- Use the Elevator
- Reclaim the Genesis Configuration from Bruno
- Hunt Marlowe
- Claim Marlowe’s Heart
Hunt Marlowe Collectibles
| Collectible | Location |
|---|---|
| Pain Pillar 4/5 | Refer to the Pain and Suffering Pillars section. |
| Suffering Pillar 5/5 | Refer to the Pain and Suffering Pillars section. |
| Pain Pillar 5/5 | Refer to the Pain and Suffering Pillars section. |
I make sure to collect all three Pillars before leaving the Labyrinth because they are required for their associated achievements.
Make Your Choice
This is the final section of the game. After defeating Marlowe and collecting his heart, I return to Sunny and reach the final story choice.
There are only a few objectives to complete here.
Make Your Choice Objectives
- Give Marlowe’s Heart to Sunny
- Return to Sunny
- Make Your Choice
Important Manual Save
Manual Save 6: I create a separate manual save right after being thrown back, when I need to return to Sunny.
This is a backup in case the autosave doesn’t work. Normally, the autosave should return me to the point just before making the final choice.
I recommend keeping this save so I can return and complete the other ending without replaying the entire game.
Firearms & Crafting Recipes
There are 17 items to collect throughout the game, including 5 firearms and 12 crafting recipes.
Most of these items can be obtained naturally while progressing through the story. However, some weapons and recipes need to be purchased from Zora after reaching certain points.
I have included the general locations of these items in the gameplay sections above.
Documents, notes, inventory upgrades, and weapon upgrades are also available, but they are not required for the collectible achievements.
All Firearm Locations
| Firearm | How to Obtain |
|---|---|
| Pistol | Obtained during the story. |
| Shotgun | Obtained during the story. |
| SMG | Found inside the safe in Bruno’s mansion. |
| Revolver | Purchase from Zora. |
| Assault Rifle | Purchase from Zora. |
Assault Rifle Achievement Tip
I recommend purchasing the AP Rounds upgrade for the Assault Rifle because it improves bullet penetration.
The best way to attempt the penetration-related achievement is to find a group of unarmoured enemies and line them up.
I aim for the torso or stomach when two or more enemies are standing behind each other.
A good location for this is near the end of the game, where I reach a large sewer section containing several enemies.
I lure the enemies toward one side of the area and then run to the opposite side. Once they line up, I use the Assault Rifle with AP Rounds to shoot through them.
All Crafting Recipe Locations
| Crafting Recipe | How to Obtain |
|---|---|
| Bandage | Available automatically from the beginning. |
| Pistol Ammo | Obtained when collecting the Pistol. |
| Medkit | Purchase from Zora at her first shop. |
| Lockpick | Purchase from Zora at her first shop. |
| Basic Repair Kit | Purchase from Zora at her first shop. |
| Advanced Repair Kit | Purchase from Zora at her second shop. |
| 12-Gauge Ammo | Purchase from Zora at her second shop. |
| 9mm Ammo | Purchase from Zora after obtaining the Statue’s Hand. |
| Bear Trap | Purchase from Zora after obtaining the Statue’s Tongue. |
| Fuel Can | Purchase from Zora after obtaining the Statue’s Tongue. |
| .357 Ammo | Purchase from Zora at her third shop. |
| 7.62 Ammo | Purchase from Zora at her third shop after returning from the Labyrinth. |
Crafting Achievement Tip
Crafting materials are limited, so I recommend completing the crafting-related achievements near a manual save point.
Once I have unlocked all the recipes and collected enough materials, I craft one required item and reload my save.
I repeat this process for the remaining items to avoid wasting crafting supplies.
Pain and Suffering Pillar Locations
There are 10 Pillars hidden throughout the Labyrinth, including 5 Pain Pillars and 5 Suffering Pillars.
Activating Pain Pillars increases maximum health, while Suffering Pillars increase maximum Suffering.
All 10 Pillars are required for their associated achievements.
Important: All 10 Pillars are missable. The Labyrinth is mostly one-way, so I recommend collecting each Pillar before moving to the next area.
Free Sunny’s Soul – First 3 Pillars
The first three Pillars can be collected during the Free Sunny’s Soul objective after escaping the graveyard.
Pain Pillar 1/5
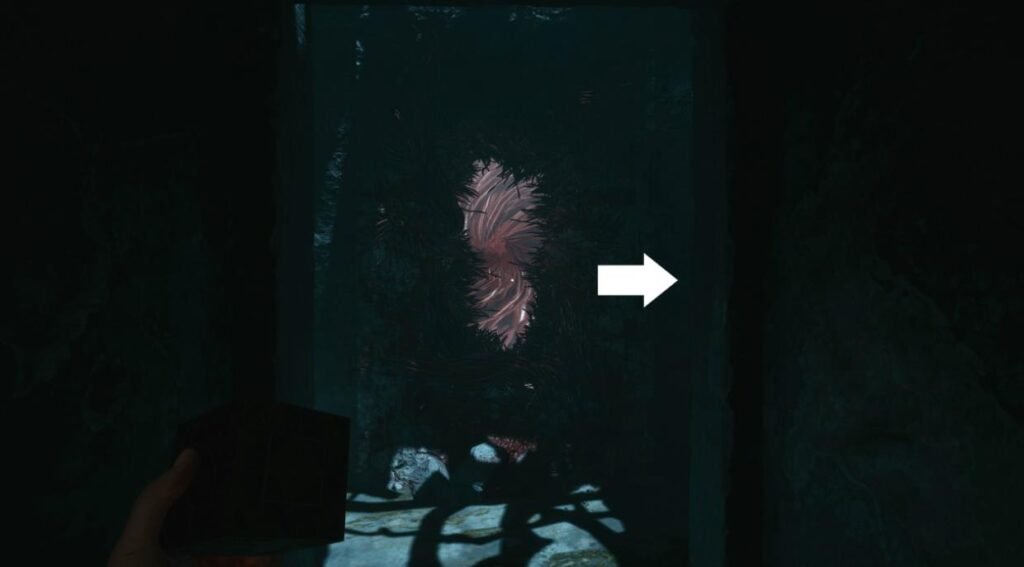
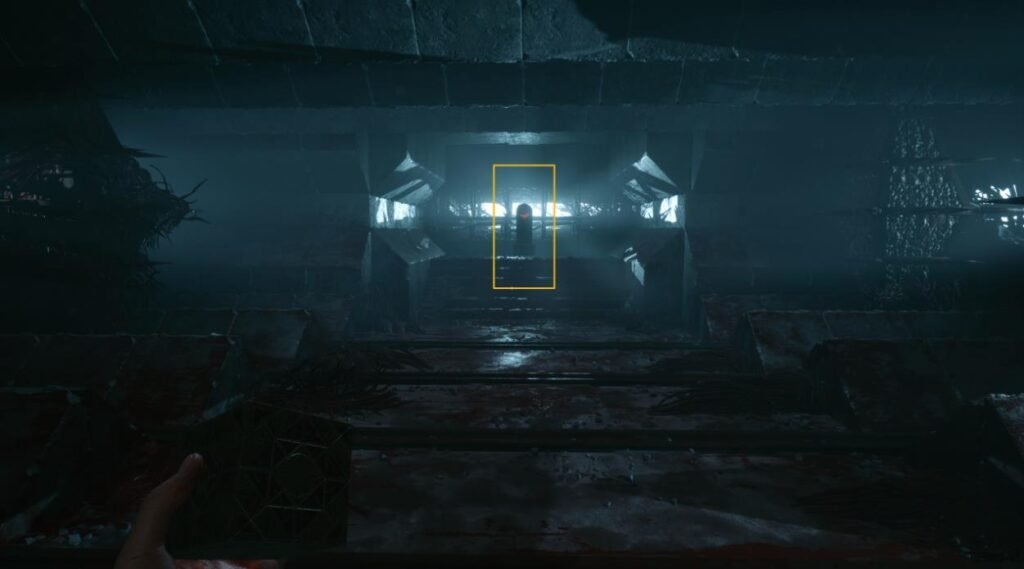
After encountering the first spinning diamond trap, I continue until I reach an intersection with a bloody organic opening.
I turn right and enter a room containing four spinning diamond traps in a row.
The Pain Pillar is located on the opposite side of this room.
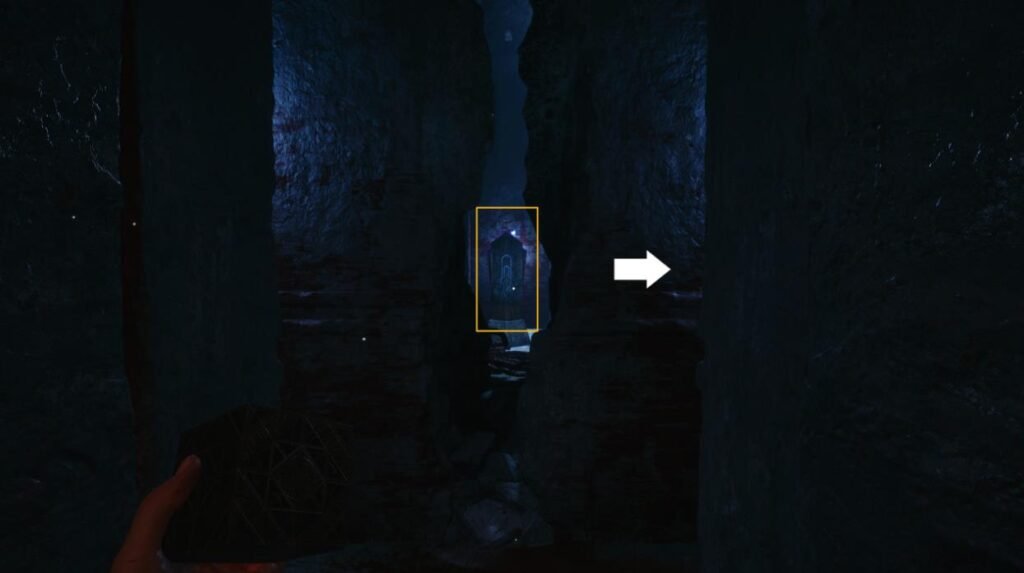
Suffering Pillar 1/5
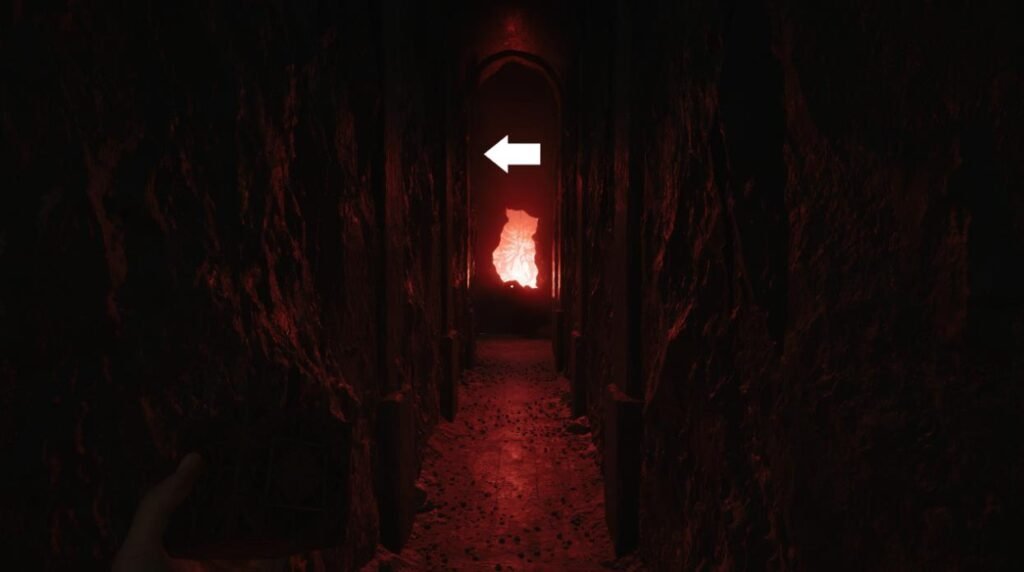
After descending the spiral staircase with the spiked moving walls and dropping ceiling, I enter a red-lit corridor.
At the intersection, I turn left and can see the Pillar through a crack in the wall.
To reach it, I need to move counterclockwise through the area while avoiding the spinning diamond traps.
Suffering Pillar 2/5
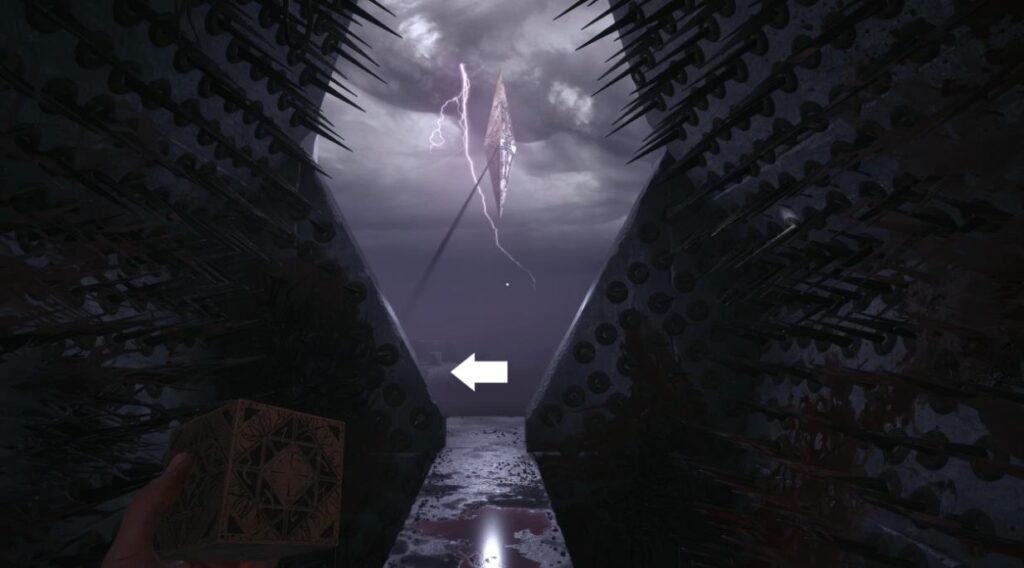
After passing through the spiked hallway, I reach an outdoor area where Leviathan is watching.
I duck under the beam on the left and enter a short maze where the Chatterer appears.
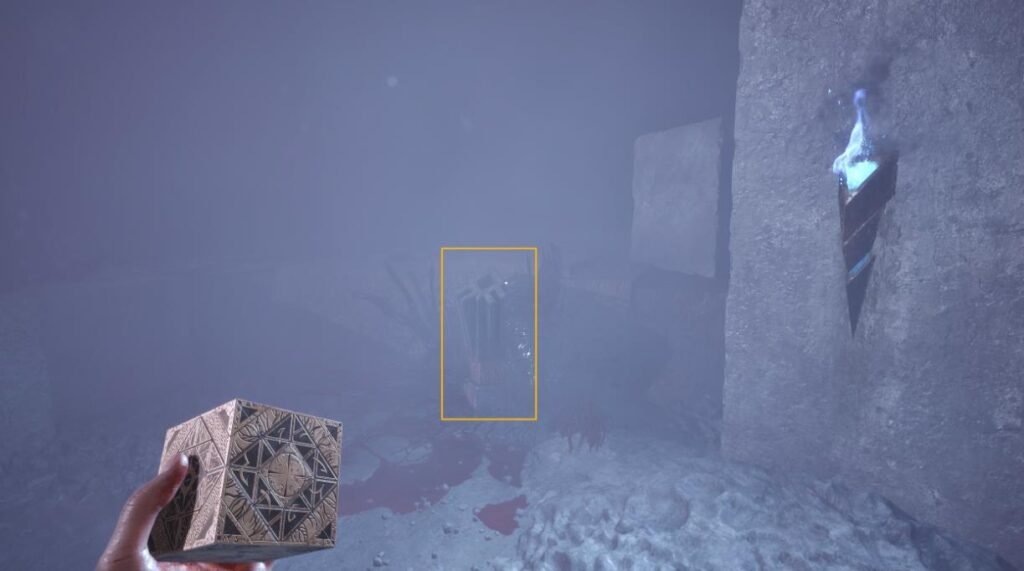
After leaving the maze, I enter a smoky area with Leviathan on my left and a blue torch on my right.
The Suffering Pillar is located beside the blue torch.
Give Charlotte’s Heart to Sunny – Next 2 Pillars
The next two Pillars are available during the Give Charlotte’s Heart to Sunny objective, immediately after defeating Charlotte.
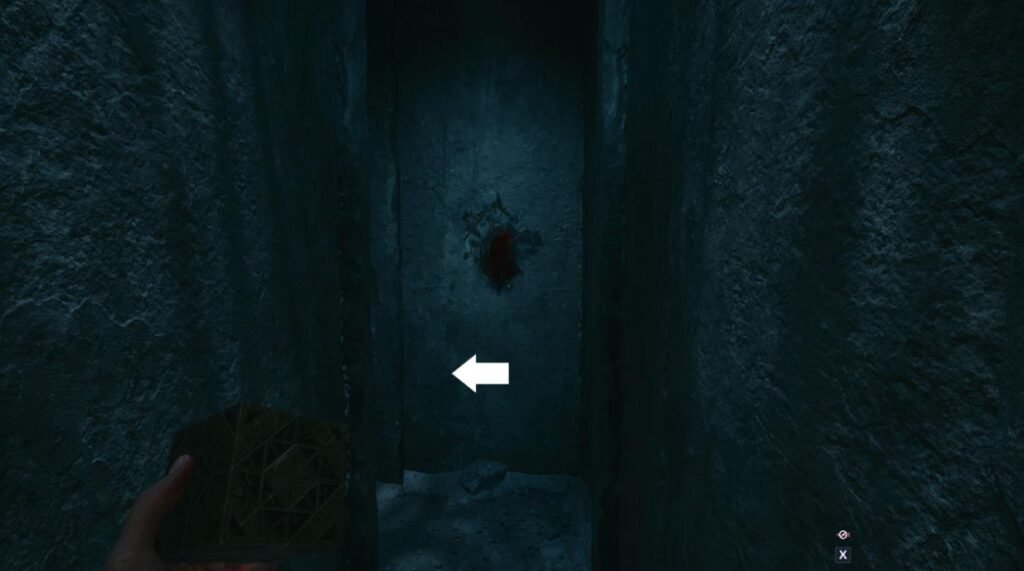
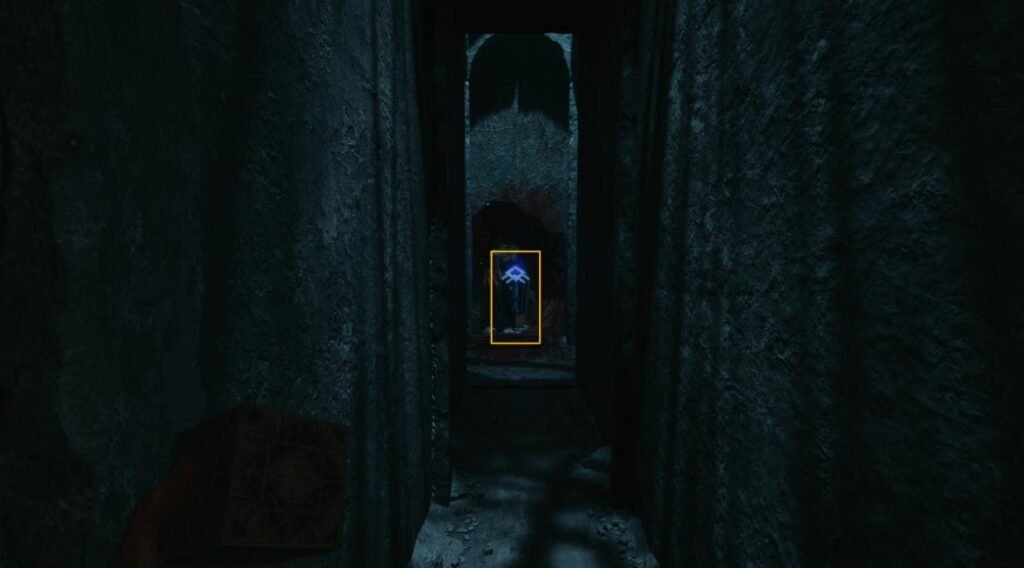
Suffering Pillar 3/5
After entering the Labyrinth, I reach a manual save point.
I follow the main path to the left and then turn right.
The Suffering Pillar is directly ahead, making it one of the easiest Pillars to collect.
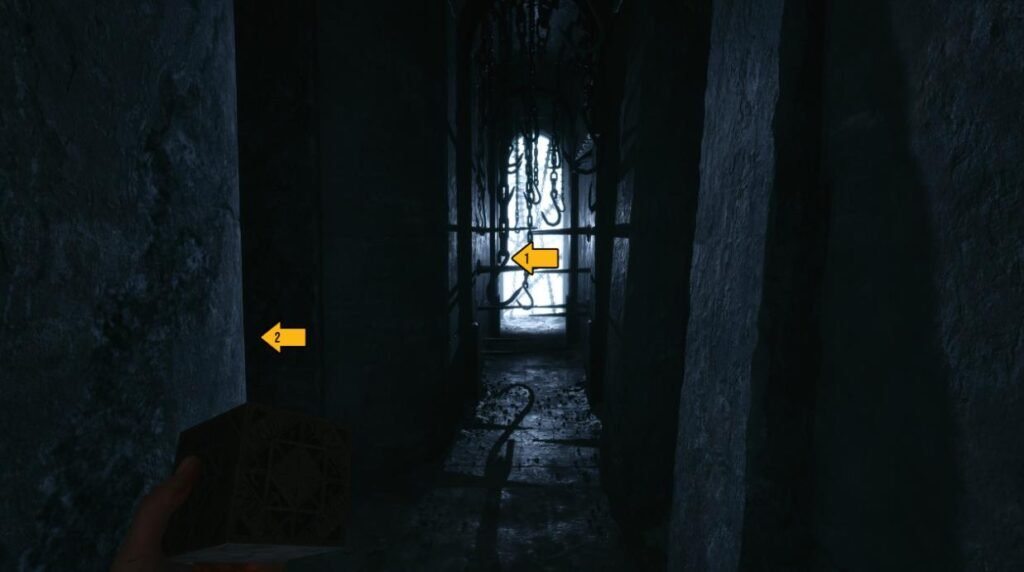
Pain Pillar 2/5
After passing through the wall trap with spikes, I turn left and see the Pain Pillar across a gap.
There is also a rotating platform in this area.
To reach the Pillar, I return past the spiked wall and take the path on my right.
I follow this path until I find the Pillar inside a small alcove on the left.
Get the Genesis Configuration Back – Next 2 Pillars
These two Pillars can be found during the Get the Genesis Configuration Back objective after sneaking past the Sister of Mercy and entering the Labyrinth.
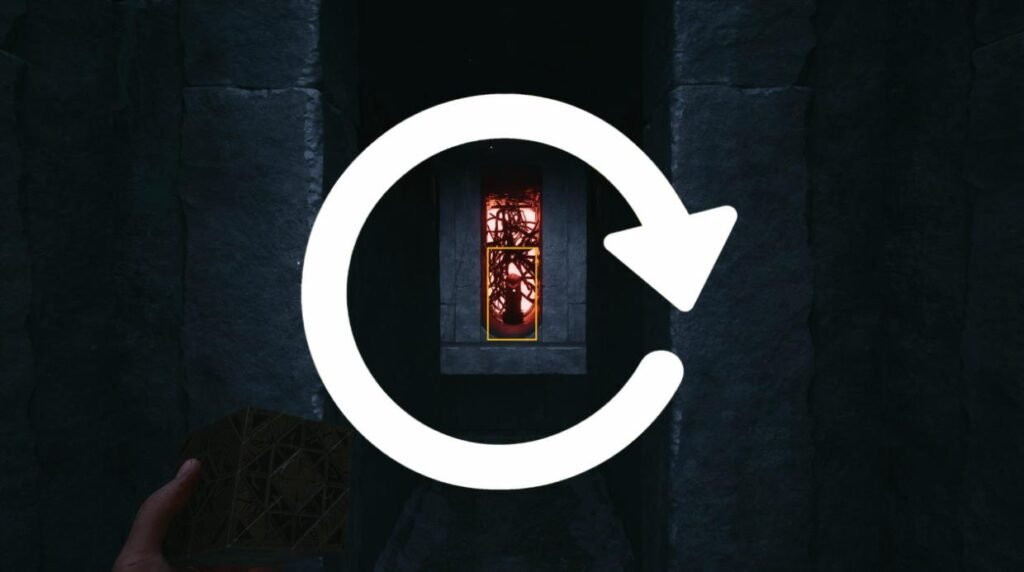
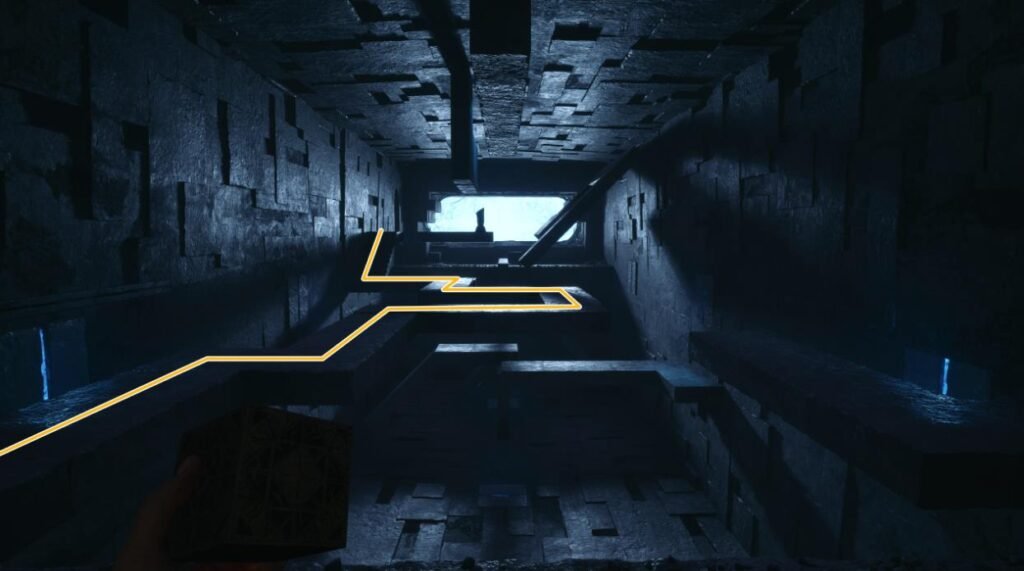
Suffering Pillar 4/5
I find this Pillar on the third rotating octagonal platform.
To reach it, I need to rotate and align the platforms correctly until I can access the area containing the Pillar.
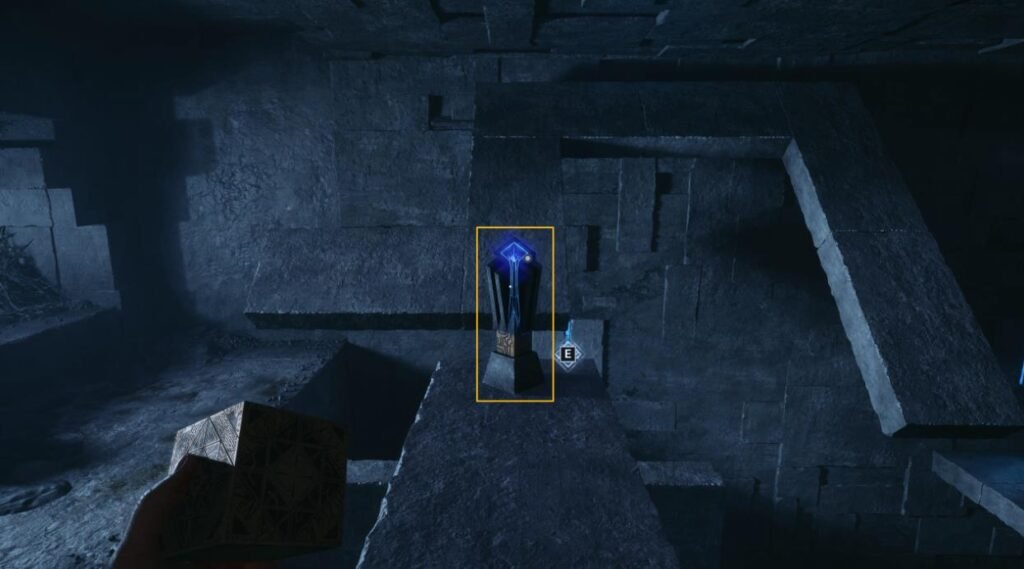
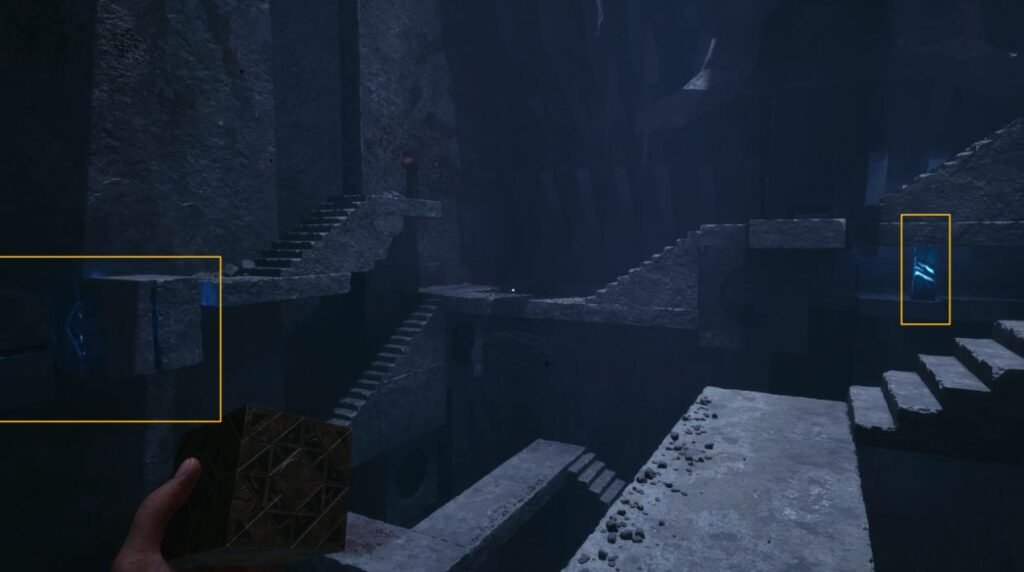
Pain Pillar 3/5
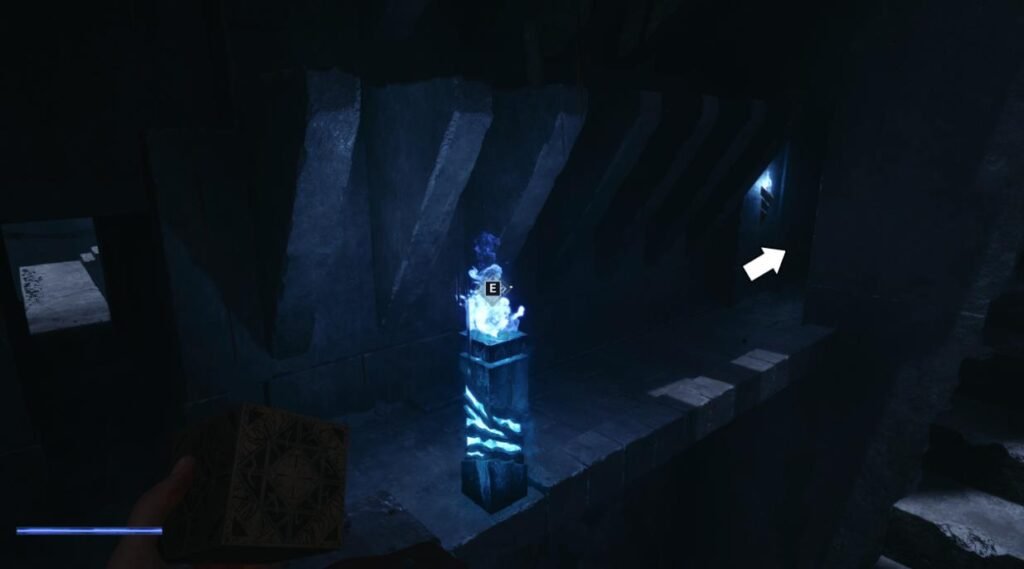
After climbing a ladder in the moving staircase section, I can see two movable cubes on my left.
I move the cubes into position to create a platform.
After that, I collect the fire and follow the available path until I can place it into a fire pillar.
I then continue through the red-lit corridors until I reach the Pain Pillar.
Hunt Marlowe – Final 3 Pillars
The final three Pillars are available during the Hunt Marlowe objective after defeating the Sister of Mercy and giving her heart to Sunny.
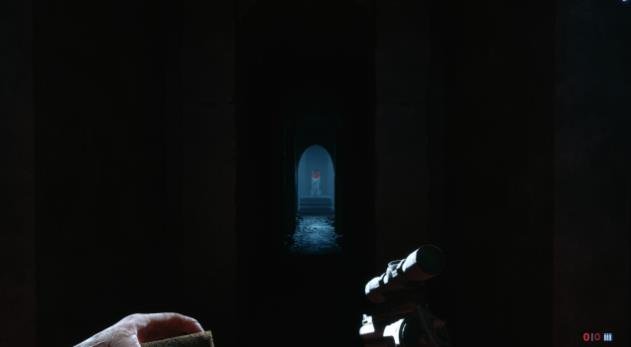
Pain Pillar 4/5
This Pillar is located immediately after entering the Labyrinth following the Sister of Mercy encounter.
It is directly along the path and should be easy to collect.
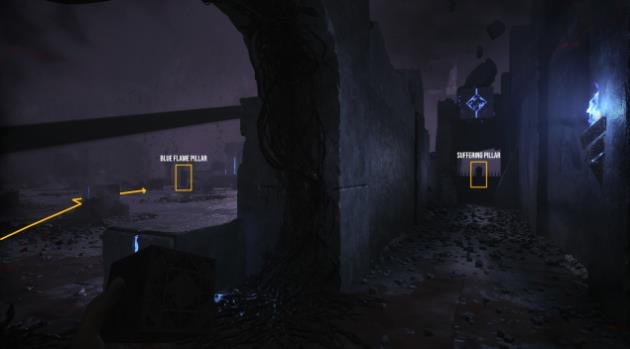
Suffering Pillar 5/5
I find the final Suffering Pillar during the section where I need to avoid Leviathan’s gaze.
First, I make my way toward the center of the area and collect the blue flame from the pillar near the bridge.
I throw the blue flame toward a cube on the eastern side.
After that, I return around the area until I reach the cube.
I raise the cube to reveal the final Suffering Pillar.
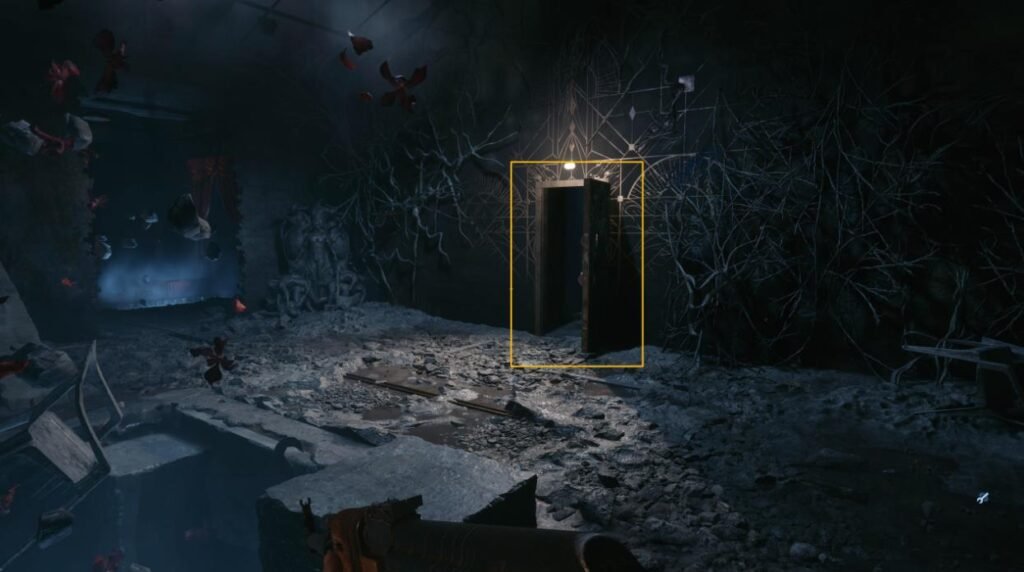
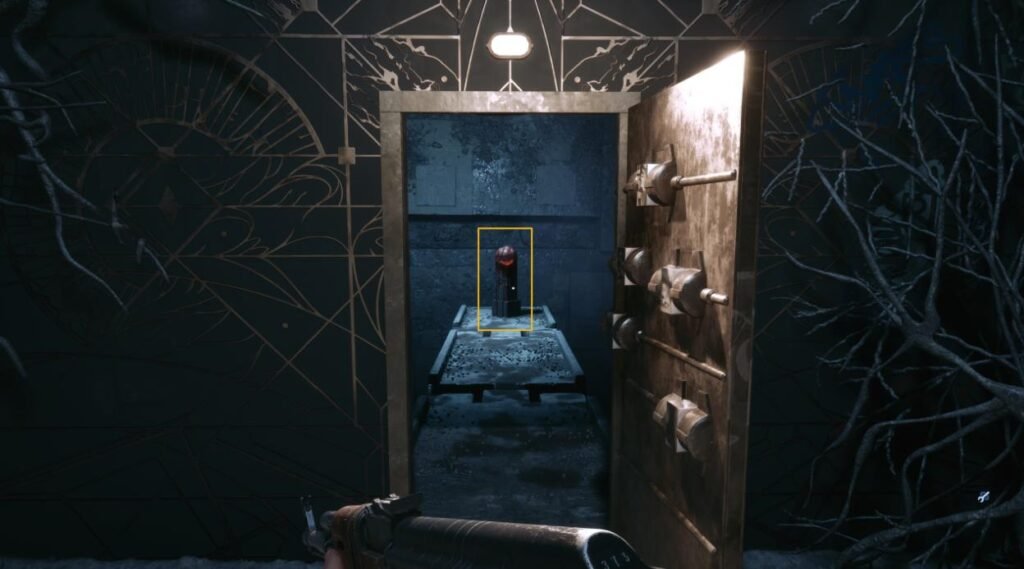
Pain Pillar 5/5
The final Pain Pillar is located shortly after Bruno takes the Genesis Configuration.
I need to find a door containing four adjustable sections.
To open the door, I change the sections until they match the mural.
Once the puzzle is completed, I can enter the room and collect the final Pain Pillar.
Missable Achievements
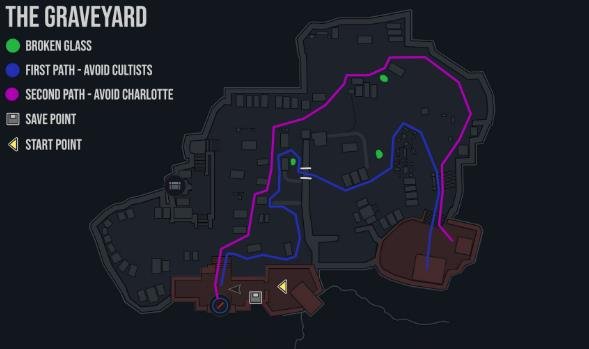
A Quiet Place
The A Quiet Place achievement can be unlocked shortly after escaping the Scarlet Church.
After Charlotte’s encounter, I wake up in the graveyard and need to escape without being detected.
To unlock the achievement, I must complete both stealth sections without being spotted or throwing any objects.
Important: Do not pick up or throw any stones or bottles during this section.
First Section – Cultists
- I head outside and move toward the right side.
- I follow the eastern wall while using bushes for cover.
- I wait until the Cultists move away from the central path.
- I continue around the graves while staying hidden.
- I move through the low opening in the wall, avoiding the broken glass.
- I continue toward the house.
Second Section – Charlotte
- I follow Charlotte through the bushes.
- I continue toward the central area.
- I wait until Charlotte starts patrolling south.
- Instead of trying to pass her, I follow her movement from a safe distance.
- Once Charlotte reaches the far southern area, I turn around.
- I move back toward the northwest and crawl under the fallen tree.
- Charlotte does not follow me into the area previously occupied by the Cultists.
- I return to the church building and use the gate to escape.
I recommend making a manual save before entering the graveyard so I can retry if I get detected.
Red Dead Damnation
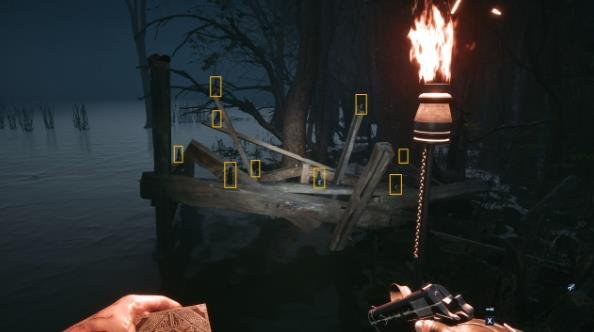
The Red Dead Damnation achievement can be unlocked during the final statue objective.
While searching for the puzzle blocks, I eventually reach an area where one of the blocks is located on a boat that I need to pull toward me.
After defeating the enemies that spawn, I look to the right of the boat.
There are 9 bottles placed together in this area.
I need to shoot all 9 bottles to unlock the achievement.
I recommend having at least 9 bullets before attempting this because the bottles respawn if I leave the area to purchase more ammunition.
Other Combat Achievements
These achievements are related to combat actions that do not require firearms.
Fire Ability Achievement
The easiest way to complete this achievement is after unlocking the fire ability during the hunt for Charlotte.
Once I unlock the ability, I find a fully armoured enemy and use fire on them until the achievement unlocks.
Hellchains – Stun 3 Enemies
I recommend attempting this achievement after unlocking the Hellchains ability.
Instead of immediately using Hellchains, I attack the Unworthy enemies with melee weapons until three of them are stunned.
Once all three enemies are stunned, I use Hellchains on them.
I recommend avoiding killing other enemies between the required actions.
Melee Headshot Achievement
If I haven’t unlocked this achievement naturally, I recommend attempting it around the section where I unlock Hellchains.
I find three Unworthy enemies and attack them until they become stunned.
After that, I use the same melee weapon and aim for their heads to complete the required kills.
Hellchains Kill Achievement
The best place to grind Hellchains kills is immediately after unlocking the ability.
I kill as many enemies as possible using Hellchains and then reload the autosave.
I repeat this process until the required number of kills is reached.
Electricity Damage Achievement
I completed this achievement shortly after unlocking Telekinesis.
Once I reach the area with electricity on the ground, I run into the electricity and then reload my save.
I repeat the process if needed until the achievement unlocks.
Merchant (Zora) Achievements
The following achievements are related to the merchant system and purchasing items from Zora.
Most of these achievements should unlock naturally while progressing through the story, especially if I regularly visit Zora and purchase the available items.
During my playthrough, I unlocked all the merchant-related achievements before reaching the fight with Charlotte.