
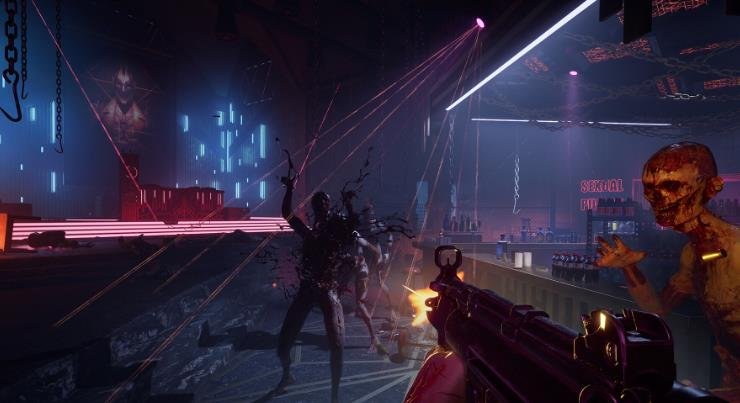
In this guide, I show how to unlock all 69 achievements, including story achievements, boss fights, keypad codes, crafting recipes, and firearm upgrades. I follow the game’s progression and explain the requirements for each achievement to make them easier to complete.
I have organized the achievements into separate sections so you can track your progress and avoid missing achievements that require specific conditions.
General Information
The game has 69 achievements, and it is possible to unlock all of them in a single playthrough.
The story is mostly linear, but I can explore certain areas to find collectibles, weapon upgrades, and other useful items.
Here are a few important things I keep in mind before starting:
- Difficulty: Achievements are not tied to difficulty, so I can unlock all of them on any difficulty setting.
- Documents: There are no achievements for collecting documents. I can skip them, although they contain useful background information about the story.
- Chapter Select: There is no chapter selection option. I recommend saving at the beginning of each chapter to make it easier to return for achievements that require grinding or specific conditions.
- A Quiet Place: This achievement can be cheesed on Normal difficulty by using the autosave system. This method does not work on Hard difficulty or above.
- Hard Difficulty: Enemies take more damage before dying, and more enemies appear in certain areas. A room with two enemies on Normal may contain three on Hard.
- Save Points: On Hard difficulty and above, autosaves and some checkpoints are disabled. If I die, I return to my last manual save point.
Story-Related Achievements
These achievements unlock as I progress through the main story. Most do not require any additional actions, although the two ending achievements require different choices.
We Have Such Sights to Show You
I unlock this achievement by entering the Labyrinth.
This achievement is story-related and cannot be missed.
What’s in the Box?!
I unlock this achievement by using the Genesis Configuration.
This achievement is story-related and cannot be missed.
Not Leaving Us so Soon, Are You?
I unlock this achievement by escaping the Labyrinth.
This achievement is story-related and cannot be missed.
The Box. You Opened it. We Came
I unlock this achievement after completing the Prologue.
This achievement is story-related and cannot be missed.
A Waste of Good Suffering
I unlock this achievement by escaping confinement.
This achievement is story-related and cannot be missed.
No Time for Argument
I unlock this achievement after escaping from the Chatterer for the first time.
This achievement is story-related and cannot be missed.
Not Even IP
I unlock this achievement by entering the club’s VIP Lounge.
This achievement is story-related and cannot be missed.
Only Nightmares Last Forever!
I unlock this achievement after escaping from Charlotte.
This achievement is story-related and cannot be missed.
With Great Power
I unlock this achievement by obtaining the Telekinesis power.
This achievement is story-related and cannot be missed.
Burn? Oh, Such a Limited Imagination!
I unlock this achievement by setting Charlotte on fire.
This achievement is story-related and cannot be missed.
Run, Aidan, Run!
I unlock this achievement after escaping from the Chatterer for the second time.
This achievement is story-related and cannot be missed.
Demons to Some, Angels to Others…
I unlock this achievement by talking to a Cenobite.
This achievement is story-related and cannot be missed.
Welcome to Oblivion
I unlock this achievement after reaching the Field of Souls.
This achievement is story-related and cannot be missed.
Every Drop of Blood You Spill…
I unlock this achievement by resurrecting Sunny.
This achievement is story-related and cannot be missed.
Puts More Flesh on My Bones
I unlock this achievement when I begin hunting for the hearts.
This achievement is story-related and cannot be missed.
Come to Daddy
I unlock this achievement by defeating Bruno in the first boss fight.
I explain the boss strategy in the section below.
Pyromaniac
I unlock this achievement by obtaining the Pyrokinesis power.
This achievement is story-related and cannot be missed.
Heart on Fire
I unlock this achievement by defeating Charlotte.
I explain the boss strategy in the section below.
So Much for the Cat and Mouse Shtick
I unlock this achievement by sneaking past the Sister of Mercy.
This achievement is story-related and cannot be missed.
I Can Do This All Day
I unlock this achievement by escaping from the Chatterer again.
This achievement is story-related and cannot be missed.
Unlimited Power!
I unlock this achievement by obtaining the Hellchains power.
This achievement is story-related and cannot be missed.
No Mercy
I unlock this achievement by defeating the Sister of Mercy.
I explain the boss strategy in the section below.
Come Here, Damn You, I Want to Touch You
I unlock this achievement by defeating Bruno for the second time.
I explain the boss strategy in the section below.
Go to Hell!
I unlock this achievement by defeating Marlowe.
I explain the boss strategy in the section below.
Tear Your Soul Apart
I unlock this achievement by completing the Ritual of Rebirth.
This achievement is story-related and cannot be missed.
Experience Beyond Limits
I unlock this achievement by accepting the Cenobites’ offer at the end of the story.
When Deepthroat, the female Cenobite, makes the offer, I follow her to select this ending.
I can reload a save or autosave to choose the other ending.
Human After All
I unlock this achievement by rejecting the Cenobites’ offer.
When Deepthroat makes the offer, I remain standing still instead of following her.
I can reload a save or autosave to unlock the other ending.
Boss-Related Achievements
In this section, I explain how I defeat each boss and unlock the related achievements.
Come to Daddy – Defeat Bruno
I fight Bruno in a small room with several objects that I can throw at him.
I use the available objects, firearms, and melee weapons to damage him.
Every time I knock Bruno down, he transforms into a moving red substance that tries to grab me.
I avoid the red substance and continue attacking when he returns to his normal form.
I repeat this process two more times until Bruno is defeated.
When his health gets low, several Unworthy enemies appear to help him. I deal with them while continuing to attack Bruno.
Heart on Fire – Defeat Charlotte
I fight Charlotte in a large arena filled with torches, barrels, and police cars.
I use Pyrokinesis from the cube or shoot the explosive barrels to set Charlotte on fire.
Once she catches fire, she becomes stunned. I use this opportunity to deal heavy damage with the shotgun.
When Charlotte reaches half health, she climbs a hill beside the arena and starts throwing explosive Unworthy enemies with large blue bellies.
I shoot one of these enemies while Charlotte is holding it. The explosion knocks her back into the arena.
I repeat the same strategy, setting her on fire and attacking while she is stunned, until she is defeated.
No Mercy – Defeat Sister of Mercy
The Sister of Mercy boss fight has three phases.
I can identify each new phase when she begins glowing blue after I use the cube.
The arena contains ammunition, crafting materials, and healing supplies.
Phase 1
During the first phase, Sister of Mercy throws knives and tries to close the distance to grab or slash me.
I keep moving and use the pillars on the second level as cover to avoid her knives.
The pillars can eventually be destroyed, so I do not rely on them for the entire fight.
Phase 2
After losing one-third of her health and three arms, Sister of Mercy covers the arena in red mist.
She then tries to grab me from inside the mist.
I watch for her silhouette and shoot whenever I see her approaching. This forces her to retreat.
Phase 3
After losing two-thirds of her health and all her arms, she creates a shield and continues throwing knives.
I use a throwable object to break the shield and continue shooting until she is defeated.
Come Here, Damn You, I Want to Touch You – Defeat Bruno Again
I fight Bruno for the second time in a battle with two phases.
I follow the same strategy as the first fight by using throwable objects, firearms, and melee weapons to damage him.
Every time Bruno falls, he transforms into moving red goo and tries to grab me.
I avoid him until he returns to his normal form.
When Bruno reaches half health, he transforms into red goo and forces me to move into another room.
Unlike the first fight, he does not summon Unworthy enemies.
I continue attacking and avoiding his goo form until he is defeated.
Go to Hell! – Defeat Marlowe
Marlowe is the final boss, and I fight him in a medium-sized arena.
He mainly attacks by charging toward me and punching.
His outer shell protects him from damage, so I need to open it before I can attack him directly.
I look for the three glowing orange growths on his back and shoot them.
I can use Hellchains to hold Marlowe in place and make these growths easier to hit.
Once all three growths are destroyed, his shell opens, allowing me to damage him.
At 75% Health
Marlowe punches me into another section of the arena.
He gains additional attacks, including punches and a grab that I can escape by shooting him.
He also begins protecting the growths on his back with his arms.
At 50% Health
The arena changes and introduces environmental traps.
I use Telekinesis to raise spiked walls or move spiked diamond traps into Marlowe’s path.
When he charges toward me, I position the traps so he crashes into them.
At 25% Health
The environment changes again, and spiked cubes appear hanging from the ceiling.
I wait until Marlowe moves underneath one of the cubes and shoot its support to make it fall onto him.
I continue using my weapons and ammunition to lower his health.
There are several breakable objects around the arena containing ammunition and supplies, so I use them whenever I need more resources.
Once Marlowe and his shell begin screaming, he falls to the ground and slowly moves toward me.
I continue attacking until he flashes blue, then interact with him to Banish him and unlock the achievement.
Code-Related Achievement
Codebreaker – Unlock 5 Numpad Locks
I unlock the Codebreaker achievement by opening five numpad locks.
Throughout the game, I find locked cupboards, lockers, and doors that require four-digit codes.
The combinations are hidden in nearby paintings, documents, photographs, statues, and other environmental clues.
I have listed all 10 code locations below.
| # | Location | Code |
|---|---|---|
| 1 | Red Hallway | 9901 |
| 2 | Medical Bay | 9891 |
| 3 | Gravekeeper’s House | 9606 |
| 4 | Bruno’s Music Room | 1966 |
| 5 | Snake Room | 1952 |
| 6 | Private Rooms Bathroom | 1923 |
| 7 | Blue Door | 1362 |
| 8 | Bruno’s Room | 8571 |
| 9 | Destroyed Medical Teaching Room | 2342 |
| 10 | Sewers Room | 1512 |
Code #1 – Red Hallway (9901)
I find the first numpad lock after collecting the card and escaping Bruno’s torture room.
I enter a red hallway with four paintings.
I examine the paintings named Marlow Succeeds ’99 and The Prophet’s Vision ’01.
These two paintings contain the numbers needed for the combination.
Code: 9901
Code #2 – Medical Bay (9891)
I find the second code after completing the first Chatterer chase sequence.
I enter the Medical Bay, where I learn the combat and stealth takedown mechanics.
After completing the tutorials, I pass through a room containing three enemies. I can use stealth to avoid unnecessary combat.
I then enter the room with hanging bodies and go through the green door ahead.
I check the tubs on the right and find the code tattooed on one of the bodies.
Code: 9891
Code #3 – Gravekeeper’s House (9606)
I find the third code inside the Gravekeeper’s House on the hill after passing through the graveyard.
Near the save point, I find two documents containing the combination.
I rotate the photograph to reveal 96, then read the document available after obtaining the shed key to find 06.
I combine both numbers to unlock the safe.
Code: 9606
Code #4 – Bruno’s Music Room (1966)
I find the fourth code after defeating Bruno and gaining access to the mansion.
I go to the second floor and examine the painting near the studio save point.
The back of the painting contains the number 1666.
I then enter the music room and read the note mentioning a fire that happened 300 years ago.
I add 300 to 1666 to get the combination.
The locked cupboard is in the same music room.
Code: 1966
Code #5 – Snake Room (1952)
I find the fifth code after returning to the club following the statue puzzle and Labyrinth section.
I reach the living room near the Snake Room door.
To access the lockpad, I cross the lobby toward the changing rooms and enter the locker area.
I find two lockers. One contains the Snake Room key, while the other contains a photograph of four men partying.
The photograph provides the combination.
Code: 1952
Code #6 – Private Rooms Bathroom (1923)
I find the sixth code after completing the Sister of Mercy stealth section and unlocking the Private Rooms area.
I enter the area and go into the room on the right to find the locked cupboard.
I then check the room opposite the entrance for a photograph of four businessmen.
I look at the numbers written above the men wearing pins on their jackets.
These numbers provide the combination.
Code: 1923
Code #7 – Blue Door (1362)
I find the seventh code after leaving the Labyrinth section where I need to avoid the Leviathan’s gaze.
I reach a gated hallway where I speak with the vendor.
Before approaching the vendor, I go left and find a small opening that I can crouch through.
This leads to a room with a locked blue door.
I explore the area and find two statues that I can rotate to reveal the numbers needed for the combination.
Code: 1362
Code #8 – Bruno’s Room (8571)
I find the eighth code after Bruno takes the cube away.
I obtain the bell to access Bruno’s building and explore the rooms.
I find two VHS tapes that reveal the numbers needed for the combination when I interact with them.
I then cross the room containing several traps to reach the locked cupboard.
Code: 8571
Code #9 – Destroyed Medical Teaching Room (2342)
I find the ninth code after Marlowe transforms and begins destroying the area.
During the chase, I pass through a medical teaching room and reach a ladder.
The locked cupboard is next to the ladder.
I turn around and examine the numbers written in the corners of the walls to find the combination.
Code: 2342
Code #10 – Sewers Room (1512)
I find the final code in the sewers while progressing through the story.
I reach a room where I need a crank to cross a gap.
I go to the lower section and examine the cylindrical wall with a message about someone beating a high score.
The groups of tally marks provide the numbers for the combination.
I return to the upper section near the save point to find the locked cupboard.
Code: 1512
Crafting-Related Achievements
Librarian – Collect Every Crafting Recipe
I unlock the Librarian achievement by collecting all 12 crafting recipes.
Two recipes are obtained automatically, while the remaining 10 can be purchased from the merchant as I progress through the story.
| # | Crafting Recipe | How to Obtain |
|---|---|---|
| 1 | Bandage | Automatically obtained |
| 2 | Pistol Ammo | Automatically obtained |
| 3 | Lockpick | Purchase from merchant |
| 4 | Medkit | Purchase from merchant |
| 5 | Basic Repair Kit | Purchase from merchant |
| 6 | Advanced Repair Kit | Purchase from merchant |
| 7 | Shotgun Ammo | Purchase from merchant |
| 8 | SMG Ammo | Purchase from merchant |
| 9 | Revolver Ammo | Purchase from merchant |
| 10 | Assault Rifle Ammo | Purchase from merchant |
| 11 | Bear Trap | Purchase from merchant |
| 12 | Fuel Canister | Purchase from merchant |
I check the merchant regularly as new recipes become available throughout the story.
Once I obtain all 12 recipes, the achievement unlocks.
Artificer – Craft Every Craftable Item
I unlock the Artificer achievement by crafting every item from the 12 available recipes.
The game does not track which items I have already crafted or how many times I have crafted them.
To avoid missing anything, I craft each item immediately after obtaining its recipe.
I repeat this process for every recipe listed in the previous section until I unlock the achievement.
Firearm-Related Achievements
Power to the People – Upgrade a Firearm
I unlock this achievement by installing an upgrade on any firearm.
I can obtain weapon upgrades by purchasing them from the merchant or finding them while exploring.
Once I obtain an upgrade, I equip it on the compatible weapon to unlock the achievement.
Lord of War – Fully Upgrade a Firearm
I unlock the Lord of War achievement by installing every available upgrade on a single firearm.
Each firearm has at least five upgrades that I can find or purchase.
I recommend upgrading the Pistol because its five upgrades are relatively easy to obtain.
I find the Pistol upgrades in the following locations:
- First Upgrade: I find it in a room shortly after meeting the merchant for the first time, near the area with an explosive barrel that can kill several Unworthy enemies.
- Second Upgrade: I find it inside the safe at the Gravekeeper’s House.
- Third Upgrade: I purchase it from the merchant.
- Fourth Upgrade: I purchase it from the merchant.
- Fifth Upgrade: I purchase it from the merchant.
After collecting and equipping all five Pistol upgrades, I unlock the achievement.
Armed and Dangerous – Equip a Firearm in Every Slot
I unlock this achievement by equipping a firearm in all three firearm equipment slots.
I need at least three different firearms to complete it.
One of the easiest places to unlock this achievement is Bruno’s Mansion, where I can obtain the SMG.
Once I have three firearms in my inventory, I equip each one in a separate weapon slot.
The achievement unlocks when all three slots are filled.
Guns, Lots of Guns – Acquire All Firearms
I unlock the Guns, Lots of Guns achievement by collecting all five firearms.
Some weapons are obtained automatically through the story, while others must be found or purchased.
| # | Firearm | How to Obtain |
|---|---|---|
| 1 | Pistol | Automatically obtained at the beginning of the game |
| 2 | Shotgun | Automatically obtained after the Charlotte chase |
| 3 | SMG | Found by opening the office vault in Bruno’s Mansion |
| 4 | Revolver | Purchased from the merchant |
| 5 | Assault Rifle | Purchased from the merchant |
I make sure to open the vault in Bruno’s Mansion to collect the SMG and purchase the Revolver and Assault Rifle from the merchant.
After obtaining all five firearms, the achievement unlocks.
Combat-Related Achievements
In this section, I show how to unlock all combat-related achievements, including Hellchains kills, stealth takedowns, headshots, Telekinesis kills, and other combat challenges. I also include the locations where I can farm these achievements more easily.
In the Land of the Pig, the Butcher is King – Rip Apart 69 Enemies Using Hellchains
I unlock this achievement by killing 69 enemies with Hellchains.
To use Hellchains, I first need to fill the Suffering bar. Once the bar is full, I can activate the power and use it against enemies.
I can farm these kills across multiple playthroughs. The easiest method is to use Hellchains after unlocking the power, then reload the autosave and repeat the process.
If I still need more kills near the end of the game, I can use the Sewers arena, where around 15–20 enemies appear.
There is a save point near the arena entrance, making it a useful location for farming kills.
I Spy with My Little… – Kill 6 Enemies Using the Revolver Scope
I unlock this achievement by killing six or more enemies while aiming through the Revolver scope.
I first purchase the Revolver and its Scope upgrade from the merchant.
I then find a group of Unworthy enemies and lower their health until they begin flashing blue.
Once they are close to death, I switch to the Revolver with the Scope equipped and finish them while aiming through it.
Important: Equipping the Scope removes the Hollowpoint upgrade if I already have it installed.
Wetwork – Perform 10 Stealth Kills Without Alerting Anyone
I unlock this achievement by performing 10 stealth takedowns on cultists without alerting anyone.
I approach cultists from behind while they are facing away and use the stealth takedown.
I can also throw stones or bottles to distract enemies and separate them from groups.
I repeat this process until I complete 10 stealth kills.
Fully armored cultists cannot be killed using stealth takedowns, so I focus on regular enemies.
Trickshot – Kill 2 Enemies with a Single Shot
I unlock this achievement by killing two or more enemies with one shot.
I find a group of Unworthy enemies and damage them until they start flashing blue.
I then equip either the Shotgun or the Assault Rifle with the AP Rounds modification.
Once the weakened enemies are lined up, I fire a single shot through them to unlock the achievement.
Portable Guillotine – Behead 3 Enemies with the Same Melee Weapon
I unlock this achievement by beheading three or more enemies using the same melee weapon.
I recommend using a bladed weapon with high durability.
I find a group of Unworthy enemies and lower their health until they begin flashing blue.
I then use the bladed weapon to attack their heads and behead them.
I repeat this process on two more enemies without switching weapons.
Headtaker – Kill 3 Enemies with a Single Telekinetic Throw
I unlock this achievement by killing three or more enemies with one Telekinesis throw.
I first weaken several Unworthy enemies until they begin flashing blue.
I then grab a nearby object using Telekinesis, line up the enemies, and throw the object through them.
One of the best locations for this achievement is the Sewers arena near the end of the game.
This area contains around 15–20 enemies. When I reach the center, approximately 10 Rushing Unworthy spawn and run toward me.
These enemies wear full gimp suits and move quickly, but they are weak enough to die from a well-placed throw.
The arena also contains several throwable objects that I can use.
Deadeye – Kill an Enemy with a Headshot from 30 Metres Away
I unlock this achievement by killing an enemy with a headshot from at least 30 metres away.
I recommend using the Revolver with the Scope upgrade because it makes long-distance aiming easier.
I first lower an Unworthy enemy’s health, then move far enough away and shoot it in the head.
I find the Sewers arena near the end of the game useful for this achievement.
I lure an enemy toward the far-right corner of the arena, then return toward the save point near the entrance.
From there, I aim at the enemy’s head and fire to get the achievement.
Twisted Firestarter – Burn 10 Enemies to Death
I unlock this achievement by killing 10 or more enemies with fire.
I can burn enemies by shooting explosive barrels or fuel canisters, or by using Pyrokinesis.
One of the easiest locations is the area where I collect the final puzzle piece needed to open the gate for the Charlotte boss fight.
This area contains several enemies, torches, and explosive barrels.
I use these objects to set enemies on fire and continue until I reach 10 kills.
Breacher – Kill a Fully Armored Enemy Without Breaking Armor
I unlock this achievement by killing a fully armored enemy without destroying any armor pieces.
The easiest method is to use fire instead of regular attacks.
I can shoot an explosive barrel or fuel canister near the enemy or use Pyrokinesis to burn them.
The earliest opportunity I find is after obtaining the Rubber Ducky from the statue puzzle in the Red Hallway.
Before completing the puzzle, I move or kick a barrel toward the iron maiden on the left.
After solving the puzzle, I return toward the door with the duck. A fully armored enemy jumps out.
I shoot the barrel to set the enemy on fire and unlock the achievement without breaking its armor.
Trapper – Damage 10 Enemies with Bear Traps
I unlock this achievement by damaging 10 or more enemies with Bear Traps.
I begin finding Bear Traps after obtaining the Gravekeeper’s key.
I place a trap on the ground and lure an enemy into it.
Bear Traps can kill regular enemies or break their legs.
They are also useful against stronger enemies. A Bear Trap can stun Charlotte and can kill an armored enemy in a single hit.
I repeat the process until 10 enemies have taken damage from traps.
I Banish Thee! – Banish 3 Unworthy in Succession
I unlock this achievement by banishing three Unworthy enemies in succession.
After escaping Charlotte and obtaining the cube, I encounter the Unworthy.
I attack an Unworthy until it begins flashing blue.
Once it is ready to be banished, I press F to perform the Banish action.
I repeat this on two more Unworthy enemies to unlock the achievement.
Sticks and Stones – Kill an Enemy with a Stone
I unlock this achievement by killing an enemy using a stone.
I first lower the enemy’s health, then throw a stone to finish it.
One of the easiest locations is the entrance to Bruno’s Mansion.
I find around six to eight stones scattered around this area.
There are two enemies outside the main entrance, including one armored enemy, and another enemy near the car shed where I find the bolt cutter.
I weaken one of the regular enemies and finish it with a stone.
A Quiet Place – Escape the Graveyard Without Being Seen or Throwing Anything
I unlock this achievement by escaping the graveyard without throwing objects or being detected.
There are two methods mentioned for this achievement.
Method 1 – Normal Difficulty
I use this method on Normal difficulty or below.
- I progress through the graveyard normally.
- I reach the point where I need to use the puzzle piece to open the gate.
- I save the game before opening the gate.
- I reload the game.
- I open the gate and continue to unlock the achievement.
This method takes advantage of the autosave system.
Important: This method does not work on Hard difficulty or above because autosaves are disabled.
Method 2 – Hard Difficulty
A verified method for Hard difficulty was still being worked on as of October 15, 2026.
Until a reliable method is available, I recommend attempting the achievement on Normal difficulty using Method 1.
Red Dead Damnation – Shoot Every Bottle at the Docks
I unlock this achievement by shooting all nine bottles at the docks shooting range.
I reach this area while collecting the final statue piece needed for the Charlotte boss fight.
To collect the Tongue Statue, I need to complete a box puzzle that requires several parts.
One of these parts is inside a boat that I pull toward the edge of the dock using a rope.
I look to the right of the boat and find a wooden structure standing in the water.
There are nine bottles on this structure.
I shoot all nine bottles to unlock the achievement.
Labyrinth-Related Achievements
In this section, I show how to unlock the Labyrinth achievements, including completing puzzles, activating Pain and Suffering Pillars, and dying to Leviathan’s gaze.
Puzzle Me This – Complete 3 Labyrinth Puzzles
I unlock this achievement by completing three Labyrinth puzzles.
I get this achievement during my second extended visit to the Labyrinth.
After completing the puzzle where I rotate the tube in the center of the room to continue, the achievement unlocks.
The Further Regions of Experience – Activate a Labyrinth Pillar
I unlock this achievement by activating any Labyrinth Pillar artifact.
There are two types of pillars:
- Pain Pillars: Red, blob-like artifacts that increase maximum health.
- Suffering Pillars: Blue pillars that increase the maximum Suffering capacity used by the cube’s powers.
I interact with either type of pillar to unlock the achievement.
There Are No Limits – Activate Every Pain Pillar
I unlock this achievement by finding and activating all five Pain Pillars.
Pain Pillars appear as red, blob-like artifacts inside the Labyrinth.
Whenever I interact with one, my maximum health increases.
I need to find and activate all five Pain Pillars to unlock the achievement.
Pain and Pleasure, Indivisible – Activate Every Suffering Pillar
I unlock this achievement by finding and activating all five Suffering Pillars.
These pillars appear as blue columns with an opening where I can insert the cube.
Each activated pillar increases my maximum Suffering capacity, allowing me to store more power for the cube’s abilities.
I activate all five pillars to unlock the achievement.
No Life in the Void, Only Death – Die to Leviathan’s Gaze
I unlock this achievement by dying to Leviathan’s gaze.
After defeating the Sister of Mercy and feeding her heart to Sunny, I enter another Labyrinth section.
In this area, Leviathan scans the environment using a black ray.
Normally, I need to avoid the ray to continue, but for this achievement I intentionally let it kill me.
Recommended Method
Before entering the Labyrinth, I lower my health as much as possible.
I can use Pyrokinesis to throw fireballs at the ground and damage myself.
I also avoid collecting the health upgrade because it restores my health completely.
I then continue to the Leviathan section, trigger the cutscene, and stand still until the black ray targets and kills me.
Important Bug Information
As of October 15, 2026, this achievement was partially bugged.
Dying to Leviathan’s gaze at full health could fail to unlock the achievement.
There are two possible workarounds:
Method 1 – Use a Save File
I can use the save file provided in Doom’s achievement guide.
The guide contains a section titled:
Part 3 – Достижения которые можно упустить / Achievements that can be lost
This section explains how to load the save file and attempt the achievement.
Method 2 – Create a Backup Save
I create a separate save file before reaching Leviathan’s gaze.
I then continue playing normally and keep the save available.
If the achievement does not unlock, I can return to this save after a future patch and attempt it again.
Miscellaneous Achievements
Electro-Shock Therapy – Die from Electric Shock
I unlock this achievement by dying from electricity.
The earliest opportunity is after the first Charlotte chase sequence in the sewers.
I reach a puzzle involving a generator and an electrified puddle.
I stand in the electrified water until my health reaches zero to unlock the achievement.
With My Own Two Hands – Craft an Item
I unlock this achievement by crafting any item from the Crafting menu.
The game introduces crafting through a tutorial.
I collect three Cloth and one Chemical to craft Bandages.
I follow the tutorial and craft the item to unlock the achievement.
Just a Flesh Wound – Heal to Full Health
I unlock this achievement by restoring my health to maximum.
I can use Bandages, Medkits, or food to recover health.
Once my health bar reaches full, the achievement unlocks.
A Little to the Left, a Little to the Right – Open a Basic Lock
I unlock this achievement by opening a basic lock using a Lockpick.
After the first stealth section where I learn about Bruno, I reach a corridor with a door on the left.
I enter the room and find a locked cupboard and a Lockpick.
I use the Lockpick on the cupboard and successfully complete the lockpicking minigame to unlock the achievement.
Oh Snap – Break a Lockpick
I unlock this achievement by breaking a Lockpick.
I can get it in the same room where I find the first locked cupboard after the stealth section.
Instead of completing the lockpicking minigame successfully, I intentionally fail until the Lockpick breaks.
The achievement unlocks when the Lockpick breaks.
Knives Out – Kill an Enemy with a Knife
I unlock this achievement by killing an enemy using a Knife.
After the first Chatterer chase, I enter the Medical Bay.
A cutscene introduces the Knife and explains the melee combat mechanics.
I use the Knife to kill the enemy during the tutorial to unlock the achievement.
Bullet Time – Kill an Enemy with a Firearm
I unlock this achievement by killing an enemy using a firearm.
After crossing the Medical Bay, I find a dead detective blocking a door.
There is also a recording and some Pistol ammunition nearby.
I interact with the detective’s body to obtain the Pistol.
I then enter the newly opened room and kill an enemy using the Pistol.
Silent, but Deadly – Perform a Stealth Takedown
I unlock this achievement by killing an enemy with a stealth takedown.
After obtaining the Knife, I continue through the area until I find a crouched enemy positioned for a stealth attack.
I approach the enemy and press the takedown key to perform the stealth kill.
A Bigger Stick! – Reinforce a Melee Weapon
I unlock this achievement by reinforcing a melee weapon.
I first obtain an Advanced Repair Kit.
I then use the kit on any melee weapon, such as a Bat, Plank, or Machete.
Once the weapon is reinforced, it displays a blue border in my inventory.
Handyman – Repair a Melee Weapon
I unlock this achievement by repairing any melee weapon.
I obtain a Basic Repair Kit and use it on a damaged melee weapon.
I can repair weapons such as a Bat, Plank, or Machete.
Once the repair is complete, the achievement unlocks.
Excessive Use of Force – Break a Melee Weapon in Combat
I unlock this achievement by breaking a melee weapon during a fight.
Every melee weapon has a durability bar.
I continue attacking enemies with the same weapon until its durability reaches zero and it breaks.
One of the easiest locations is the Medical Bay, where I encounter my first armored enemy.
Finders, Keepers – Collect Some Coins
I unlock this achievement by collecting coins.
After escaping the room where the game begins, I find a cupboard that I can open.
Inside, I find Cloth and some coins.
I pick up the coins to unlock the achievement.
What’s Your Pleasure, Sir? – Purchase an Item from the Vendor
I unlock this achievement by purchasing anything from the mysterious vendor.
After escaping Charlotte, I enter the sewer system.
I continue through the area until I find a pink lantern near a ladder.
I climb the ladder and meet the vendor.
I interact with the vendor and purchase any available item to unlock the achievement.
What’re Ya Sellin? – Earn 999 Coins from Sales
I unlock this achievement by earning 999 or more coins from selling items.
Throughout the game, I collect valuable items that I can sell to the vendor.
These include Occult Books, Labyrinth statue pieces, and items dropped by bosses.
I can also sell regular inventory items such as weapons and Bandages.
I continue selling items until my total sales reach 999 coins.
What’re Ya Buyin? – Spend 666 Coins in the Shop
I unlock this achievement by spending 666 or more coins at the vendor.
I purchase useful supplies, weapon upgrades, crafting recipes, and firearms as I progress through the story.
Once my total spending reaches 666 coins, the achievement unlocks.
Financial Elite – Spend 1337 Coins in the Shop
I unlock this achievement by spending 1337 or more coins at the vendor.
I collect valuable items throughout the game and sell them to earn more coins.
I can sell Occult Books, Labyrinth statue pieces, boss drops, and regular inventory items.
I then use the coins to purchase weapons, upgrades, crafting recipes, and supplies.
Once my total spending reaches 1337 coins, the achievement unlocks.
Changelog
October 15, 2026
- Added a second set of screenshots for the Codebreaker achievement.
- Clarified that Method 1 for A Quiet Place works on Normal difficulty or below.
- Added new information about unlocking No Life in the Void, Only Death.
- Corrected minor spelling errors.
October 14, 2026
- Added the first set of Codebreaker screenshots.
- Added Method 1 for A Quiet Place, suggested by Medio.
- Continued working on screenshots and a Hard difficulty method for A Quiet Place.
October 13, 2026
- Completed the Code-Related Achievements section with all codes and locked locations.
- Started adding screenshots to make locations easier to find.
- Updated the Combat-Related Achievements section.
October 12, 2026
- Added boss fight strategies and related achievements.
October 11, 2026
- Updated achievement strategies and added more boss tips.
- Added spoiler tags to story-related achievements.
- Reorganized sections to make the guide easier to follow.
October 10, 2026
- Updated achievement strategies and boss fight tips.
October 9, 2026
Started working on detailed descriptions and screenshots.
Published version 1.0 of the guide.
Added basic achievement information and discovered codes.