
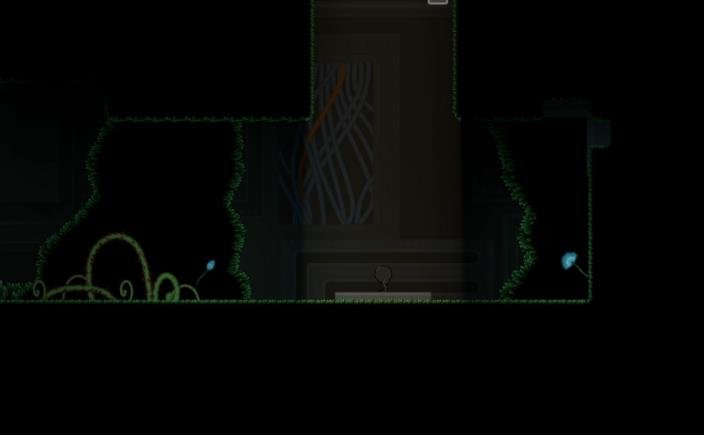
I cover the movement mechanics and tech I have discovered in IGTAP: an Incremental Game That’s Also a Platformer. I start with the basic movement and then cover wall jumps, dashes, air jumps, polarity switching, and advanced movement tech. I try to include as much detail as I can. I do not have easy access to frame data or backend information, so most of this is currently based on what I can see in-game.
Starting Movement
I cover all movement options that are available when I first start the game. I may mention tech from other sections to help explain something, but I do not cover those tech here.
Basics
I cover the basic inputs and how they work.
Walking
I can move left or right. I have a consistent maximum movement speed when using only walking, and I cannot hold a button to run.
I can also move while I am in the air. There seems to be almost no acceleration, although there appears to be extremely minor deceleration.
QuickFall
I can increase my falling speed by holding the down key.
Normal falling has a maximum downward velocity. Holding down increases both the maximum velocity and how quickly I accelerate downward.
When I release down, the maximum velocity returns to its previous value. My velocity then gradually returns to the previous maximum.
Grounded Jump
I can jump while grounded.
A grounded jump works differently from an air jump, so I treat them as separate movement options.
The height of the jump depends on how long I hold the jump button. It appears that the jump applies a consistent upward force while gravity is disabled.
When I release jump, gravity becomes active again. Holding jump again after this does not seem to cause any noticeable change.
There is both a minimum and maximum amount of time that gravity can remain disabled. This gives me a minimum and maximum jump height.
A grounded jump normally keeps my horizontal momentum. However, jumping in the opposite direction completely stops my momentum.
For example, if I am moving quickly to the right and jump to the left, the jump acts as if I was stationary.
Note: If I release and rehold jump before the minimum time is reached, gravity remains disabled. This suggests that the jump depends on the gravity state rather than the input itself.
Advanced Movement
I cover movement and tech that are not immediately obvious from the basic mechanics.
Coyote Frames
After I leave the ground without jumping, there are a few frames where I can still jump.
This jump does not use an air jump. Even if I have air jumps available, they are not consumed during coyote frames.
A coyote frame jump works like a grounded jump instead of an air jump.
BHops
There is slightly less friction in the air than on the ground.
If I jump as soon as I land, I spend less time affected by grounded friction. This lets me retain a small amount of speed above the normal maximum.
Spiike Tech
Touching spikes kills me. Touching vines also kills me.
However, the definition of “touching” is sometimes fairly liberal.
At least for spikes, they cannot kill me when I am moving in the same direction as them. Spikes also extend roughly 10 pixels, although the exact value is currently unknown.
Spikes usually have a hitbox that is around 1 or 2 pixels thinner than I might expect. This allows me to briefly land on the very edge of spiked ground, even when the wall next to it is also covered in spikes.
Without any input, I simply slide off the edge. However, I can use the spike direction rule to perform a spiked corner jump.
I jump at the edge to perform a grounded jump. This gives me upward velocity without pushing me away from the edge. Since I am moving upward, the spikes do not kill me.
Vines do not have a direction, so they likely do not follow the same rule. Vines also occasionally do not work correctly for unknown reasons.
Input Buffering
If I press an input while it is invalid, the input remains stored for a few frames.
There are several possible uses for this, but at this point the only input that can be invalid is a grounded jump.
If I press jump shortly before landing, I will jump on the exact frame that I land.
Movement Theories and Data
I use this section for theories that do not have enough supporting evidence, have contradictions, or contain information that is not immediately related to movement but may still be useful.
Grounded State
Being grounded is not simply being close enough to the ground to jump.
It appears to be a specific state that activates and deactivates depending on the circumstances.
Pixel Adjustment
When I am standing on a lip, I can use tiny movement taps of 1 or 2 pixels.
If I do this precisely enough, I can eventually suspend myself at the edge. I am no longer grounded, but I am prevented from moving downward.
I believe this is pixel perfect, so it can potentially be used as a setup.
Hitbox Geometry
If I wallslide on a hanging ledge and then use a single tap to turn around, almost none of my character clips into the ledge.
However, if I use pixel adjustments forward until I stop bonking, a substantial part of my character can clip into the ledge.
This suggests that the hitbox extends further forward than it does backward.
Section 1 Movement
I cover all movement options available in the upper facilities. This includes wall jumps, side dashes, air jumps, and polarity switching.
Basics
I cover each unlockable movement option individually and explain how it works.
Wall Slide
I unlock Wall Slide with Wall Jump, but it works as a separate mechanic.
When my hitbox touches a wall, I begin a wall slide. In this case, touching means that my hitbox is in direct, pixel-perfect contact with the wall. I do not need to have momentum toward the wall.
I can start a wall slide while facing toward or away from the wall, although doing it backwards is considerably harder.
A wall slide keeps my current horizontal direction. It will not start if I have upward vertical momentum.
When the wall slide starts, all downward vertical momentum is immediately stopped. I then cling to the wall.
I slowly begin accelerating downward until I reach a maximum velocity that is substantially lower than my normal falling speed.
Holding up reduces my acceleration and maximum velocity. Holding down increases both.
If my current speed is above the new maximum, it is reduced to the maximum.
If I have no wall jumps remaining, holding against a wall keeps me in place.
Wall Jump
I unlock Wall Jump with Wall Slide, but Wall Jump is a separate mechanic.
I can wall jump while touching a wall as long as I am not exhausted.
The jump moves me up and away from the wall. Its minimum and maximum heights are significantly lower than a grounded jump.
I do not have to be in a wall slide. If I am moving upward and touch a wall without starting a wall slide, I can still wall jump.
I cannot control my horizontal movement during the jump. Holding left, right, or nothing moves me at the same angle away from the wall.
The duration of this movement depends on how long I hold jump.
The wall jump has a similar velocity to an air jump, but its minimum and maximum times are shorter.
Side Dash
I use the term side dash for the lateral use of the omni dash later in this guide as well as the ability gained in Section 1.
The noun can refer to two different things, but the verb forms are equivalent, so I use side dash interchangeably.
I start a side dash by pressing the dash key while I have a dash available.
Touching the ground for 1 frame appears to reset my available dashes. I am fairly sure this is pixel perfect. I am not yet sure whether touching a wall works the same way.
A dash has two main states: dash state and end state.
During dash state, I move at a constant velocity in the direction of the dash. Gravity is ignored, and I cannot start another dash.
Input buffering does not work during either dash state or end state.
Pressing jump during end state creates a buffer, but it does not retain my speed.
When I start a dash, a countdown begins. When it reaches zero, I enter end state for a few frames.
End state returns some or all of the momentum I had when starting the dash. It does not keep momentum from the dash itself.
Momentum is only returned when it is moving in the same direction as the dash.
End state only happens if the dash is not interrupted.
The only ways I have found to interrupt a dash are with a grounded jump or a wall slide.
Air Jump
I use the term air jump instead of the game’s “mid-air jump” because mid-air jump can also refer to jumps made during coyote frames.
I can perform an air jump by pressing jump when no other jump takes priority, as long as I have an air jump available.
An air jump takes the same amount of time as a grounded jump, but it does not move me upward as quickly.
An air jump also does not ignore momentum moving in the opposite direction.
If I complete an air jump while I have upward momentum, the jump cleanly adds its energy on top. This means I do not lose height regardless of when I start the air jump.
If I complete an air jump while moving downward, all downward momentum is ignored.
Polarity Switching
Starting a dash switches the polarity of the polar blocks.
Activated polar blocks and spikes behave normally. Deactivated ones become intangible.
There is no way to dash without switching polarity.
Polarity can also switch without dashing by dying or starting a stage.
Polar objects begin working almost immediately, but there is a short delay.
During this delay, spikes do not kill me and the objects remain intangible.
After the delay ends, spikes become dangerous again and the objects push me outward in the closest available direction.
If the delay ends while I am inside a block and I am performing a side dash, I am pushed in the opposite direction from the dash instead of being pushed in the closest direction.
Advanced
I cover the advanced tech available in Section 1.
There is not as much advanced tech here as I might expect because most of the unusual mechanics are already covered by the basic movement.
Superdash
I perform a superdash by doing a grounded jump during dash state.
Depending on my directional input, this can result in a normal, failed, or reverse superdash.
Grounded jumps are easiest to perform on a long strip of ground. Coyote frames also work for the grounded state.
There is enough corner correction when I dash into the top corner of the ground that I can comfortably start or finish a superdash in mid-air.
A superdash gives me the horizontal momentum of a side dash while keeping the vertical height of a grounded jump. This makes it useful for covering long distances.
Failed and Reverse Superdash
If I hold no directional input during a superdash, I perform a failed superdash.
It keeps the upward momentum of a regular jump but does not keep the sideways momentum of the dash.
This is likely because jumping in the same direction as my momentum allows me to bhop and retain speed, while a neutral jump partially normalizes my momentum.
If I hold the opposite direction from my dash when jumping, I perform a reverse superdash.
It works like a normal superdash but moves in the direction I am holding instead of the direction of the dash.
Wall Bounce
I perform a wall bounce by side dashing into a wall and wall jumping on the exact frame that I make contact.
Input buffering works for wall bounces. Pressing jump one frame before contact works, but pressing it even one frame after contact does not.
A wall bounce moves me slightly away from the wall and gives me a constant upward velocity that is greater than a grounded jump.
It lasts for the same amount of time as a maximum jump, giving me more height than a maximum grounded jump.
Unlike a wall jump, I am not constantly pushed away from the wall during the jump. I can also move left or right normally.
The height of a wall bounce does not change depending on how long I hold jump.
Section 2 Movement
I cover all movement and tech available in Section 2.
The movement options unlocked here are refresh orbs, zipper blocks, and the omni dash.
Refresh orbs and zipper blocks have little advanced tech, so I mainly cover their basic mechanics.
Basics
I cover the three unlocked movement options and how they work.
Refresh Orbs
There are three types of refresh orbs: dash refresh, air jump refresh, and complete refresh.
A dash refresh restores my dashes to the maximum amount only if I am missing at least one dash.
An air jump refresh restores my air jumps to the maximum amount only if I am missing at least one air jump.
A complete refresh restores both my air jumps and dashes to the maximum amount if I am missing at least one of either.
All refreshes also restore my wall jumps. However, missing wall jumps alone is not enough to activate a refresh, even if I have no wall jumps remaining.
After I use a refresh, it becomes inactive for around 2 seconds. I can use it again after this period.
Dying does not reset refreshes.
A complete refresh looks identical to a dash refresh stacked on an air jump refresh, but it works differently.
Using a complete refresh locks me out of both refresh types. There is currently no obvious way to distinguish a stacked refresh from a complete refresh.
Zipper Blocks
Zipper blocks activate when I touch them.
After a short delay, they rapidly move along their rails. When they reach the end, they stay there for a few moments before slowly returning to their original position.
I cannot activate the zipper again until it returns.
The zipper does not reset when I die or restart the course.
Standing or sliding on a zipper keeps me attached to it. This allows me to gain the zipper’s momentum while it moves.
If I exit the zipper in a way that preserves momentum, such as jumping, superdashing, or wavedashing, I can keep the zipper’s momentum.
There is also a short period after the zipper reaches the end where I can retain the momentum it had at maximum speed instead of its current stopped momentum.
Omni Dash
The omni dash allows me to dash in eight directions.
These include the four orthogonal directions and the four diagonal directions. Each direction is 45 degrees apart.
The dash appears to travel the same distance in every direction. For example, diagonal dashes do not travel further simply because they move the same horizontal distance as a side dash.
If I dash while sliding on a wall, the horizontal direction is ignored and set away from the wall.
The vertical direction is still controlled normally. Holding up makes me dash diagonally upward, holding down makes me dash diagonally downward, and holding nothing makes me dash directly away from the wall.
If I dash directly down while grounded, nothing happens except that I cannot walk or dash for around half a second.
A diagonal down dash while grounded simply becomes a side dash.
Advanced
I mainly cover omni dash tech here.
Most of these techniques are based on Celeste movement, with some techniques being specific to IGTAP.
Wave Dash
I perform a wave dash by dashing diagonally down into the ground and jumping before the dash ends.
I need to jump before the dash finishes.
Because I cannot perform diagonal dashes while grounded, I first need to jump to start the diagonal dash.
A wave dash has around half the height of a superdash but gives me significantly more speed.
Failed and Reverse Wave Dash
Like a superdash, a wave dash fails if I complete it with neutral input.
The result is much worse than a failed superdash because a failed wave dash barely moves me.
I can also reverse a wave dash in the same way as a superdash.
High Jump
I perform a high jump by dashing directly down into the ground and jumping while I am still in dash state.
This gives me a jump around twice as high as a normal grounded jump.
Up Flick
I perform an up flick by dashing diagonally upward into a wall and wall jumping while I am still in dash state.
This sends me upward and away from the wall at very high speed.
The angle is similar to a normal wall jump, but I do not have the same movement restrictions as a normal wall jump.
Ultradash
A wave dash gives me significant speed, but unlike Celeste, repeating wave dashes on flat ground does not continue increasing my speed.
There is another way to chain wave dashes and move much faster.
If there is a piece of ground slightly below another piece of ground, I can wave dash from the higher piece into the lower piece.
This increases my velocity substantially.
The height of an ultra is the same as a wave dash.
I can perform this with very small differences in elevation. The difference between the plate of a teleporter and the ground it is sitting on is enough.
I can also start the first wave dash as a reverse wave dash.
I am not yet sure whether starting with a superdash does not work or simply produces a similarly minimal change.
Failed and Reverse Ultra
A failed ultra has similar speed and height to a normal wave dash.
A reverse ultra has zero vertical momentum.
This suggests that ultras work by retaining the velocity from the previous wave dash and then adding the velocity of the new wave dash on top.
Because of this, I tentatively consider the speed of an ultra to be double the speed of a wave dash.
High Dash
A down dash returns horizontal velocity after it finishes.
A high jump works by cancelling a down dash with a jump.
Because of this, a high jump with significant horizontal velocity can retain that velocity while still getting the full height of a high jump.
The most obvious use is chaining it with another dash technique.
A high wave dash has exactly the same height as a high superjump, which makes a high wave dash more useful in most situations.
A high ultradash is also possible, but it is not very useful because there are not many large spaces with the correct geometry to perform it.