
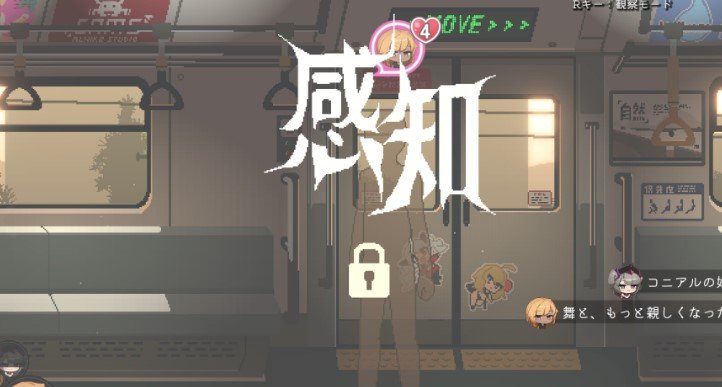
In this guide, I cover all 57 anomaly cars below in order, including how to detect or clear each one. The guide also covers the terminal cars, item locations, puzzle codes, special event routes, story cars, and the requirements for reaching the true ending.
All 57 Anomaly Cars in Train45
There are 57 anomaly cars to find across the six chapters of Train45. Each chapter adds new Anomalies, while some special cars require specific actions or items to clear. The game has six major chapters. Each chapter adds new types of Anomaly cars.
- Chapter 1: 10
- Chapter 2: 16
- Chapter 3: 11
- Chapter 4: 7
- Chapter 5: 5
- Chapter 6: 8
The boxes marked with Box unlock the Butler’s favor in the latter half of Chapter 4. There are 11 boxes in total. Some Lost Item Boxes require Lost Item Boxes from other destination cars. I buy Lost Item Location Hint -1- and Lost Item Location Hint -2- from the Butler. Even without buying the hints, I still trigger the boxes normally.
The numbered character avatars represent cars triggered by the affection levels of the two female protagonists. There are eight affection levels, and each level has an H event. Generally, when an affection level reaches 1 or is nearly full, the next anomaly car is randomly assigned to the corresponding event car first, unless the next stop is the final car.
Anomaly Cars
Some special cars cannot be detected normally. I need to take the required action to clear them. If I have an Empty Beer Can, I directly dispel all female ghosts.
01. White Liquid
I look at the upper-left advertising area near the middle door. A thick white liquid appears there.
02. Crows
I go outside the window and check the power lines. A large number of crows appear there. I press Space anywhere to detect the anomaly.
03. Button
I look at the indicator light on the left side of the right door. It emits a green light.
04. Black Bra
Between the hanging straps on the left side of the middle door, a black bra appears.
05. Window
I look at the window between the middle and right doors. The reflection shows the figure of a tall ghost.
06. Upper Body Change
I check the female protagonist’s outfit. Her upper outfit changes to a more exposed version.
07. Stickers
I look at the glass of the middle door. Multiple duplicate stickers appear.
08. Flying Underwear
I go through the window between the left and middle doors. I see white underwear flying outside.
09. Empty Car
If I find no anomaly, I simply continue to the far right.
10. Reverse
I notice that the train is moving in the opposite direction. The clearest sign is the shadow of the utility poles moving to the right inside the car. I press Space anywhere to detect it.
11. Extended Car
I look at the area to the right of the middle door. It has been stretched unusually far.
12. Shadow
I check the shadows of the utility poles inside the car. They have changed into an unusual silhouette.
13. Gaze
I look under the seat on the left side of the middle door. A red moving eye appears underneath.
14. Tunnel
This car cannot be detected normally. The train enters a tunnel and the windows become completely dark. If the ghost outside the window sees me, I am caught immediately.
15. Flooding
This car cannot be detected normally. The car starts flooding, so I quickly continue to the far right.
I also check the four directions under the graffiti on the left side of the right door. I need these directions later for the puzzle.
16. Poster Clothing Change
I look at the bikini girl poster on the left side of the middle door. The lower half of the poster suddenly changes.
17. Acceleration
The train moves noticeably faster, and the scenery outside the windows moves faster as well. I press Space anywhere to detect it.
18. Low Speed
The train becomes noticeably slower. I press Space anywhere to detect it.
19. Watching
I look at the right door. Half of a female ghost’s face appears there. When I detect it, the upper body is revealed.
If I have the Broken Key, clearing the anomaly unlocks another interaction.
20. Hairstyle
I check the heroine’s hairstyle.
- Mai changes from long hair to short hair.
- Rena changes from short hair to long hair over her shoulders.
21. XXX Poster
I look at the bunny girl poster on the right side of the middle door. The XXX symbol gradually increases.
22. Shaking Poster
I look at the bikini girl poster on the left side of the middle door. The poster bounces with the movement of the train.
23. Chibi Form
The female protagonist changes into a small chibi-style character.
24. Flashlight
This car cannot be detected. The car becomes dark.
When I reach the far right, an attack starts. I use the flashlight against the enemies attacking from the left and right. I keep a safe distance while doing this.
25. Expanded Advertisement
I look at the square poster with the woman’s head on the right side of the left door. It stretches outward and reveals the abnormal version.
26. Seat Eyeball
I check the seats on the left side of the right door. Eyeballs occasionally appear there.
27. Fogged Glass
I look at the glass of the right door. A blurry steam-like shadow appears.
28. Exit Advertisement
I look at the advertisement on the glass on the left side of the right door. It has been replaced with the abnormal version.
29. Tactile Paving
I look at the yellow tactile paving below the left door. The round protrusions become faintly visible.
30. Doll
I cannot detect this car normally.
I enter and find the scarecrow sitting on the seat. When I reach the center, a female ghost appears. I let her chase me back toward the scarecrow.
31. Slingshot Bikini
I look at the square bikini girl poster on the left side of the left door. It has been replaced with the slingshot version.
32. Lower Body Exposure
I check the female protagonist’s outfit. It has changed and something new appears on the lower body.
33. Giant Konial
I look outside the window between the middle and right doors. I see the huge Konial head outside.
34. Upper Body Exposure Plus
The heroine appears in the advanced version of the outfit. After I successfully detect it, another interaction becomes available.
35. Falling Ghost
I look between the front and middle doors. A faceless female ghost suddenly falls down.
If I have the Broken Key, clearing the anomaly unlocks another interaction.
36. Snow Woman
This car cannot be detected normally.
I continuously dodge the red circle and delay the falling ice spikes until the cast ends.
I also check the three numbers under the door on the right side. They are needed for a later puzzle.
37. Hug
This car cannot be detected normally.
Female ghosts emerge from dimensional rifts and follow my movement. I predict their movement and guide them close enough to trigger the hug interaction two or three times with the talisman.
38. Search Exposure
Mai appears in an exposed pose while looking for something. Rena has a different outfit version.
39. Disguise
I look at the left side of the right door. A woman lying horizontally is disguised as a seat.
If I have the Broken Key, clearing the anomaly allows me to interact with the main event.
40. Adult Poster
I look at the square girl poster on the right side of the left door. It changes to the exposed version.
41. Bondage Poster
I look at the poster girl on the left side of the left door. It has changed to the exposed abnormal version.
42. Walking Object
I check the middle section of the car. The object run.
43. Fashion
I look at the girl on the poster on the left side of the left door. She changes into different styles.
If I have the Broken Key, clearing the anomaly allows another interaction.
44. Priority Seat
I look at the priority seat logo on the right side of the right door. It has changed to an unusual version.
45. Bunny Girl
I look at the bunny girl poster on the right side of the middle door. It has changed into a new version.
46. Rei and Kokyo
I check the clothes of the two collaboration mascot girls below the right door. Their outfits have been swapped.
47. Diving
I look at the festival poster below the middle door. Some details have changed.
48. Arnikol
I look at the red poster above the window between the middle and right doors. The small swinging figure has been replaced with a Konial head.
49. Search Exposure Plus
Rena crouches down to discover something in the fully exposed version, while Mai has a completely different version.
After I detect it, I interact with the demon.
50. Hidden Toy
I check next to the seat in the lower-left corner of the right door. A hidden toy be found there.
51. Poster Backside Change
I look at the red poster above the window between the left and middle doors. The character originally wearing black underwear has completely changed.
52. Poster Underwear Detail
I check above the rear-door window. The poster characters have changed to a new version.
53. Tentacles 1
I look at the handrails. Tentacles are wrapped around them.
54. Tentacles 2
I look at the top of the upper-right handrail of the middle door. Tentacles are wrapped around it.
55. Tentacles 3
I check next to the seat in the lower-right corner of the right door. Tentacles appear there.
56. Upper Poster Change
I look at the Strawberry poster in the upper-right corner of the left door. The woman on the right side of the poster has changed to a new version.
57. Half-Destroyed Car
I enter the car and find the entire area in complete disarray.
Train45 Terminal Cars and Items
After I finish collecting the train cars, props, H events, and solving the puzzle sections, I collect 19 terminal cars.
The first eight terminal cars give the first eight items in the item list. Items 9-19 can be purchased from the Butler Shop. Item 20 is given through the story.
The eight heroine H events are also unlocked through the affection levels. The affection H events from 1-8 can be reclaimed according to the table above, while the final three are required for the story.
A. Torn Fan
I use the keywords 18-19-20-21.
I enter the broken AC car and obtain [Item 05: Rough Fan].
B. Train Inspection Report -2-
I use the keywords:
13 Gaze, 14 Tunnel, 30 Doll, 5 Window
This gives 13-14-30-5.
I enter the rest room and obtain [Item 04: Empty Beer Can].
C. Padlock
I follow the clue about the rising water.
In 15. Flooding, I check the graffiti on the left and right sides:
Left 2, Right 4, Left 3, Right 6
This gives the four-digit password:
1-2-13-8
I enter the security car and obtain Item 06: Broken Key.
D. Groper Warning
I collect the anomaly car numbers related to the heroine’s exposed appearances:
6-32-34-38-49
I choose any three and enter the groper warning car.
I obtain [Item 07: Lock with Blocked Keyhole].
E. Slow Zone Notice
I use the keywords:
- Priority Seat
- Tactile Paving
- Low Speed
- Seating
This gives:
44-29-18
I enter the slow car and obtain Item 08: Ancient Record Tablet.
F. Broken Clock
The current pocket watch time is 1:20:40.
I subtract the 3 hours and 15 minutes from the keyword about being fast. This gives:
10:05:40
I use:
10-5-40
I enter the passing car and obtain [Item 01: Silent Alarm Clock].
G. Validated Ticket
I check the two flipped tickets and use the numbers at the punched locations:
50-23-47
I enter the ticket check car and obtain Item 03: Used Lipstick.
H. Lover’s Letter
I use the keyword Watching Snow.
I enter the car where the Snow Woman appears. She gives three sets of numbers:
9-16-29
I enter the strong AC car and obtain Item 02: Daruma Doll.
Special Event Terminal Cars
For these cars, I make sure I bring the corresponding character. Otherwise, I have to repeat the trip.
There is an avatar prompt on the right side showing which character is required.
I. Flyer – Hot Spring Car
When Rena’s affection reaches above 5, I unlock the conversation topic Hot Spring.
The keywords are:
- Flooding everywhere
- White water dripping
- Windows foggy
These correspond to:
15. Flooding, 1. White Liquid, 27. Fogged Glass
I make sure Rena accompanies me.
I enter the hot spring car and receive Hint Number 54 from the door. This unlocks Rena H Event: Side-Lying.
J. Dog Collar
When Rena’s affection reaches above 6, I unlock the conversation topic Cooking.
I use the numbers at the collar punch position:
6-17-23-28
I make sure Rena accompanies me.
I enter the pet car and unlock Rena H Event: Puppy Outfit.
K. Train Inspection Report -3-
When Mai’s affection reaches 5 or above, I unlock the Favorite Animal dialogue.
This gives the priority repair locations:
7-22-24-32
I enter the malfunction car with Mai and unlock Mai H Event: Cat Outfit.
L. Flyer – Pachinko
When Mai’s affection reaches 6 or above, I unlock the conversation topic Intuition.
I use the following car numbers:
- 46. Rei and Kokyo
- 45. Bunny Girl
- 31. Slingshot Bikini
This gives:
46-45-31
I enter the collaboration car and receive Hint Number 45 from the wall.
I make sure Mai accompanies me.
I step on the rabbit pattern immediately in all three slot-machine sections. Each one gives the 777 reward tickets.
If I fail, I need to retrace the route from the beginning and try again.
I then interact with the ball dropped from the slot machine to unlock Mai H Event: Bunny Girl.
M. Black Bikini
I trigger the Mai Affection Level 7 H Event to obtain this directly.
The bikini contains the numbers:
30-28-10
I make sure Rena accompanies me.
I enter the changing room and unlock Rena H Event: Swimsuit.
N. Empty Milk Bottle
After Chapter 5, I enter 12. Shadow and successfully detect the anomaly.
The Lost Item Box appears, allowing me to obtain the item.
The number on the bottle is:
4-5-8-12
The number on the back is 5, not 2.
I make sure Rena accompanies me.
I enter the nursing room and unlock Rena H Event: Nursing Room Event.
O. Door Repair Notice
After Chapter 5, I enter 13. Gaze and successfully detect the Lost Item Box.
I use the keyword for the odd-numbered months between March and July:
3-5-7
I make sure Mai accompanies me.
I enter the door malfunction car and unlock Mai H Event: Door Malfunction Event.
P. Rod and Rope
In Chapter 6, I enter 57. Half-Destroyed Car and successfully detect the Lost Item Box.
I obtain the rod.
The rod has three sides, and each strip matches one side of the rod. I wrap the note around the rod.
The number set with 33 can skip the 2 rule:
33-36-41
I enter the punishment car and unlock Pazuzu H Event.
Train45 Story Cars
Q. Path to the Storage
After I unlock navigation in Chapter 4, I obtain the story quest at:
3-4-5
I enter the Butler’s Lost Item Storage.
R. Memo – Dark Room
In the Chapter 5 storyline, I use the keywords:
- Reverse movement
- Green light
- Being bound
- Birds outside
These correspond to:
10. Reverse, 3. Button, 41. Bondage Poster, 2. Crows
So I use:
2-3-10-41
I enter the dark room where Pazuzu is imprisoned.
S. Konial’s Memo
In Chapter 6, I obtain the story after dispelling multiple anomalies. Kokonia then reveals the location of the final car.
From the earlier Hot Spring and Pachinko clues, I know:
45 and 54
The other two numbers are on the poster next to the Butler:
8 and 31
This gives:
8-31-45-54
I enter the ending car.
How to Get the True Ending in Train45
After I obtain the Konial Memo, I enter the final car mechanism room using the method above. Entering it directly only triggers the normal ending.
If I have not unlocked the start-menu lock in Appreciation Mode, I need to continue carrying the Copper Bracelet and raise Konial’s affection to 2.
After the third training session, I obtain Xiao Ke OMEGA. I then reach the final choice in the mechanism room.
If I have Xiao Ke OMEGA, the option Take out Xiao Ke OMEGA appears. If I do not have it, the option remains blank.
I choose Take out Xiao Ke OMEGA to enter the true ending, where time is rewound to defy fate and change the outcome.