
In this guide, I cover the general tips, buildings, and mechanics I use in Car Park Capital. I explain how I manage Civil Unrest, deal with protestors and riots, make and sell cars, supply oil and fuel, and provide food, drinks, toilets, and entertainment for my car owners.
General Tips
Here are some tips I’ve accumulated so far while playing Car Park Capital:
- I check the prices of all your businesses in one menu. I click on Statistics, then go to Money → Configure Pricing to see the prices of all my businesses. This helps a lot with managing prices, especially after levelling up and having my Carbrainess drop because of a new mechanic I haven’t started yet.
- Keep an eye on your Carbrainess level when you level up. Your Carbrainess drop when you unlock a new mechanic that needs to be fulfilled. I try to save up some cash before levelling up so I’m ready to build whatever new things my car friends might want.
- I edit drive-thrus later to add new unlocks! I make sure to leave some extra room when building drive-thrus so I add new features later. I recommend leaving space for at least four drive-thru units.
- Don’t be afraid to generate your own parking demand. Many objects in the build menu generate parking demand, although they be expensive. I build in the middle of nowhere and place these demand generators nearby to attract car owners, just like real-life anchor stores!
- Be mindful of where you build factories and refineries. Placing them farther away help reduce Civil Unrest and keep parking demand unaffected, but it also means cars and gas will take longer to be delivered.
- Remember to manage your traffic. I try not to put too many drive-thrus in one place. Car owners don’t complain, but having too many in one area still slow things down.
Civil Unrest, Protestors, Riots, and Combat
When showing the world the freedom of cars, some need the idea beat into their heads.
Civil Unrest
Civil Unrest is caused by:
- Destroying bus stops and train stations.
- Evicting people from their homes.
- Destroying plants and trees, either directly or indirectly through pollution.
- Building certain structures, such as refineries, pumpjacks, and factories.
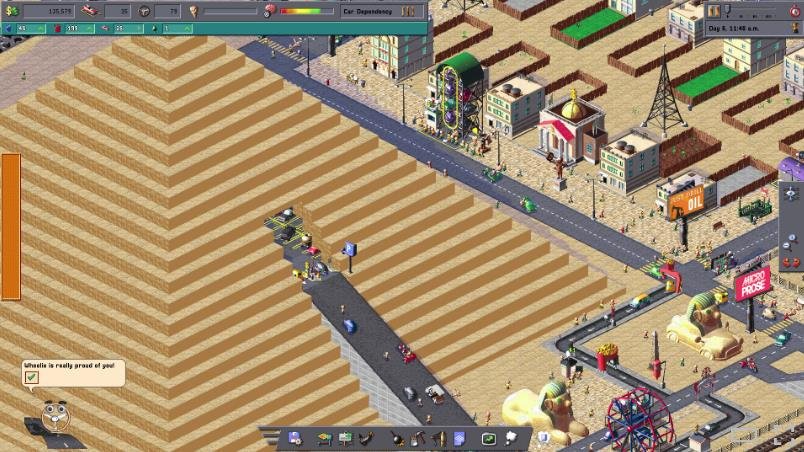
- Building in restricted areas on certain maps, such as around the pyramids on the Egypt map.
Civil Unrest is only removed after dealing with protestors and riots or by building Plastic Trees. Plastic Trees usually aren’t unlocked until near the end of the game, so dealing with protestors is generally the main way to manage unrest earlier on.
Riot Control
To deal with protestors, I need to build Riot Control buildings. Each building supports one truck with up to 10 slots for police officers and dogs.
I’m not entirely sure what the exact benefits of each unit are, but I usually use a crew of eight police officers and two dogs per car.
I set riot control cars to patrol automatically and deal with minor protests they encounter along their routes. They don’t seem to handle larger protests, although that might just be because the riots spawned outside their patrol range.
Minor Protests
If Civil Unrest rises above 50%, there’s a chance for minor protests. These usually involve a protestor gluing themselves to the entrance of one of my businesses.
That business becomes unavailable until I deal with the protestor.
I click on the protestor or the notification on the left side of the screen to open their menu. From there, I dispatch a riot control car to their location to provide some “help” with ungluing themselves.
Major Protests (Riots)
If Civil Unrest reaches 100%, there’s a chance for a riot to break out. A large group of protestors gathers somewhere on the map and starts shouting about fictional things like “trains”.
These protestors march around the map, and if they reach one of my car parks or happen to spawn there, there’s a chance they’ll set cars on fire.
I need to dispatch my police units to these locations as quickly as possible. I think the higher my unrest goes above 100%, the more protestors show up.
To resolve a riot, I need to deal with nearly every protestor involved.
Combat
Once I dispatch my police to a protestor’s location, they’ll leave their vehicle and begin combat. Here are some tips I’ve picked up:
- Check the health of your units. Both my units and the protestors have health bars. I click on the car to view them.
- Replenish units during bigger fights. I may need to add more police officers and dogs during larger battles. I check my riot cars regularly and build more units when needed. Thankfully, new units spawn at the car, ready to fight.
- Don’t be afraid to send every riot unit you have. As far as I know, there can’t be more than one riot at a time, so I send all my available units to deal with the current one.
- Replace defeated units. If all the units in a car are defeated, I’ll receive a notification, and the car will return to the garage. I replenish its units and send another car if one is available.
After combat is over, I always send my units back to their garage. This allows them to heal and get ready for the next riot.
Pollution
Smell that? That’s the freedom. The coughing means you’re free.
Car Park Capital has a mechanic where certain buildings and vehicles generate pollution that changes the surrounding environment.
Objects That Generate Pollution
- Oil Refineries
- Car Factories
- Oil and Gas Transport Vehicles
- Plastic Tree Factory
Transport vehicles drop oil spills along their routes, which cause pollution. This means I may see a lot of pollution between my refineries and gas stations.
Downsides of Pollution
- Nearby trees and plants will die, causing Civil Unrest.
- Cows on nearby farms die.
- Brown is ugly 🙁
Upsides of Pollution
- Land value decreases. This make nearby land cheaper, with discounts reaching 100% in some cases, effectively making the land free.
Making and Selling Cars
Gotta sell cars to sell car-related products.
Under Cars & Parking, I find the buildings and machines needed to produce and sell cars.
Car Shop Carousel
I’m putting this first because there’s an important detail here: I simply buy cars and sell them at the Carousel.
Each car costs $200, so I make sure my selling price is higher than that if I want to make a profit.
The Car Shop Carousel is where people become enlightened and buy freedom through car ownership. Each carousel hold 10 cars.
I purchase cars directly for $200 each or build factories to produce cars and have them delivered.
I personally find a selling price of $250 works well, as it’s usually within the green zones even after levelling up.
Car Factory
Okay, so I actually want to build cars.
A Car Factory generates approximately one car every 30 seconds. I open its menu and choose which cars I want it to build.
If I’m playing on the Florida map, I think this is the only way to build the boat cars.
Cars produced by factories will always be grey, so I’ll need to build some Car Paint Shops if I want them to have different colours.
Factories have two downsides: they generate pollution and reduce nearby parking demand.
On the upside, factories don’t need to connect directly to the street because the next building handles transportation.
Car Carrier
The Car Carrier takes cars from my factories and delivers them to my Car Shop Carousels.
Each carrier fit four cars per truck, and I think another four cars be stored at each lot.
I do need to connect these facilities to my roads so the trucks deliver the cars properly.
Car Paint Shop
I’m putting this here because once people buy their cars, they’ll probably head here.
The Car Paint Shop is a drive-thru where new car owners customize their cars. Each shop needs a payment station and a spray booth.
Remember to build the payment station first!
Oil and Fuel
We gotta put lead back in gas, bro. I swear, bro.
Once my Car Dependency level is high enough, I’ll be asked to provide fuel for the cars.
The production chain works like this:
Pumpjack → Oil Transport → Refinery → Gas Transport → Gas Station
Placing any of these buildings reduce nearby parking demand.
Pumpjack
A Pumpjack generates one unit of oil every 40 seconds.
Each one adds 5% Civil Unrest, and Pumpjacks need to be at least three spaces apart.
Crude Oil Transportation
Crude Oil Transportation collects oil from nearby Pumpjacks and delivers it to a refinery.
The trucks drop oil slicks along their routes, causing pollution between the transport building and the refinery.
Each truck carry six oil drums.
Oil Refinery
An Oil Refinery takes one unit of oil and generates two units of gas every 15 seconds.
Each refinery adds 15% Civil Unrest and causes a large amount of pollution to spread around the surrounding area, roughly 25 units in each direction.
Gasoline Transportation
Gasoline Transportation collects gas from nearby refineries and delivers it to Gas Stations.
I’m not sure what the maximum carrying capacity of each truck is, possibly around 100 units, but it seems fairly large.
Gas transport vehicles also drop oil slicks, causing pollution between the transport buildings and the gas stations.
Gas Stations
Gas Stations are drive-thrus where car owners refill their vehicles.
Each car needs one unit of gas, so I need to make sure there’s enough fuel available.
A newly built Gas Station starts with four units of gas, meaning I don’t need to deliver fuel immediately.
The game lists gas as “optional”, but I don’t know exactly what happens if a gas station runs out of fuel.
Oil and Fuel Tips
- Keep an eye on your oil and fuel supplies. I check the top-left corner to see how much oil and fuel I have. If either resource starts dropping quickly, it’s a good sign I need more buildings producing it.
- Be careful where you place refineries. They generate a lot of pollution, and every tree that dies increase Civil Unrest. Nearly every building in the production chain also reduce parking demand.
- Don’t place everything too far apart. Longer distances mean slower deliveries. Remember that pollution kills trees, but the people don’t seem to mind!
Food and Farming
Fast Food Drive-Thru
I build drive-thrus to give my car owners somewhere to get food.
Once I build the first tile, I use the arrows in the build menu to extend the drive-thru. I need to build the queue for a few tiles before I place the actual food facilities.
The available components include:
- Ordering Window: I MUST place this first.
- Fries Stall: Gives the car some food.
- Sauce Post: An upsell for some extra sauce.
- Hamburger Stall: Unlocks later and gives cars more filling food, helping them stay satisfied for longer. It requires a supply of patties.
- Soda Stall: Unlocks later and provides drinks for car owners.
- Drive-Thru Loop: Seems to be purely cosmetic.
Keep in mind that I edit drive-thrus later to add Hamburger Stalls and Soda Stalls as I unlock them. I try to leave some extra room when building drive-thrus so I add these features later.
Farms
Once I unlock burgers, I’ll need to supply any Hamburger Stalls I build with patties.
The farming process involves three main buildings.
- Cow Field: Cows automatically grow here until they’re ready for slaughter.
- Barn: Collects nearby cows and takes them to the grinder. The Barn’s range seems to cover around three Cow Fields, so I fit quite a few nearby. However, each Barn only deliver four cows at a time, so I don’t go overboard.
- Meat Grinder: Takes cows from the Barn and turns each one into four patties. Each grinder has a truck that automatically delivers patties to drive-thrus throughout town.
Farming Tips
- Cows do NOT like pollution. I build my farms far away from factories and oil refineries.
- One cow turns into four patties. I try not to produce more than I need.
- Move wild cows when possible. If there are wild cows on the map, I pick them up and move them to one of my Cow Fields to get an additional cow.
Amusement
Fun, from the comfort of your own car!
Once my Car Dependency level is high enough, I’ll unlock Amusement as another need.
To fulfil this need, I need to build Car Ferris Wheel drive-thrus for my car friends to use. These are built like other drive-thrus, but there are a few things to remember:
- The wheel takes up space. I try not to cram it into a small area.
- The ride takes time. I may need a longer queue or a less busy road to prevent traffic from getting too bad.
- The ride is free. It doesn’t generate income, so I try not to build too many.
Drinks
Dink my oiter.
As I level up my Car Dependency, I’ll eventually be asked to provide drinks for my car owners.
I add Soda Stalls to any food drive-thrus I already have. See the Food and Farming section for more information.
Soda Vending Machines also unlock later, but I’m unsure how much they affect drink demand. Car owners would also need to get out of their cars to use them.
Ew!
Toilet
“Gotta pee…. Gotta pee…” “Nearly there, Ryan.”
Once my Car Dependency level is high enough, cars will start requesting access to bathrooms.
These facilities are built like other drive-thrus. Here are a few things I’ve noticed:
- Component order: I don’t think the order of the toilet, paper, and perfume matters.
- Queue length: The toilet animation takes some time, so I might need a longer queue.
- Public toilets: I also build public toilets for people on foot, but I’m not sure whether they help with demand for car owners.
Fires and Towing
Fire
If a large protest breaks out near one of my car parks, or I ignore a protest and the protestors keep marching, there’s a chance they’ll start setting cars on fire.
This is where the Fire Engine Garage comes in handy. I dispatch a fire truck to extinguish burning cars or assign it to patrol an area and automatically put out any fires it encounters.
One important thing to remember is that a Fire Engine Garage takes a few minutes to finish building. I can’t just place one after a fire starts, so I need to plan ahead!
Any cars I fail to save in time will be destroyed and need to be towed away.
Towing and Abandoned Cars
Sometimes, a car will become abandoned. I’m not 100% sure what causes this, but I mostly notice it after a large protest. I guess the protestors changed the owner’s mind? Or killed them, I don’t know.
Abandoned cars reduce the parking demand of the lots they’re stuck in. If enough cars are abandoned in one lot, other car owners may refuse to park there.
To remove them, I need to build a Tow Truck Garage, which is available under Cars & Parking.
I send tow trucks out manually or assign them patrol routes so they automatically tow any abandoned cars they encounter.
Towed cars also need somewhere to go. I’ll need to build a Junkyard to scrap them.
Keep in mind that Junkyards also reduce nearby parking demand, so I choose their locations carefully.
Evictions and Suburbia
Once I buy a plot of land, I’ll need to evict any tenants who are still living there.
However, I can’t just kick them out onto the street. I’ll need to build suburban houses for them to move into first.
Suburban homes be built almost anywhere, but each plot only accommodates around two to three people. They also take a minute or two to build, so I try to have a few ready before I start evicting people.
Once I have enough space in suburbia for them to move into, I begin the evictions.
Each eviction causes 2% Civil Unrest per person. If I have a Radio Tower, I start the Suburban Dream broadcast, which reduces the unrest to 1% per person.
Once everyone has moved out, I’m free to demolish the old homes and replace high-density housing with parking!